Keep a chosen app window visible while working elsewhere
Keep a live reference or status window in view while you work in another app. Select that one window, place its live stream above your other work, and give the copy a readable size. The original app remains where you interact with its content; no extra desktop is needed.
Before you begin
- Open a harmless reference or status window with a distinctive title. Keep private documents, accounts and protected video out of the trial. The original window must be available to macOS capture; not every app or protected surface can be shown.
- Keep BetterDisplay running and a usable physical desktop available. This workflow uses a single application window on your existing desktop. No display rearrangement or monitor adjustments are required.
- Record any existing selected-content configurations, sources, active/hidden/paused state, automatic start, window geometry and preferences before adding a trial. Preserve saved absence/nil separately from shown defaults. Use a new additional configuration below to avoid replacing existing selections.
- Follow the macOS content-sharing picker and any actual access request. If screen capture is denied, review System Settings > Privacy & Security > Screen & System Audio Recording for BetterDisplay, using the options on your installed macOS. Audio-only access is not screen access. Apple’s screen-access instructions
Create a separate single-window view
- Open App Menu > Tools > Stream Selected Content. Expand Tools and its more-options chevron if necessary. An existing selection may instead be named Stream [application name] or Stream Multiple Selections, with a number when similar configurations coexist.
- Find the default selected-content entry that offers Add Stream Configuration, then choose it. This command appears only in the default entry, even if that entry has been renamed after its source. Additional entries offer Remove Stream Configuration instead. Do not replace or clear an existing source just to recover the original menu title.
- Wait for the new additional entry, open it and choose Source Selection…. In the macOS picker select only your uniquely titled reference window and accept the selection using the system’s actual sharing interface. BetterDisplay’s own windows are excluded. Cancelling retains the previous selection.
- A nonempty accepted selection starts the stream. Check the source list’s application and window title, and identify the new Stream [application name] entry for later changes. Do not select Enable Stream again just to confirm acceptance: it stops a stream that is already active.
- Keep Start Automatically off for the trial. It defaults off. The copy’s size, position, source and preferences are remembered independently in this configuration.
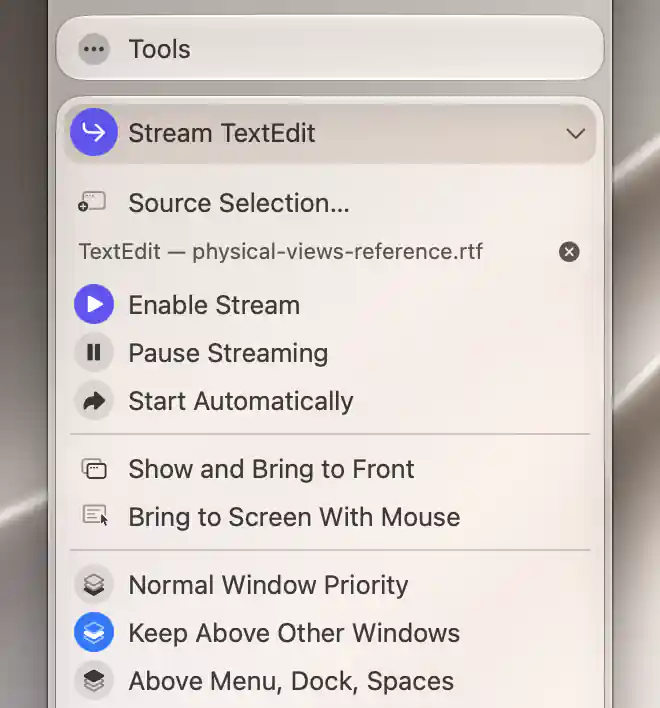
The source list identifies the selected window, while this configuration keeps its own presentation settings.
An attached App Menu hides while the system picker is open and returns when selection finishes. Exact picker labels and permission presentation belong to macOS and can vary. Selecting one window gives this task simpler framing than selecting several: a reconstructed multiple-window selection can be framed through one overlapping capture display rather than an independent canvas spanning every display.
Make the copy readable and visible
- In the new entry, keep Keep Above Other Windows, the default priority. This keeps the copy above ordinary windows while you work. Normal Window Priority lets other ordinary windows cover it.
- Leave Title Bar & Window Controls on initially. Drag the copy to an unobtrusive place and resize it using its native edges. Leave Lock Window Position and Prohibit Resizing off while arranging it; both default off.
- Keep Free Aspect Ratio off to preserve the source’s proportions. Start with no filters or transforms, Magnification and Alpha at 100%, and Show Mouse Pointer off, its selected-content default.
- For a modest moving status view, try Target FPS at 30, then assess the actual updates and resource use. The initial choice is Unlimited (∞); the slider supports 1–200 or Unlimited. This is a capture target, not a guarantee of achieved frame rate.
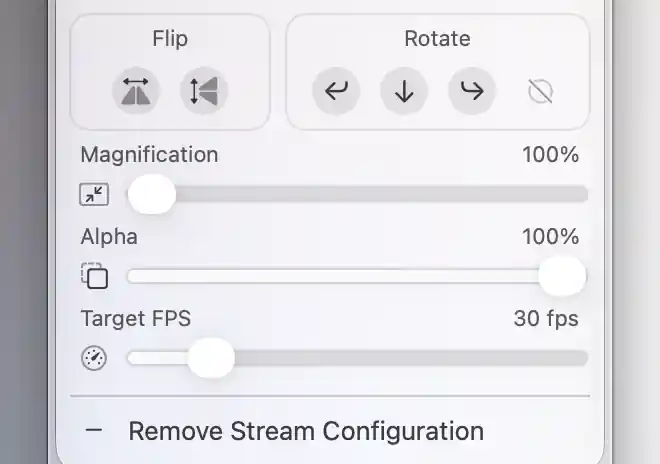
Target FPS limits the capture request; it does not measure the frame rate the source actually delivers.
If you want the copy to remain across Spaces and above the menu and Dock, optionally select Above Menu, Dock, Spaces and check its behavior in your actual workspace. It is a different presentation from ordinary topmost priority. Leave the newly exposed Show on Lock Screen off unless you deliberately want that separate behavior; it defaults off.
Resize or update the original reference and check the copy again. Source dimension changes can adjust the stream window’s geometry. The stream’s scale, opacity and filters change this presentation, not the original app’s document.
Optionally make a compact view
- Record the configuration’s original title-bar, background and both shadow preferences. While the copy is in ordinary windowed mode, turn Title Bar & Window Controls off. This restarts capture and also turns on Hide Stream Window Background and Window Shadow, while turning off Source Content Shadow.
- Keep that combination for a simple content-only copy with its own window shadow. Hide Stream Window Background is shown only with the title bar off; changing it restarts capture. It removes the stream’s surrounding background, not the selected app’s own painted background.
- If you instead want the captured source’s shadow, keep Hide Stream Window Background on and turn Window Shadow off. Only then is Source Content Shadow available. Enabling source shadow hides the ordinary Window Shadow option; turn source shadow off to reveal it again.
- Use Show and Bring to Front in the App Menu to recover an active hidden copy. With the title bar hidden, the menu also supplies Window Controls. Avoid full-screen mode during this arrangement; it disables some ordinary window actions and prevents title-bar changes while active.
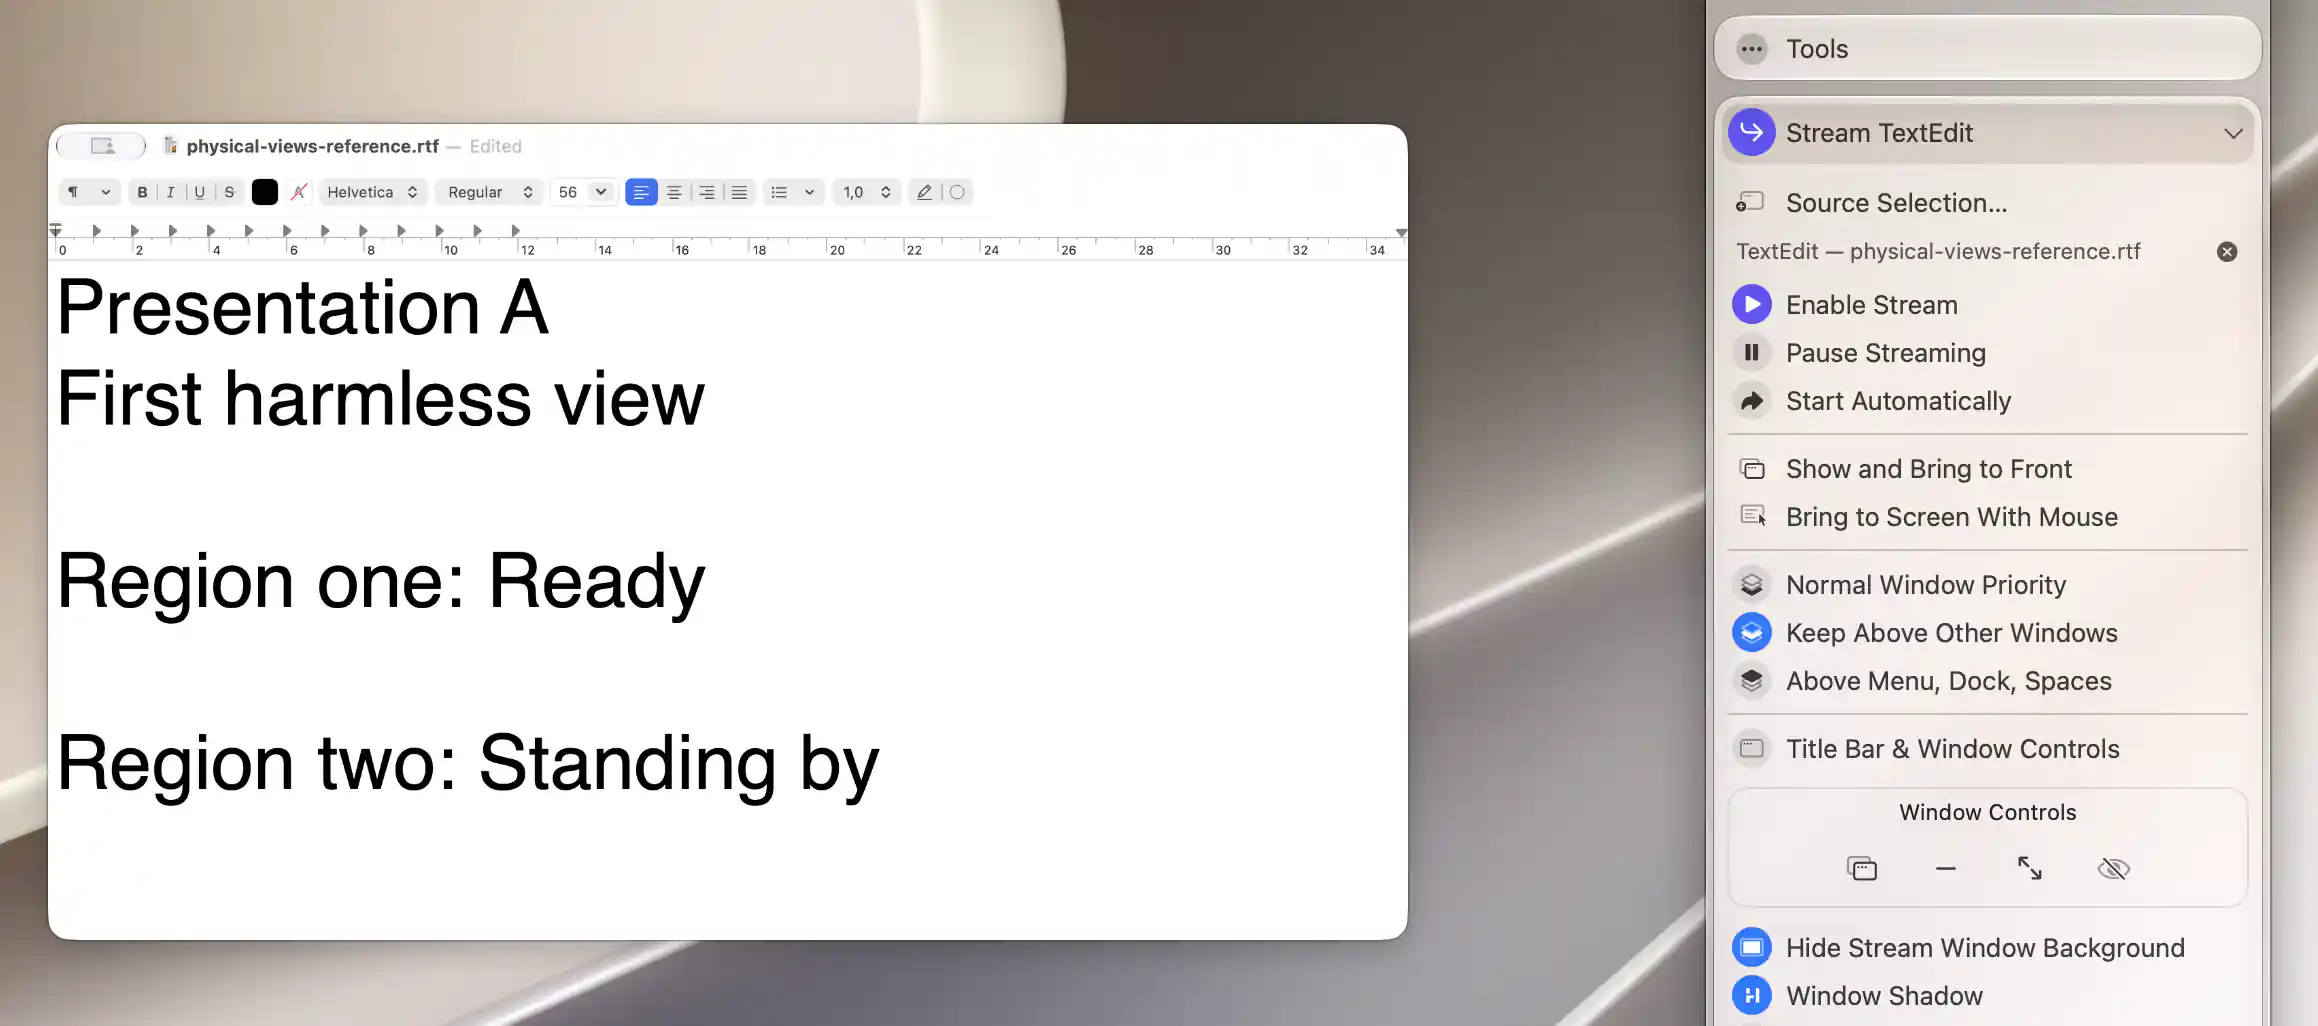
Hiding the title bar enables a content-only background and the copy’s own shadow; source shadows remain off.
Check the result
The copy is a viewing surface. Switch to the original app to edit or operate it. Mouse Click-through, initially off and available in the App Menu, sends clicks to whatever window lies underneath the copy. It does not forward them to the selected source or make a second interactive instance of the app. Turn it off again through the App Menu if you need to move or use the copy’s own UI.
- Make a harmless visible update in the original reference and confirm the copy updates. Check that the listed title belongs to the intended source, not another window in the same application.
- Activate another ordinary work window and check that the copy stays visible at the selected priority, without hiding essential work. Test another Space only if you chose the cross-Spaces priority.
- Check readability after moving/resizing either window. A static screenshot or active menu marker alone does not establish live updates or achieved FPS.
- If the original closes or is replaced, reopen the intended reference and inspect the source list. Reopen Source Selection… when the saved choice cannot be resolved confidently; do not assume a similarly named replacement is necessarily the original.
To freeze the picture temporarily use Pause Streaming; select it again to resume. A paused picture is still visible and settings changes can restart capture, so pause is not a privacy guard. Stop the stream before opening private content in the selected app.
Troubleshooting
- No source or black picture: inspect the intended window, actual macOS sharing/access state and whether the app allows capture. Select a harmless ordinary window again. Do not infer permission success from a checkbox or expect protected video to work.
- MISSING after closing or reopening a window: BetterDisplay first seeks the same window, then a unique exact title within the application, and finally its sole candidate when that application has only one saved selection. Ambiguous candidates are not guessed. Reopen Source Selection… to choose the actual reference. Availability refreshes while the App Menu is open; another available source in a multiple selection may continue.
- Copy appears lost: find its actual renamed/numbered entry and use Show and Bring to Front while active. Check priority and current Space, and turn Mouse Click-through off before manipulating the copy. Hiding it does not stop capture.
- Wrong framing or excessive load: begin with one window, preserve aspect ratio and reduce the FPS target to an appropriate observed level. See Stream Selected Content for the full sizing and filtering reference.
Stop, remove and restore
- Stop only the trial stream by turning its active Enable Stream off, closing its output normally, or pressing Command-W while that output is focused. Command-H or Option-click on its close button merely hides the copy and keeps capture running. Stopping preserves saved selection and preferences.
- Turn off any trial Start Automatically setting and finish or cancel only its pending picker. Let any pending start or source-resolution operation and menu callbacks settle, then stop the trial again and verify it is inactive before changing the source to private work or removing the configuration. An earlier Stop does not guarantee that a pending start has finished.
- To forget just a selected source, use its source-list cross. It removes that source without confirmation; removing the last source stops capture and clears its selection. It does not delete the configuration or undo its other preferences.
- To discard the fresh additional configuration entirely, use its App Menu Remove Stream Configuration. There is no confirmation. The menu closes before the removal completes, so wait until the entry is gone; do not treat the first click as completed removal. Leave the default and all preexisting configurations intact.
- Restore the original reference window’s contents/geometry and only trial-specific permissions or appearance changes. If you borrowed an existing configuration instead, restore each recorded preference and shadow companion independently; re-enabling the title bar alone does not undo its companion changes. A shown default is not original saved presence. Where ordinary UI cannot recreate original nil geometry/storage or independent current/protected targets, preserve the private record/backup, leave only an affected protection rule off and report the precise limit. Do not use global Forget, Reset or Import.
Related pages
- Stream Selected Content
- Picture in Picture for viewing an entire display.
- Display-stream mouse interaction; its source-desktop pointer-warp instructions are separate from this selected-window viewing workflow.
Additional information
This section explains licensing and platform requirements.
Features requiring Pro license
Selecting sources, starting or pausing the stream, enabling automatic start, adding configurations and Show and Bring to Front require Pro. The priority, title-bar/background/shadow, sizing/filter and FPS preferences used here also require Pro. Stopping existing output, removing its source or an additional configuration, disabling automatic start and the basic Window Controls strip remain available without Pro.
Platform compatibility
Selected-content streaming is available on both Apple silicon and Intel Macs running macOS 26.3 or later. macOS supplies the picker and access to the actual source; its UI can vary by system version. This ordinary reference-window workflow does not require DDC, an external monitor, a virtual desktop, Apple Intelligence or native-key permissions. It demonstrates visual viewing, not recording or audio routing.