Use the working part of a damaged screen
Place a smaller virtual desktop inside a display's usable area when damaged pixels occupy an edge. BetterDisplay streams the desktop into that rectangle and leaves the unused area black in the output image; it does not repair the panel or turn off light from damaged hardware.
Before you begin
Identify a usable rectangular area and estimate its width, height and position in panel pixels. This approach works best for damage along an edge; a fault through the middle may leave no suitable rectangle for a complete desktop.
Keep a working second display or another tested way to reach the Mac during setup. Grant Screen Recording permission before starting the stream. Under Settings > Keyboard > Keyboard Shortcuts…, configure and test Stop all full screen streams on an accessible keyboard. Keep automatic resumption off until the layout has been verified.
Create a desktop that fits the working area
- Open Settings > Displays > Overview > Create New Virtual Screen….
- Choose Pre-configured settings (recommended) and create a preset virtual screen. It initially remains disconnected, giving you time to configure its geometry.
- Select the new virtual screen in Settings > Displays and find Virtual Screen Configuration.
- Set Aspect ratio to the usable rectangle's shape for a flexible list of sizes. Alternatively enable Use custom resolution list and add a specific desktop size.
- Keep Enable HiDPI resolutions on if you want a HiDPI desktop. A selected HiDPI mode has twice its logical width/height in the backing image. For example, a 1920 × 1440 backing image uses a 960 × 720 HiDPI desktop. That is an illustrative size; measure your own usable area, enter the corresponding logical size in the custom list, then select that HiDPI mode after connecting. Smaller logical modes may also require Enable lower than 720p resolutions under Settings > Displays > Overview > Advanced Display Settings…, whose warning explains that macOS UI may no longer fit.
- Save the geometry, then enable Connect this virtual screen. If later edits show a reconnect notice, select Reconnect before testing the new modes.
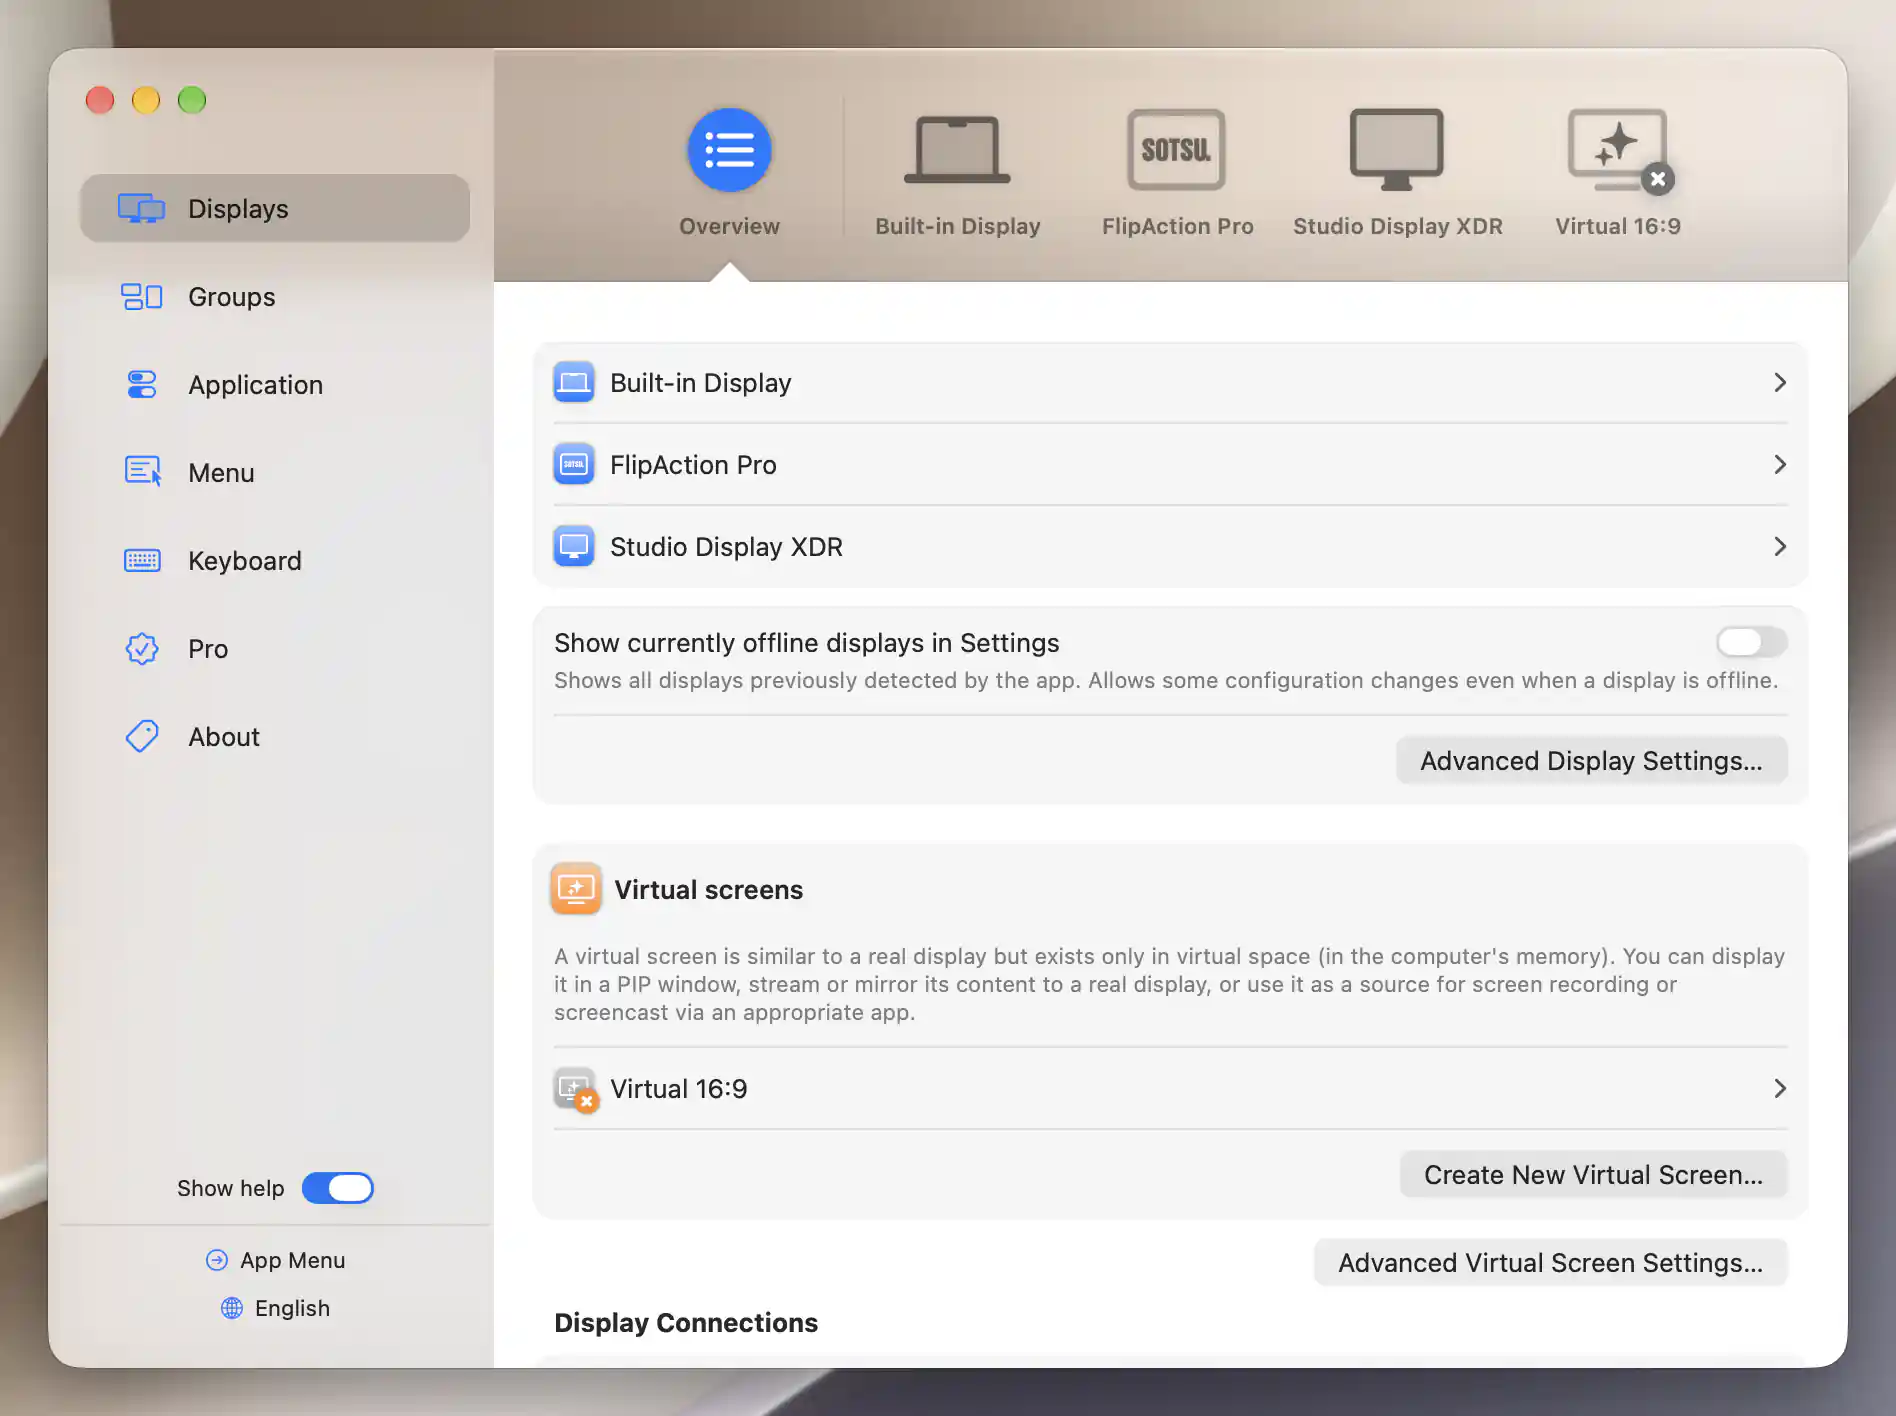
Create New Virtual Screen… is in Displays Overview.
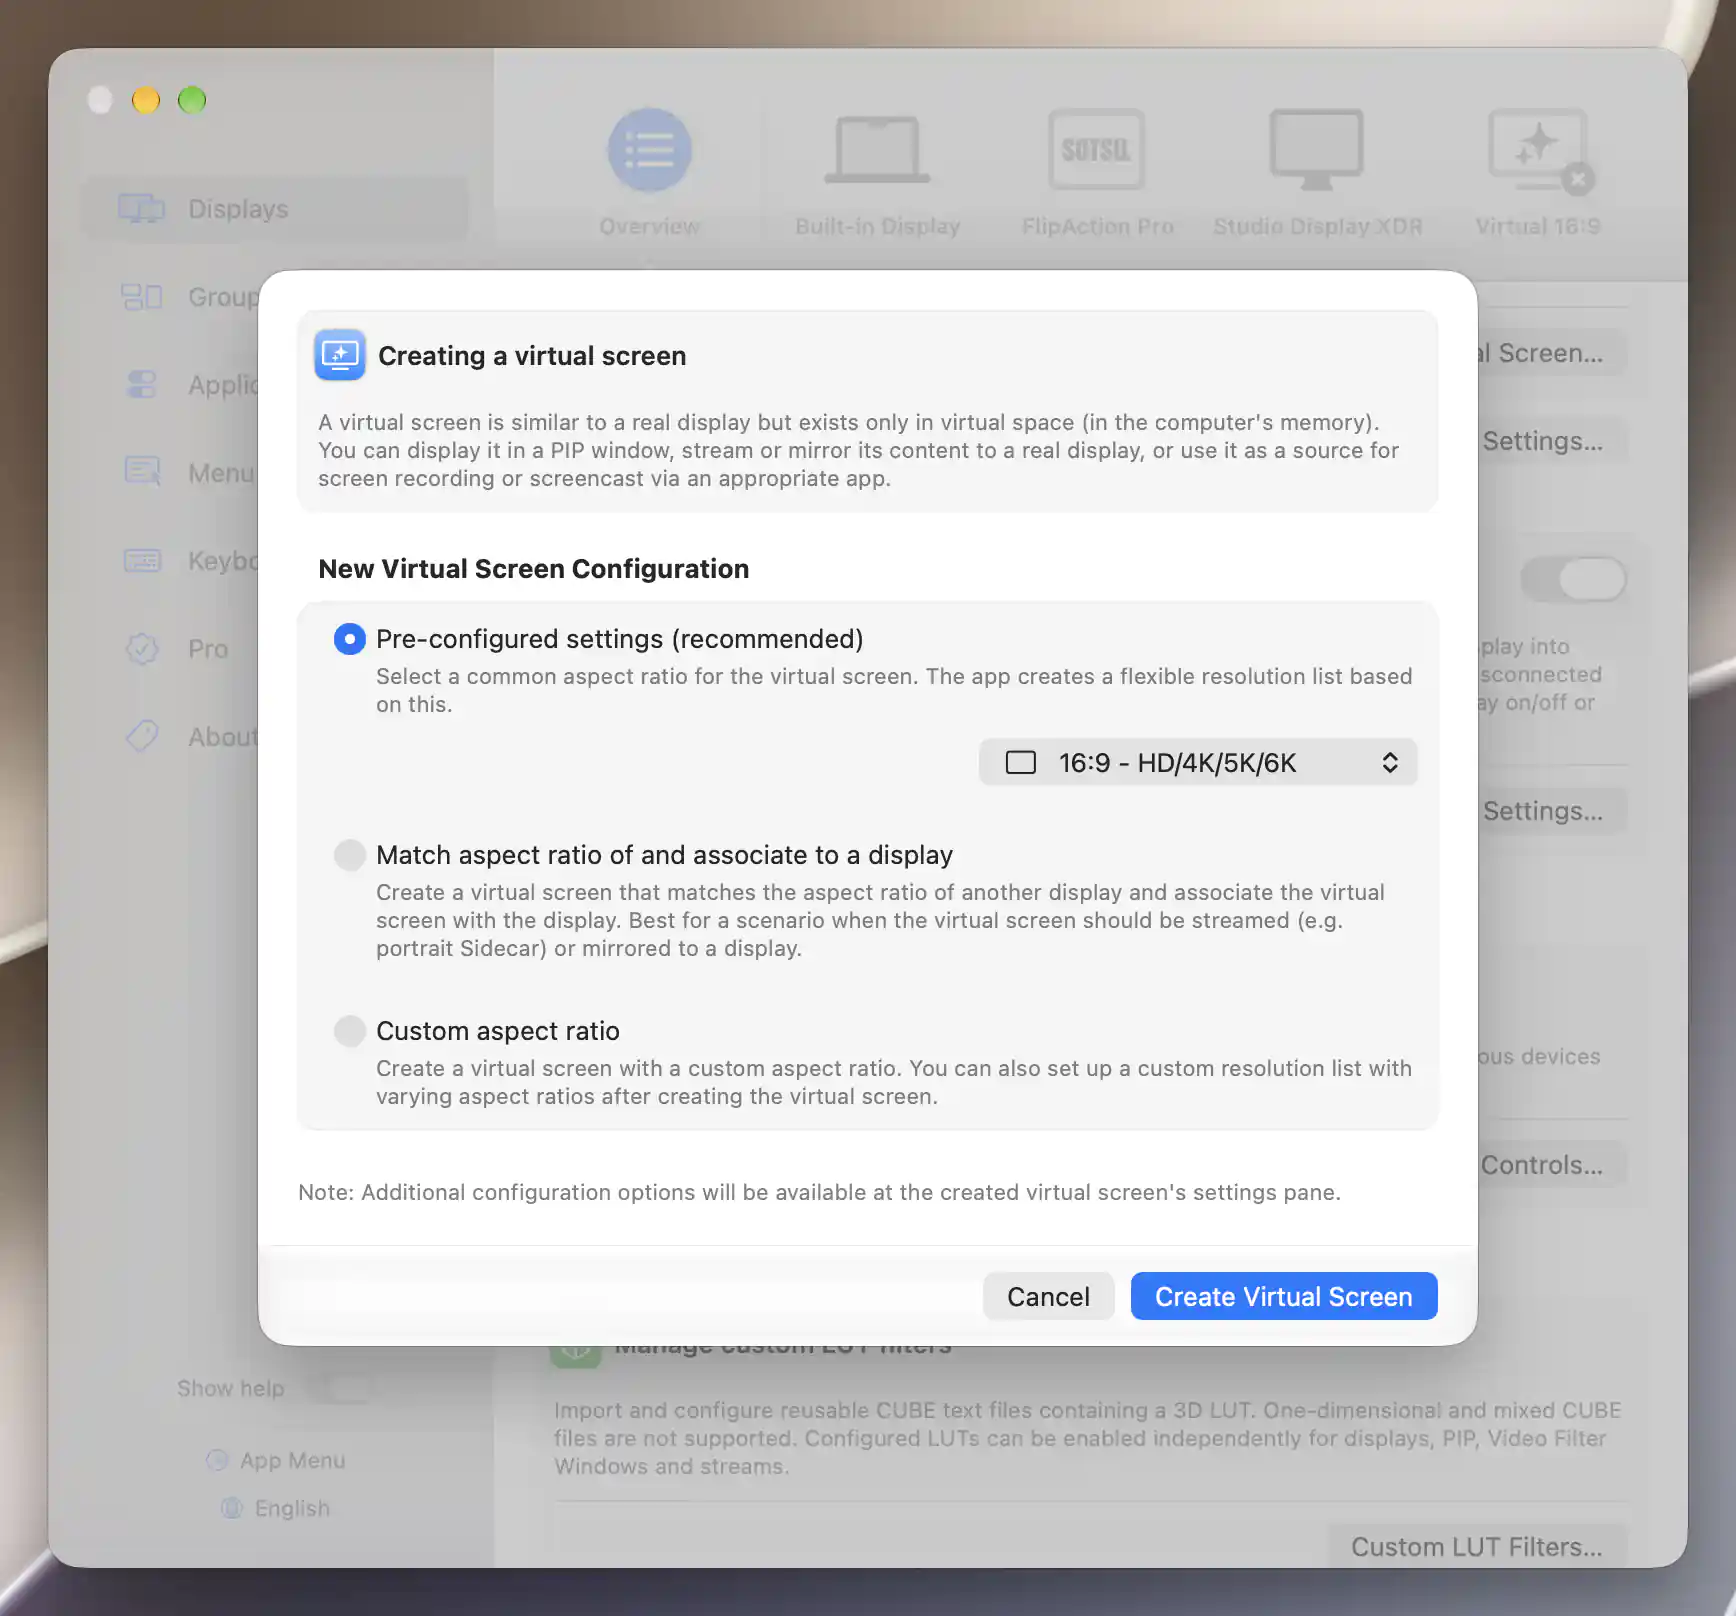
Create a disconnected virtual screen from the 16:9 preset.
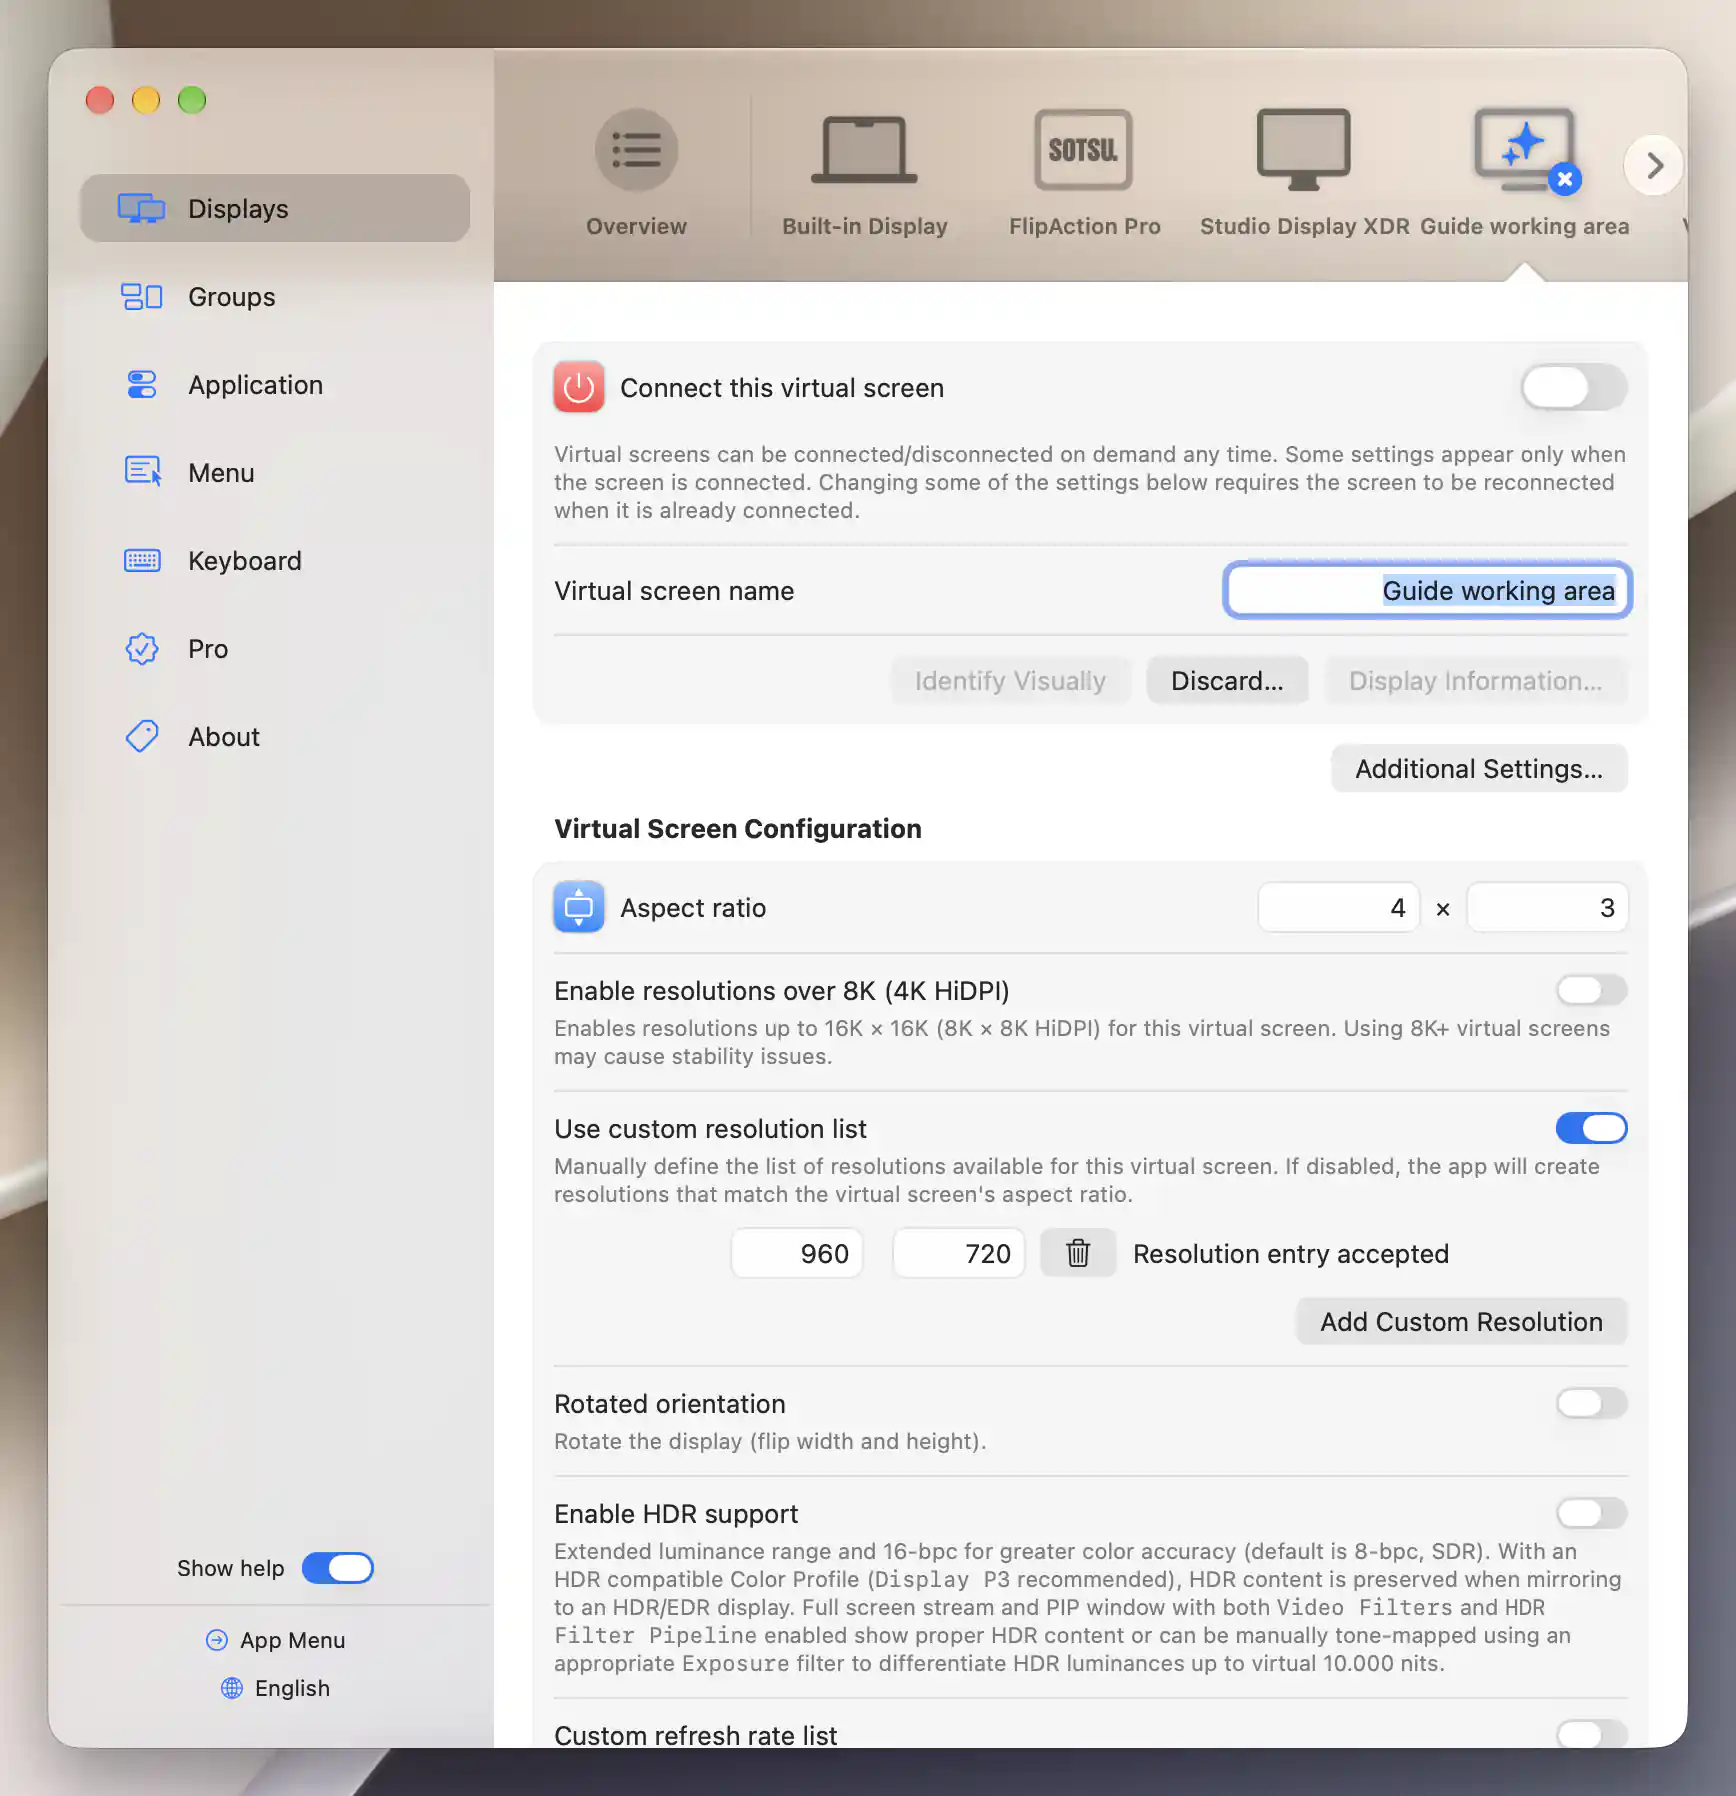
Configure a disconnected 4:3 source with a 960 × 720 custom resolution.
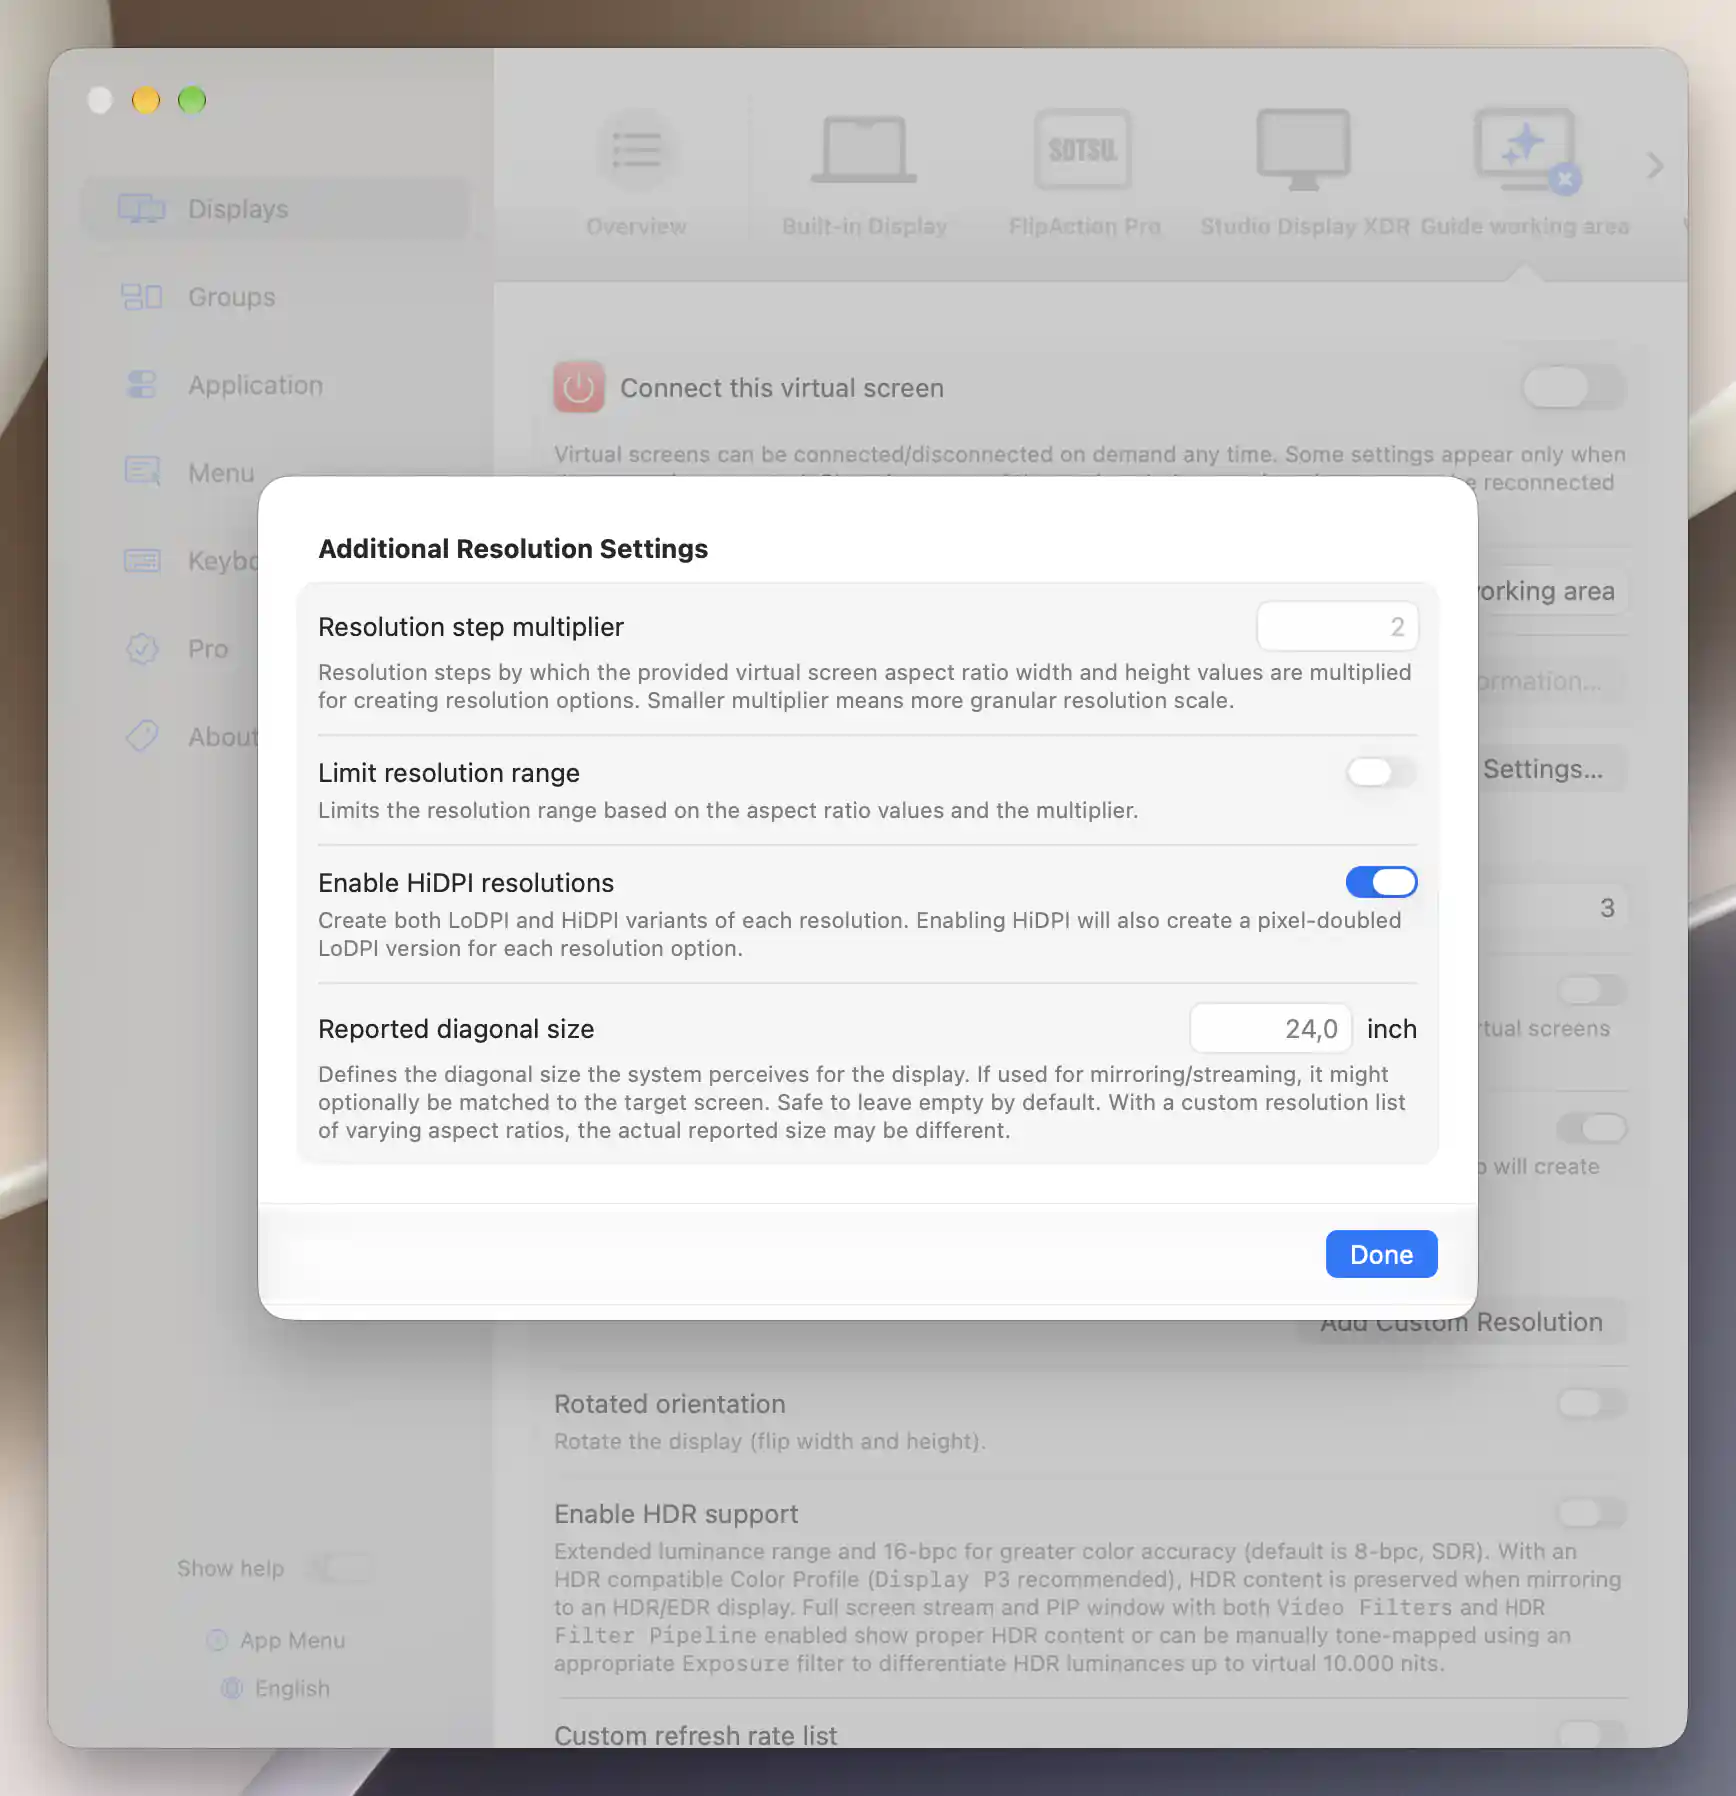
Enable HiDPI variants before connecting the virtual screen.
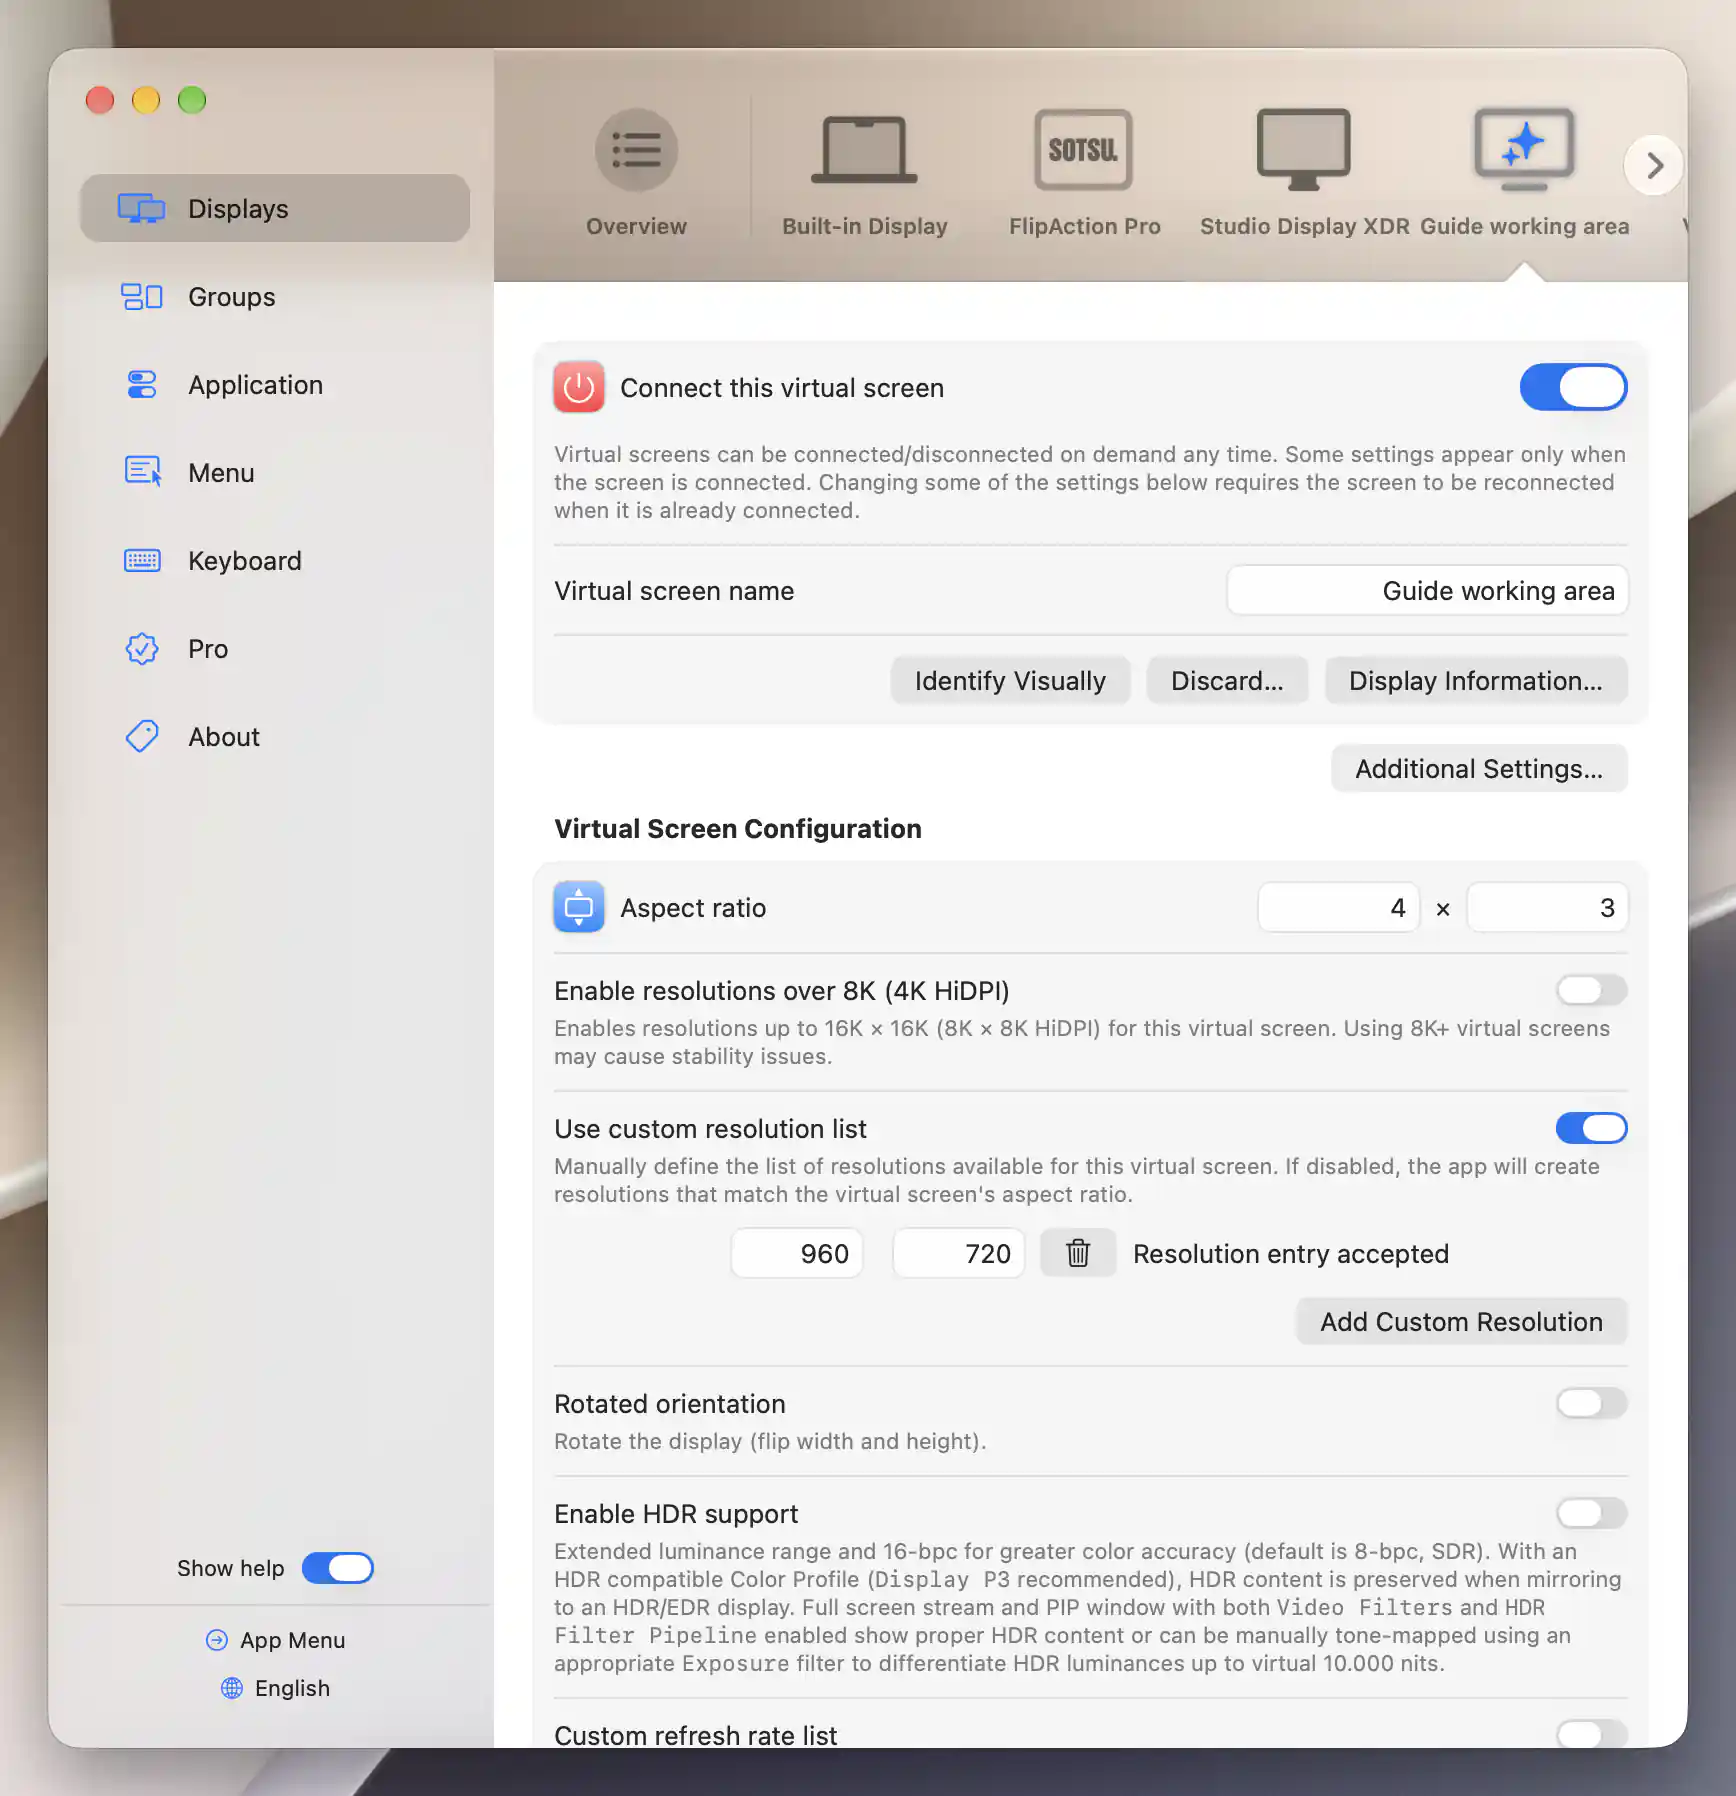
Connect the configured Guide working area virtual screen.
Position the stream inside the usable rectangle
- Open App Menu > [virtual source] > Stream Virtual Screen and select the damaged display as the target.
- Leave Free Aspect Ratio off so the desktop retains its proportions.
- Enable 1:1 Pixel Mapping if the source's backing image matches the usable area's pixel size. Otherwise choose a suitable source size and adjust Zoom and Underscan to fit the available space.
- Use Horizontal and Vertical alignment to move the picture away from the damaged edge. For a left-edge fault, for example, begin with right alignment; choose top or bottom alignment for damage on those edges.
- Move a test document to the virtual source. Check all four edges and the menu bar before relying on the setup.
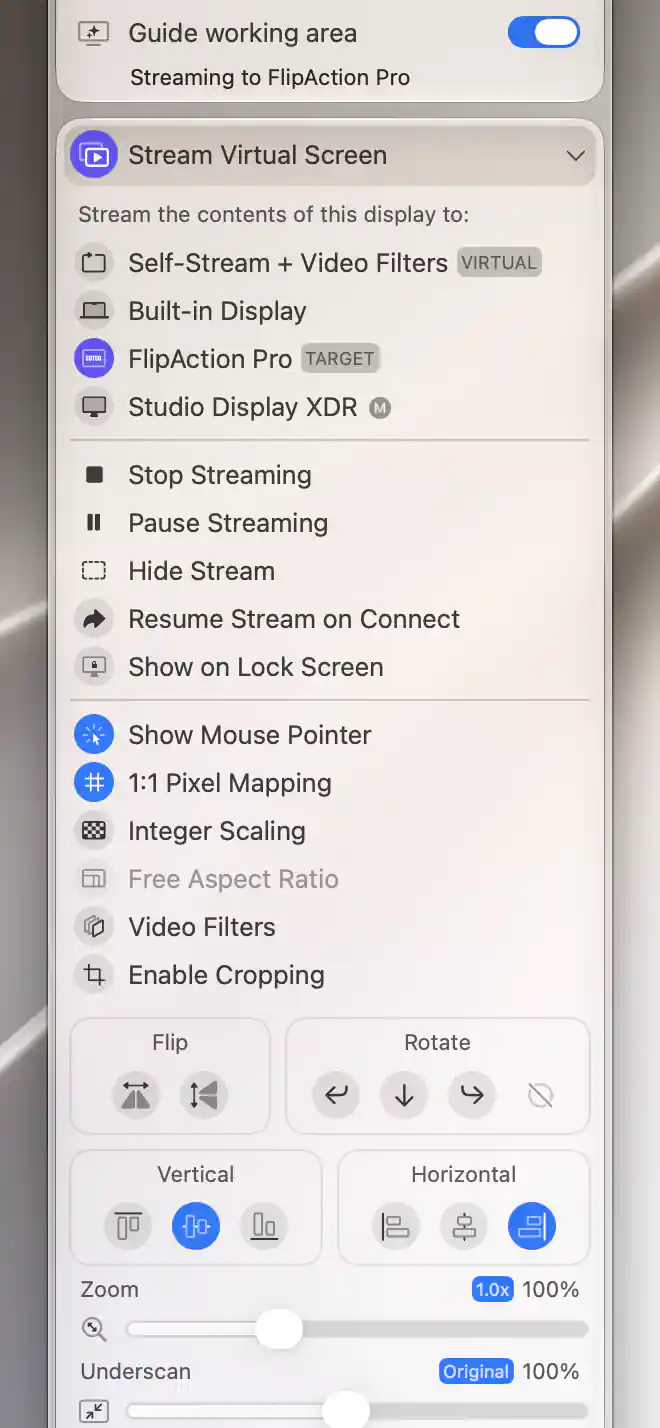
Map the 960 × 720 HiDPI source to the healthy FlipAction Pro demonstration receiver, aligned right and center.
Enable Cropping selects part of the source desktop. It is not the setting that reserves space on the damaged target. Start with an uncropped source sized for the usable region and use mapping, scaling and alignment to place it. A target-only unused area is filled by the stream overlay, so do not interpret black output as a hardware repair.
Check the result
All essential desktop content should fit inside the working rectangle, including menus and dialogs. Check a window at each edge, then test your stop shortcut again. Interact with the virtual source; Command-click the stream to move the pointer to the corresponding source position if it lands on the physical target's underlying desktop.
If you want the usable virtual desktop to be main, choose Set as Main Display under that source once you can see and operate it. Keep your recovery desktop reachable.
Save the setup for later
After verifying the geometry and recovery action, enable Resume Stream on Connect for this stream. Alternatively configure an association under Settings > Displays > [virtual screen] > Associated displays, linking automatic connection and streaming to the damaged target. Use the association's automatic-stream rule if it already manages the stream; in that case Resume Stream on Connect may be disabled because the association owns the behavior.
Troubleshooting
If the stream is absent, confirm both displays are connected, Screen Recording permission is granted, and the target is not already a mirror target. Reopen the menu after granting permission.
If the picture covers damaged pixels, reduce its backing size or scaling, check 1:1 Pixel Mapping, and adjust alignment. If the desktop stretches, turn Free Aspect Ratio off. Choose a smaller logical HiDPI size for larger text within the same target rectangle; inspect the rendering-size relationship in the scaling explanation.
If clicks do not reach a window, return the pointer to the virtual source. Arrange the virtual desktop beside the recovery screen and move the physical target farther away; the stream does not remove its underlying desktop.
Undo the setup
Move wanted windows to a normal desktop. Turn off the stream's automatic resumption or associated-display rule, then select Stop Streaming. Disconnect the virtual source to retain its definition, or Manage Virtual Screen > Discard Virtual Screen to remove it after reading the confirmation. Restore the previous main display and arrangement if you changed them.
Related pages
- Stream Virtual Screen
- Virtual Screen Configuration
- Associated displays
- Original community discussion
Additional information
This section explains feature access and platform requirements for this tutorial.
Features requiring Pro license
Custom virtual-screen geometry/resolution settings, streaming, mapping/scaling and automatic associations require Pro. Creating a preset definition and stopping an active stream remain available without Pro.
Platform compatibility
Virtual-screen streaming and placement are available on Apple silicon and Intel. Connected source and target displays and Screen Recording permission are required. Pixel mapping depends on the source backing dimensions and target geometry; a usable rectangle and reliable recovery path must be verified on the actual setup.