Control your monitor setup from Home Assistant
Give Home Assistant one action that requests a comfortable hardware brightness setting on your desk monitor. BetterDisplay’s built-in HTTP interface receives the request on the Mac; Home Assistant’s official REST command sends it. Start with one manually verified setting, then check the monitor itself before attaching the action to an automation.
Before you begin
- Keep BetterDisplay running and the intended physical monitor connected through a working DDC path. This example uses ordinary SDR and an available ranged hardware-brightness control owned by the intended DDC controller. A software-dimming slider alone does not meet that requirement. Establish the path first using hardware brightness through a dock if needed.
- Use an existing Home Assistant installation with administrator access and permission to edit its configuration. It must reach the Mac’s actual IPv4 address and listening port on your trusted local network. From another machine,
localhostrefers to that machine, not your Mac. - Privately record the monitor’s actual brightness and saved app values, configured ranges and controller ownership. Also save the original integration switches, token, port and clients that depend on them. Distinguish an unset saved value from a displayed fallback. Keep a visible recovery desktop and the monitor’s own menu available.
- Record relevant synchronization, automatic-brightness and event rules, including group membership and activation. Choose an unsynchronized fixture, or pause only rules that interfere with this test. A request naming one display can still propagate through synchronization. Preserve current modes, positions and main display separately from any different protected targets.
The server uses plain HTTP on the Mac’s network interfaces. The token is a query parameter, and request queries can appear in app logs before authentication. Use a private token, keep URLs and logs private, and do not expose this server to the public internet. A YAML secret keeps credentials out of the main configuration; it does not encrypt HTTP or the secrets file.
Verify the monitor and setting
- Open Settings > Displays > [monitor] > Display Information… > Identifiers and privately record its actual Tag ID. This is BetterDisplay’s local remembered identity. Use that single current tag together with
type=Display; a runtime display ID or another Mac’s tag is not a substitute. - Use the monitor’s own menu and App Menu > [monitor] > Brightness (Hardware) to establish a visible, comfortable hardware brightness. If the app shows a combined or software slider, follow the hardware-slider test and record any changed hardware/combined preferences. Do not assume the app’s stored slider value reflects the panel’s starting level. Verify the actual hardware result and that other displays remain unchanged.
- Choose the corresponding normalized value within
0to1for the control’s configured range. For example,0.40means 40% of that span, not a universal monitor percentage or measured luminance. Use that example only if its mapped setting is comfortable on your actual monitor. Keep the original value for restoration. Choose an original and tested setting that are distinct but both comfortable, then return the hardware brightness to the recorded original before calling Home Assistant so the first request has an observable change.
This recipe names hardwareBrightness explicitly. It does not rely on automatic hardware/software selection, change the monitor’s input, or turn it off.
Prepare authenticated HTTP access
If other clients already use the server or shared token, preserve their working setup and use the existing authenticated endpoint. For a new setup, prepare the token before the first HTTP listen:
- Open Settings > Application > Integration. Record the originals, then keep Enable integrated HTTP server OFF. It is OFF by default, as is Enable custom URL scheme access. The CLI/notification switch is separate and need not change for this HTTP recipe.
- Temporarily turn ON only Enable custom URL scheme access, then open Integration Settings…. This makes Security token editable while HTTP remains OFF. Avoid opening untrusted integration URLs during this preparation.
- Enter a private, long random token and commit the field with Enter or by moving focus. The field displays plain text: do not photograph it or publish it in a log. Use URL-safe characters, or correctly URL-encode the token when building the request. Close the sheet, then restore the URL-scheme switch to its original state.
- Turn ON Enable integrated HTTP server. Check that the pane reports the server is actually running and listening on the expected port. The default is
55777. If you need another port, open Integration Settings… > Listening HTTP port while HTTP is enabled; committing a port change restarts the server. Preserve an originally unset port separately from an explicit number.
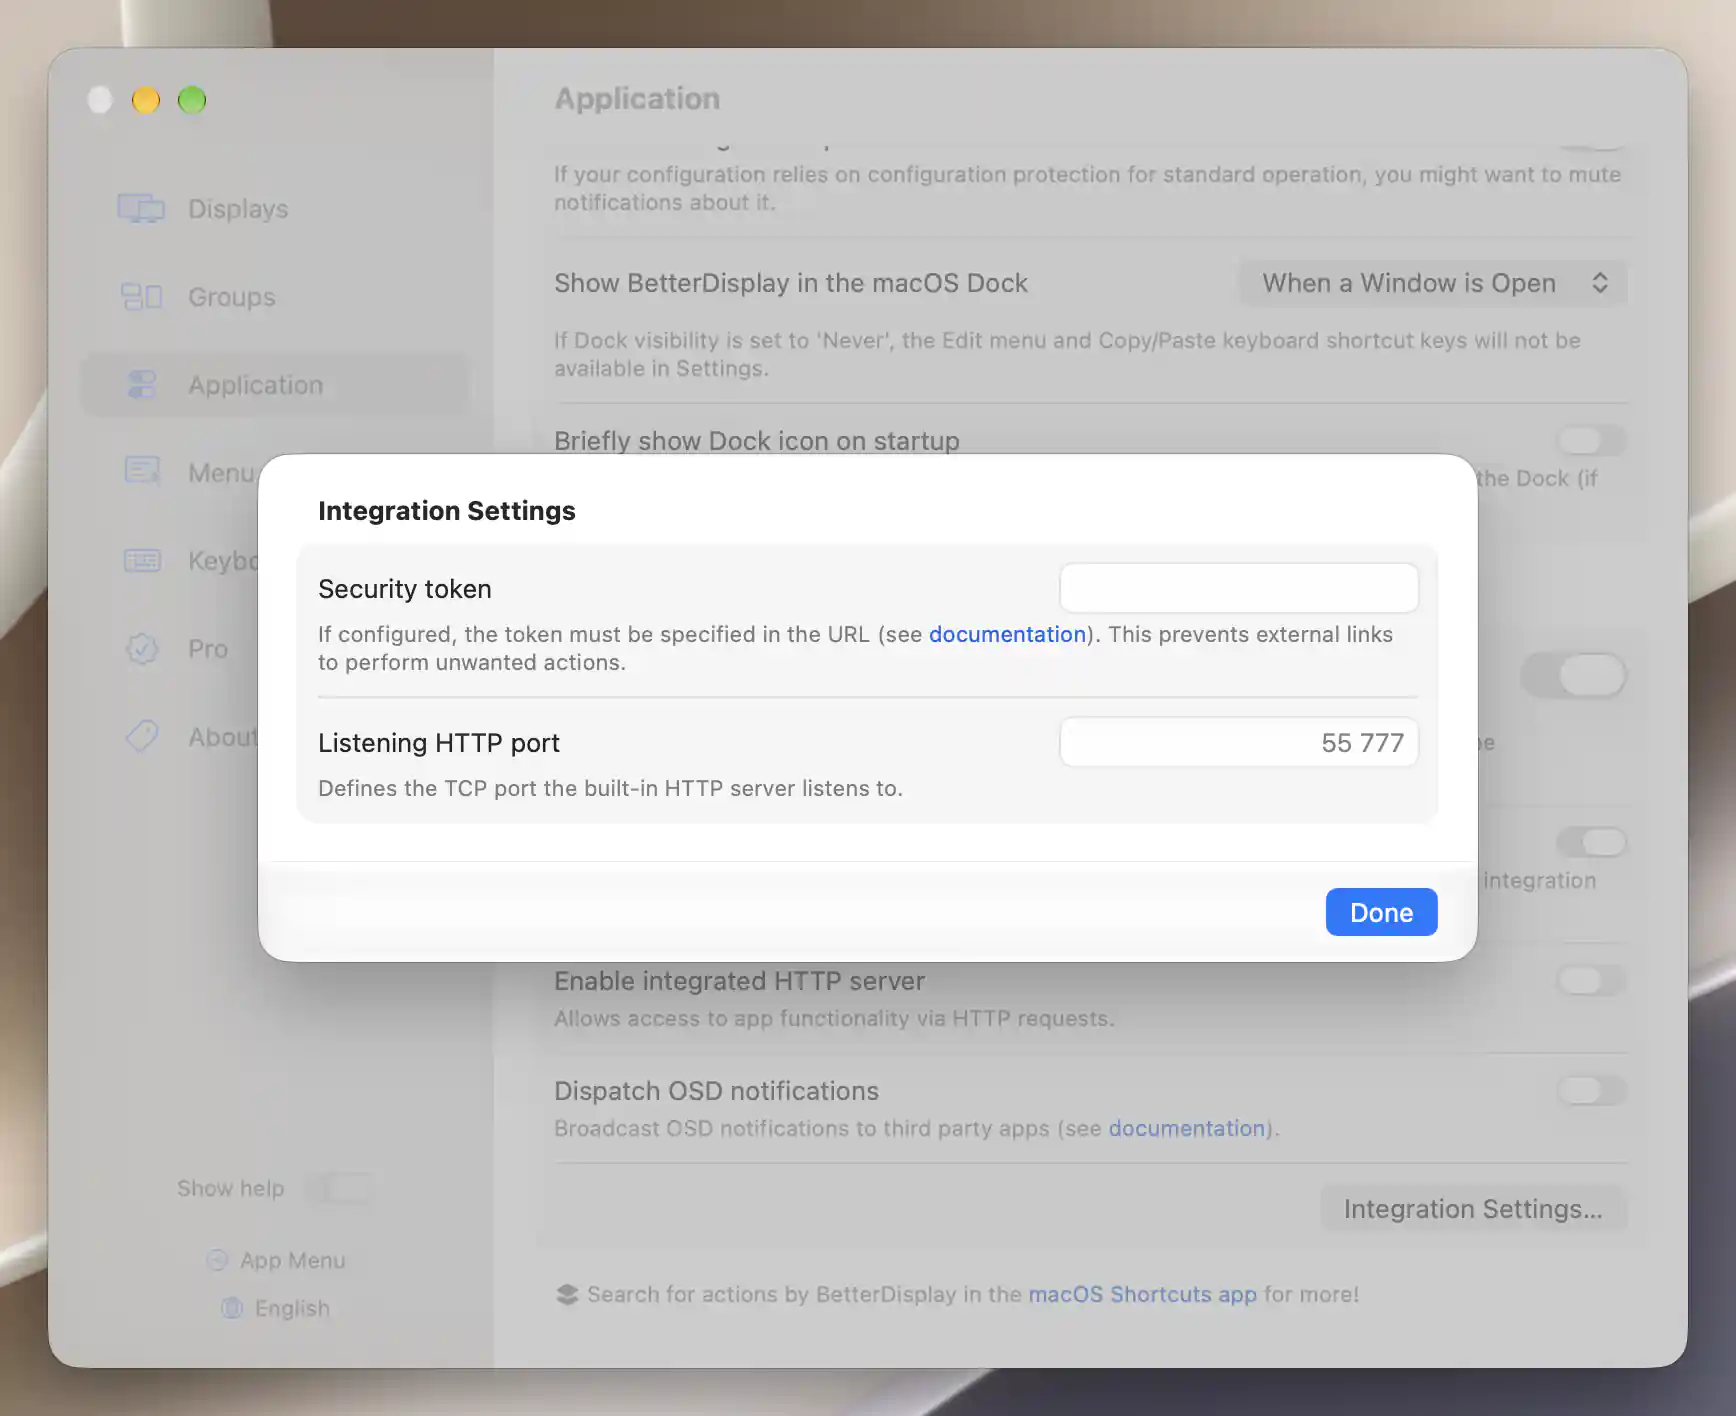
Stage token preparation with HTTP off and URL-scheme access on.
After saving the token, close Integration Settings… before sharing the running-status view.
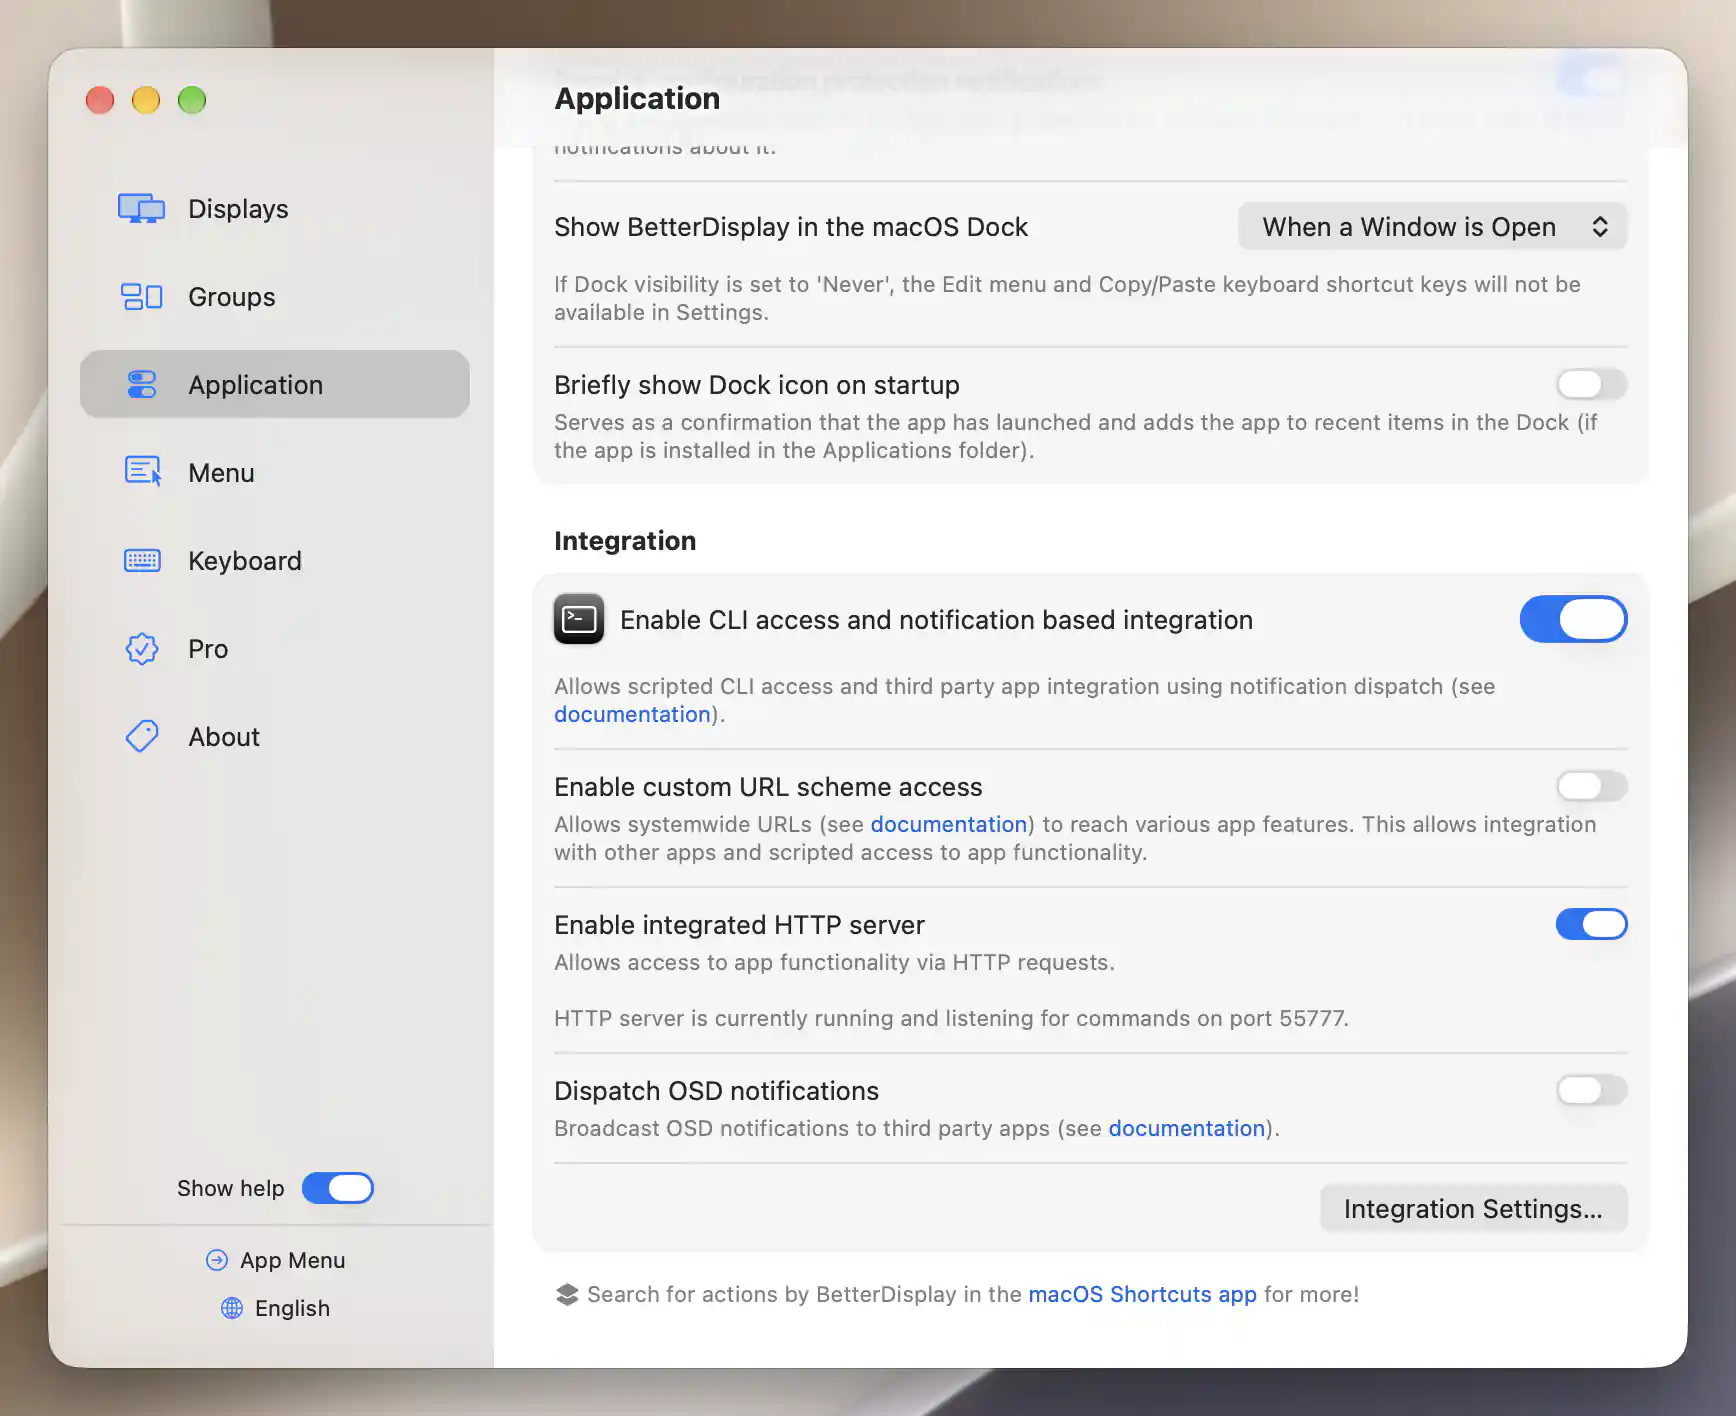
The existing HTTP listener reports its status after a private token is committed.
Follow any permission request actually presented by your Mac. This inbound HTTP/DDC recipe does not require blanket Screen Recording or Accessibility access. Incoming TCP listening and acceptance alone do not require a blanket Local Network grant; other app features may have separate requirements. See Apple’s local-network privacy guidance.
Add one Home Assistant action
- Save the relevant original Home Assistant configuration and secrets privately. In
secrets.yamlalongsideconfiguration.yaml, add one unused key containing the whole request URL. Replace every uppercase placeholder with your real Mac’s network address, actual port, verified normalized level, local Tag ID and matching private token. Do not paste the completed URL into a public issue, screenshot or browser history.
betterdisplay_desk_brightness_url: "http://MAC_ADDRESS:ACTUAL_PORT/set?hardwareBrightness=TESTED_LEVEL&type=Display&tagID=ACTUAL_TAG_ID&min=0&max=1&token=PRIVATE_TOKEN"
/set is the BetterDisplay operation; the HTTP method is GET. min=0&max=1 maps the tested value into the configured hardware-brightness range. The token belongs in the query, not an Authorization header or JSON body.
- Add this command beneath the existing
rest_command:mapping inconfiguration.yaml, or create that mapping if absent. Do not replace unrelated commands or add a second mapping with the same name. Use an unused command name if the example is already taken.
rest_command:
  betterdisplay_desk_brightness:
    url: !secret betterdisplay_desk_brightness_url
    method: get
    timeout: 10
- For initial REST-command setup, restart Home Assistant as described in its RESTful Command documentation. For later changes to an existing setup,
rest_command.reloadreloads these commands without restarting. Keep this reload scoped to REST commands. - Open Settings > Tools > Actions. In the Action dropdown, search for
rest_command.betterdisplay_desk_brightness(or your chosen name), select it, and choose Perform action once. Wait for the request and any pending monitor writes to settle.
Home Assistant’s secrets documentation explains the file lookup and privacy limits. Keep !secret in this file-based configuration; it is not supported in the YAML editor of a UI-created automation. The Tools documentation describes the administrator-only action runner and its response display.
Check the result
- Inspect the response under Response. HTTP
200indicates successful app request handling; a set request may have an empty response body. It does not establish completed hardware change. - Check the actual monitor’s brightness, other displays and the visible recovery desktop. The intended panel should reach the comfortable setting you tested manually. A stored app value or slider position is not an independent panel measurement.
- Repeat the same action once only after the first request has settled. Confirm that the fixed setting remains comfortable and other displays stay unchanged. Stop if synchronization or another rule changes the result.
After these checks, an existing Home Assistant automation can invoke your command by its action ID. Record and test its trigger separately; keep it disabled until the manual result is satisfactory. This action does not launch BetterDisplay, wake an unavailable Mac, connect an unplugged monitor or catch up missed triggers.
Troubleshooting
- No connection or timeout: compare the real Mac’s network address and port with the app’s running-server message. Check reachability and any actual firewall prompt rather than disabling unrelated safeguards. A client timeout does not roll back an already accepted brightness request.
- HTTP 401: check the committed token and its URL encoding privately. Do not clear authentication on a listening server to diagnose it.
- HTTP 404 / Failed: verify the current Tag ID,
type=Display, spelling ofhardwareBrightness, connected monitor and available controller-provided control. See the integration parameter reference. - HTTP 200 but no panel change: retest the exact hardware-brightness path manually and inspect relevant rules. Request acceptance is not a hardware acknowledgement. A
/getof hardware brightness reads app-stored or fallback state, not fresh panel luminance. - Another monitor changes: examine existing synchronization sources and targets. The explicit selector does not disable those relationships. Pause only the relevant rule, save its original state, and retest.
- Brightness works but another feature does not: volume, power and input selection have their own controller requirements and request semantics. Follow the worked integration examples and the TV workflow rather than copying unverified input codes or assuming every monitor exposes every feature.
Community integration and MQTT
The community Home Assistant component is a separate project. Its documented device testing is limited, and unsupported-control polling or its current input-request implementation can prevent expected behavior. Check its current release, device reports and issues before using it; the direct REST recipe above does not install or depend on it.
BetterDisplay does not provide a built-in MQTT broker connection or Home Assistant MQTT discovery. An MQTT workflow needs an external bridge that translates messages into supported BetterDisplay requests. See the Home Assistant FAQ for the distinction.
Stop, remove and restore
- Disable or remove only the trial’s Home Assistant triggers and stop manual calls. Wait for running actions, accepted app requests and pending hardware writes to finish before restoring anything. Removing an action or disabling the server does not cancel already dispatched work.
- Remove only your added command and secret key from the files, preserving unrelated entries and clients. Run
rest_command.reloadfrom Settings > Tools > Actions, then verify the removed action is gone. If the edited YAML is invalid, old commands can remain active; correct the configuration before considering removal complete. See REST command reload. - Restore the monitor’s actual original brightness, then any changed saved app values, ranges, controller preferences and individually paused rules. Restore other affected displays as well. Removing the client or controller does not restore hardware values.
- If a current mode or position originally differed from its protected target, restore both independently. If ordinary targeted UI cannot recreate an original nil value or both current and protected states, keep the private original record/backup, leave only that affected rule OFF, and record the precise restoration limit. Do not retarget protection to the wrong value or use global Forget, Reset or Import as an undo.
- Restore a changed Listening HTTP port while the listener still has its private token; the field is editable only with HTTP enabled. Clear it if originally unset rather than entering the displayed default, and let the port restart settle. If no other client needs the server and it was originally OFF, then turn Enable integrated HTTP server OFF. Restore only a changed original token with HTTP OFF by temporarily enabling URL-scheme access, committing the field, then restoring that switch. Preserve the token, port and access required by existing clients; do not leave an unauthenticated listener running during restoration.
Related pages
- Can I control BetterDisplay from Home Assistant?
- App Integration
- CLI reference and CLI examples
- Hardware brightness and volume through a dock
Additional information
This section explains the feature and platform requirements for this workflow.
Features requiring Pro license
The HTTP interface, security token and ordinary supported DDC hardware brightness used here have no separate Pro requirement. Other requests retain their own feature requirements; optional synchronization or configuration-protection features can require Pro. Home Assistant and its community components have separate setup requirements.
Platform compatibility
The described BetterDisplay HTTP and DDC features are available on both Apple silicon and Intel Macs, subject to the actual display and connection supporting hardware brightness. The documented app requires macOS 26.3 or later. Home Assistant must reach the running Mac; no particular Home Assistant host architecture is required by this HTTP recipe.