Reduce PWM and temporal dithering
Keep hardware brightness out of a display-specific low-brightness range, or turn off exposed GPU dithering, when those settings help your preferred viewing setup. BetterDisplay can change parts of the image path; it cannot establish that the entire display is flicker-free.
Before you begin
PWM (pulse-width modulation) varies light output by rapidly switching a backlight or pixels. Temporal dithering alternates color levels to represent intermediate shades. These are different processes, and a monitor may use its own processing after receiving the Mac's image.
Change one setting at a time and keep a record of the starting values. Use panel-specific documentation or measurement to identify modulation behavior. There is no universal 30–50% threshold or “safe” brightness percentage, and a screenshot cannot measure PWM or temporal dithering. The procedures below describe display configuration, rather than a guaranteed remedy for eye strain.
Keep a hardware brightness floor
This method needs working hardware brightness and software dimming. Below the chosen hardware floor, combined brightness makes the image darker in software rather than lowering hardware brightness further.
- Open Settings > Displays > [display] > Image Adjustments.
- Keep Enable software-based video adjustments on and enable Combined brightness. Check that its status names an active hardware controller.
- Open Image Adjustment Settings….
- Set Combined brightness - minimum allowed hardware brightness level to the floor appropriate for your tested display. The value is on the hardware controller's scale, not the combined slider's scale; the accepted range is 0–99%.
- Lower the combined brightness slider and compare the result. Confirm on the display's own brightness readout or with measurement that hardware brightness stays above the chosen floor while software dimming supplies the darker image.
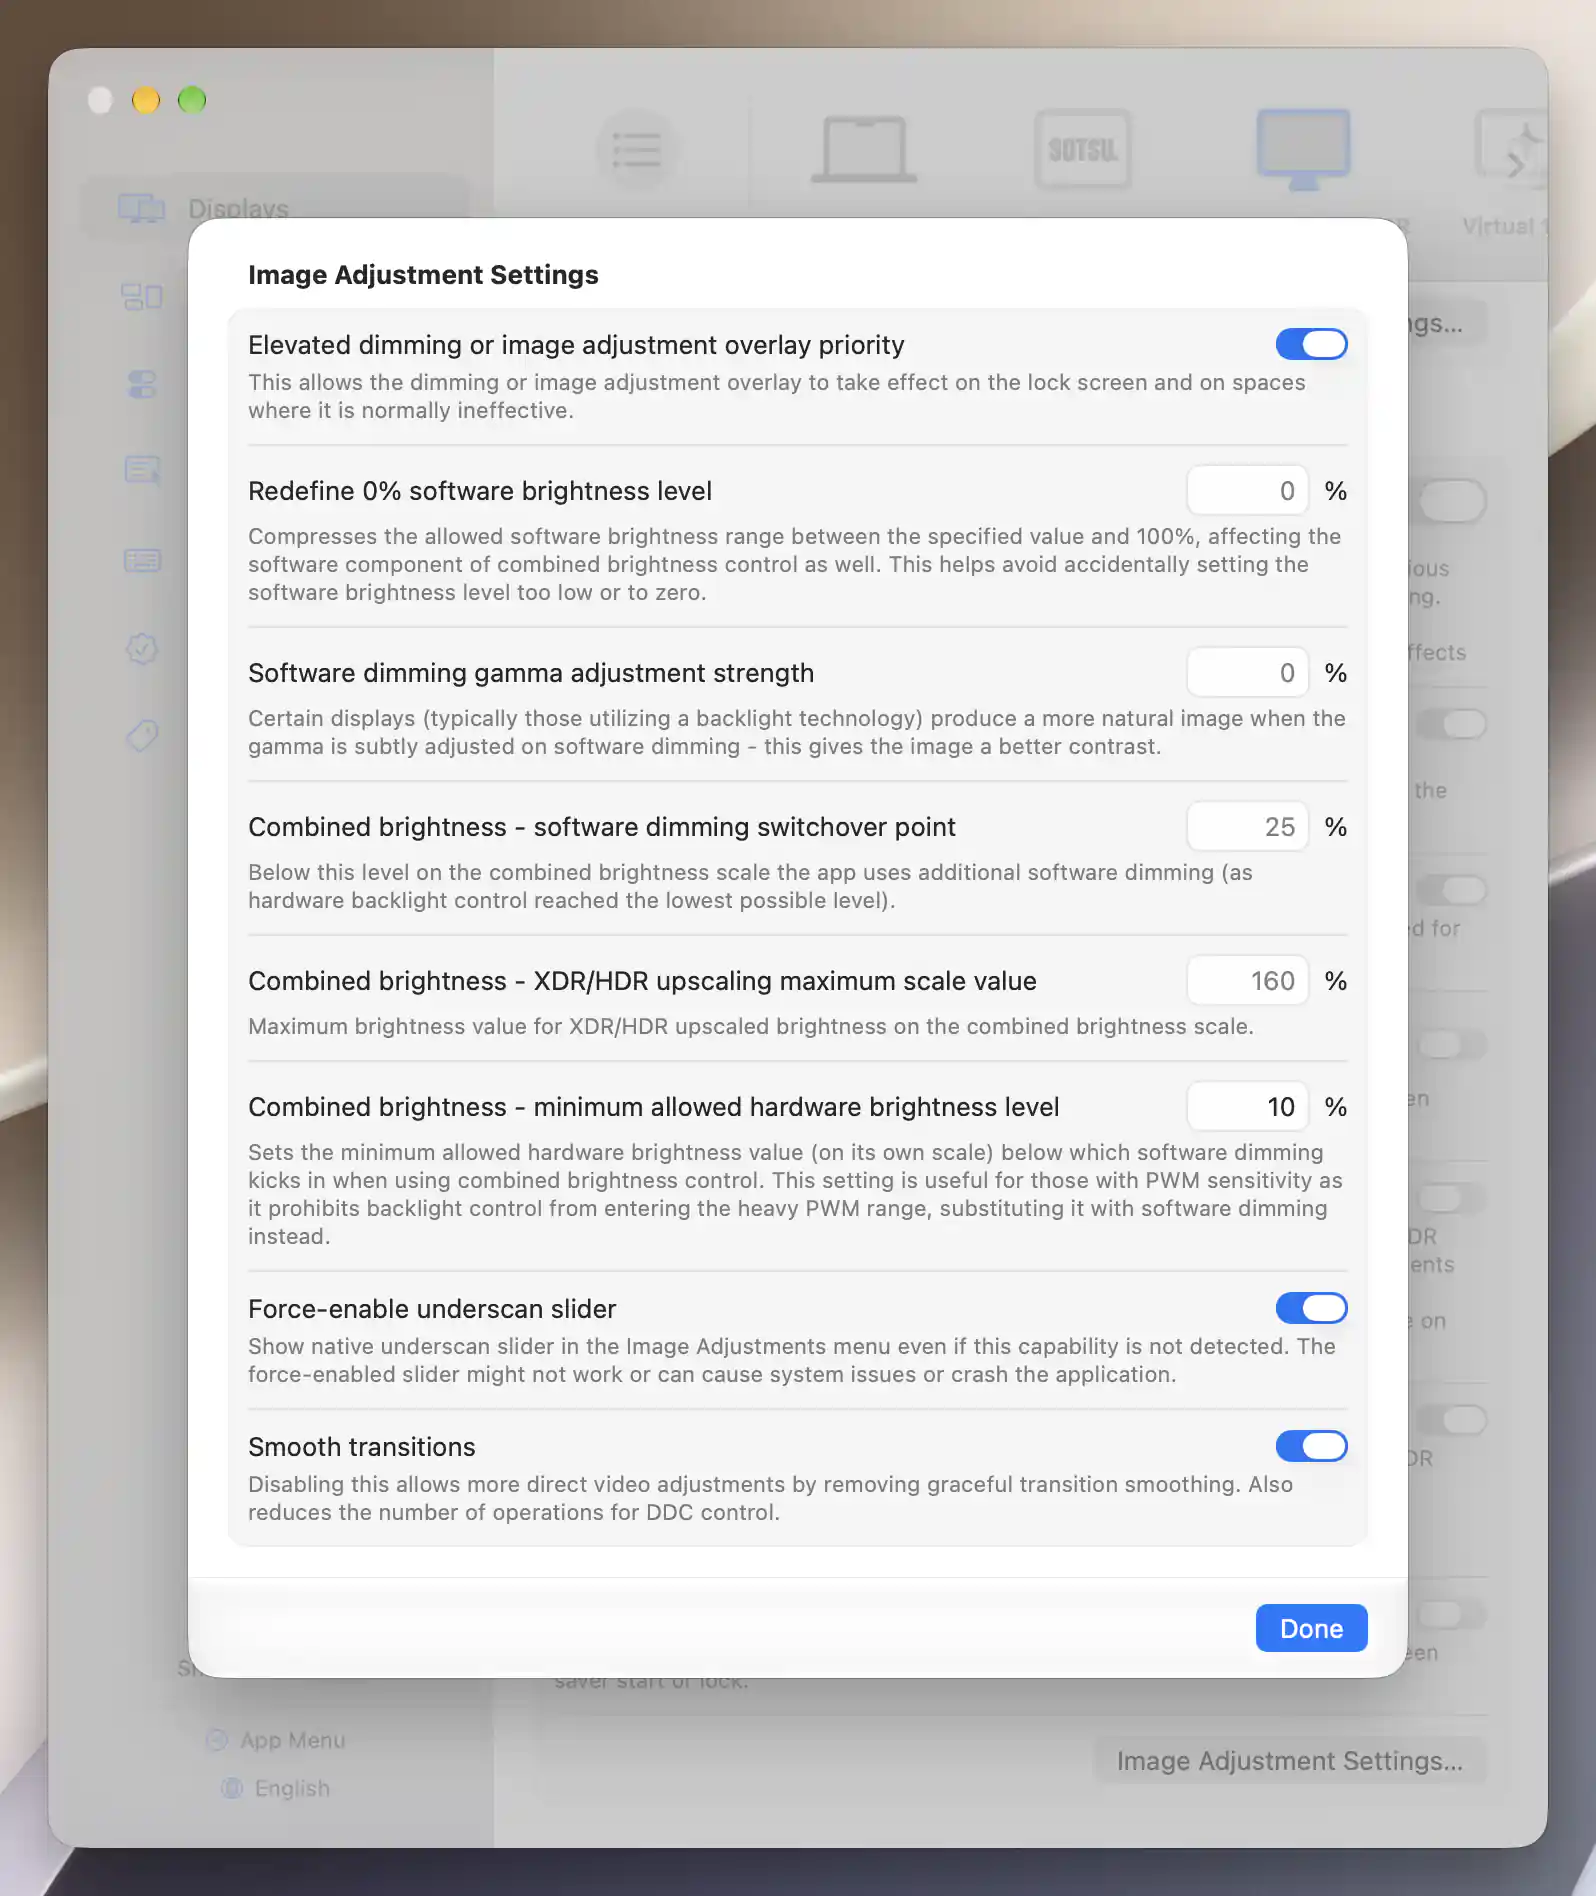
The 10% hardware floor is an illustrative setting, not a tested PWM threshold.
Check the result
The desktop should dim below the floor without requesting lower hardware brightness through that combined controller. This does not prevent modulation that exists at higher brightness, inside panel processing, or when another app or the monitor's own settings change brightness.
Software dimming reduces pixel values and can change contrast, black appearance or color precision. If there is no working hardware controller, use software dimming with the hardware brightness set manually on the monitor; the combined hardware-floor preference cannot manage an unavailable controller.
Turn off exposed GPU dithering on Apple silicon
- Open App Menu > [display] > Color Mode, usually beneath the more-options chevron.
- If GPU Dithering is shown and active, select it to turn it off. Its absence means the app cannot read that setting for the selected display.
- Compare a gradient and an ordinary document. Watch for banding and decide whether the tradeoff suits your setup.
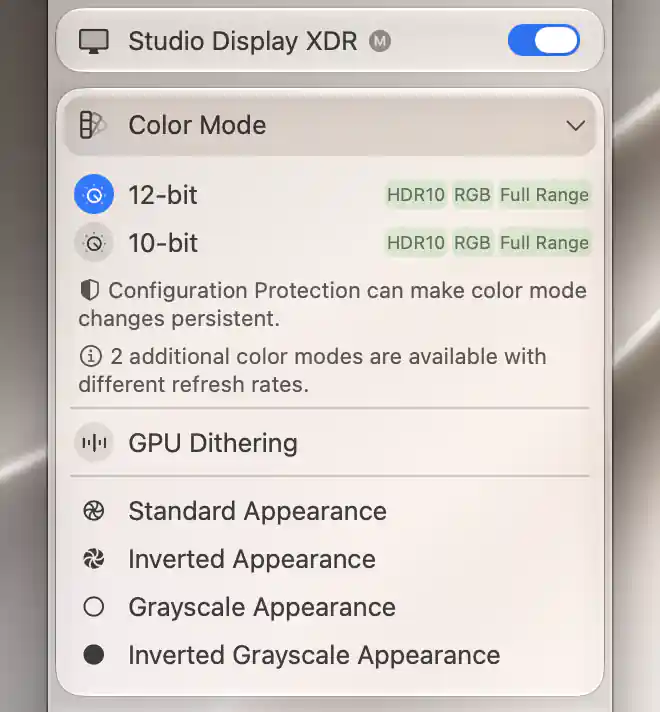
GPU Dithering is off for the exposed framebuffer setting.
Check the result
The GPU Dithering item should show its off state after a successful change. BetterDisplay remembers that exposed setting for the display, but the monitor may still apply its own frame-rate control or other dithering. The dithering FAQ explains this distinction and the interaction with Uniformity Correction on supported built-in panels.
Choose a lower color depth when available
On Intel, inspect Color Depth for an available 8-bit mode. On Apple silicon, inspect Color Mode for an 8-bit connection format at your chosen resolution and refresh rate. Check its complete SDR/HDR and encoding description before selecting it; an 8-bit choice is not guaranteed on every connection.
Selecting an 8-bit signal and disabling GPU Dithering are separate operations. Neither changes the monitor's internal panel processing. Avoid treating virtual-screen mirroring as a guaranteed 8-bit or dithering-free solution: current virtual screens can also expose HDR modes, and the physical connection retains its own capabilities. If you experiment with an SDR virtual source, use the virtual-screen setup tutorial and verify the actual result on your hardware.
Optional: create a limited-color appearance
For a simpler document appearance, open App Menu > [display] > Image Adjustments and move Quantization toward fewer color levels where available. It reduces the number of represented color levels, deliberately producing steps between shades.
On supported Apple silicon displays, Color Mode > Grayscale Appearance removes color. You can combine it with quantization for an e-book-like look, but this is an appearance preference and does not prove that hardware dithering or PWM has stopped.
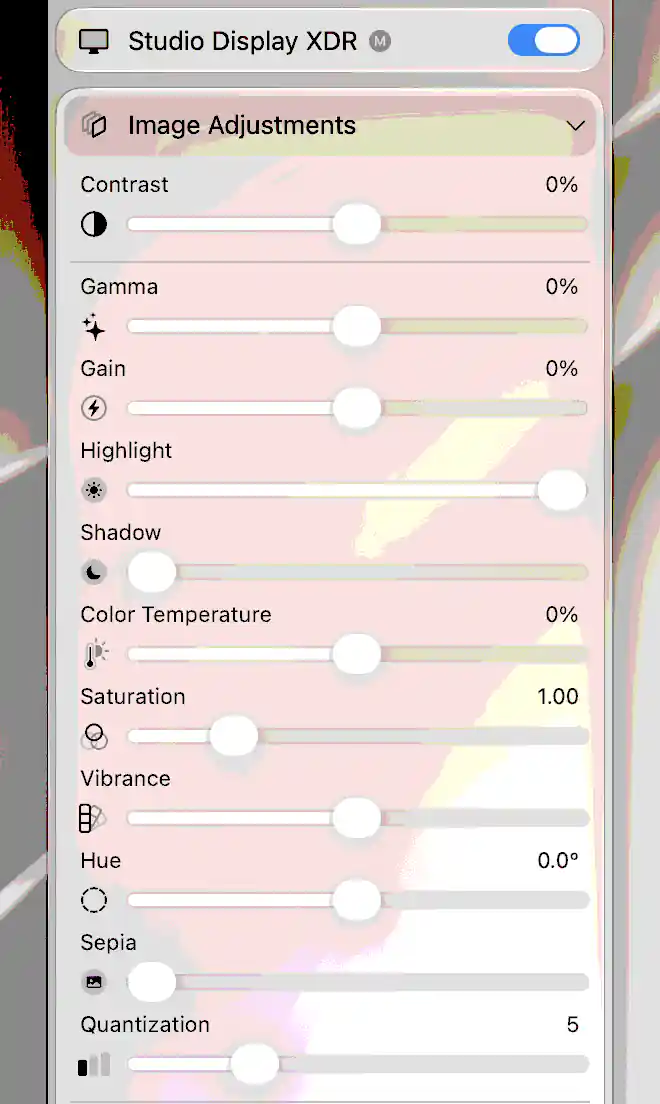
Quantization is set to five levels through the compositor; the adjustment also changes the captured desktop and menu.
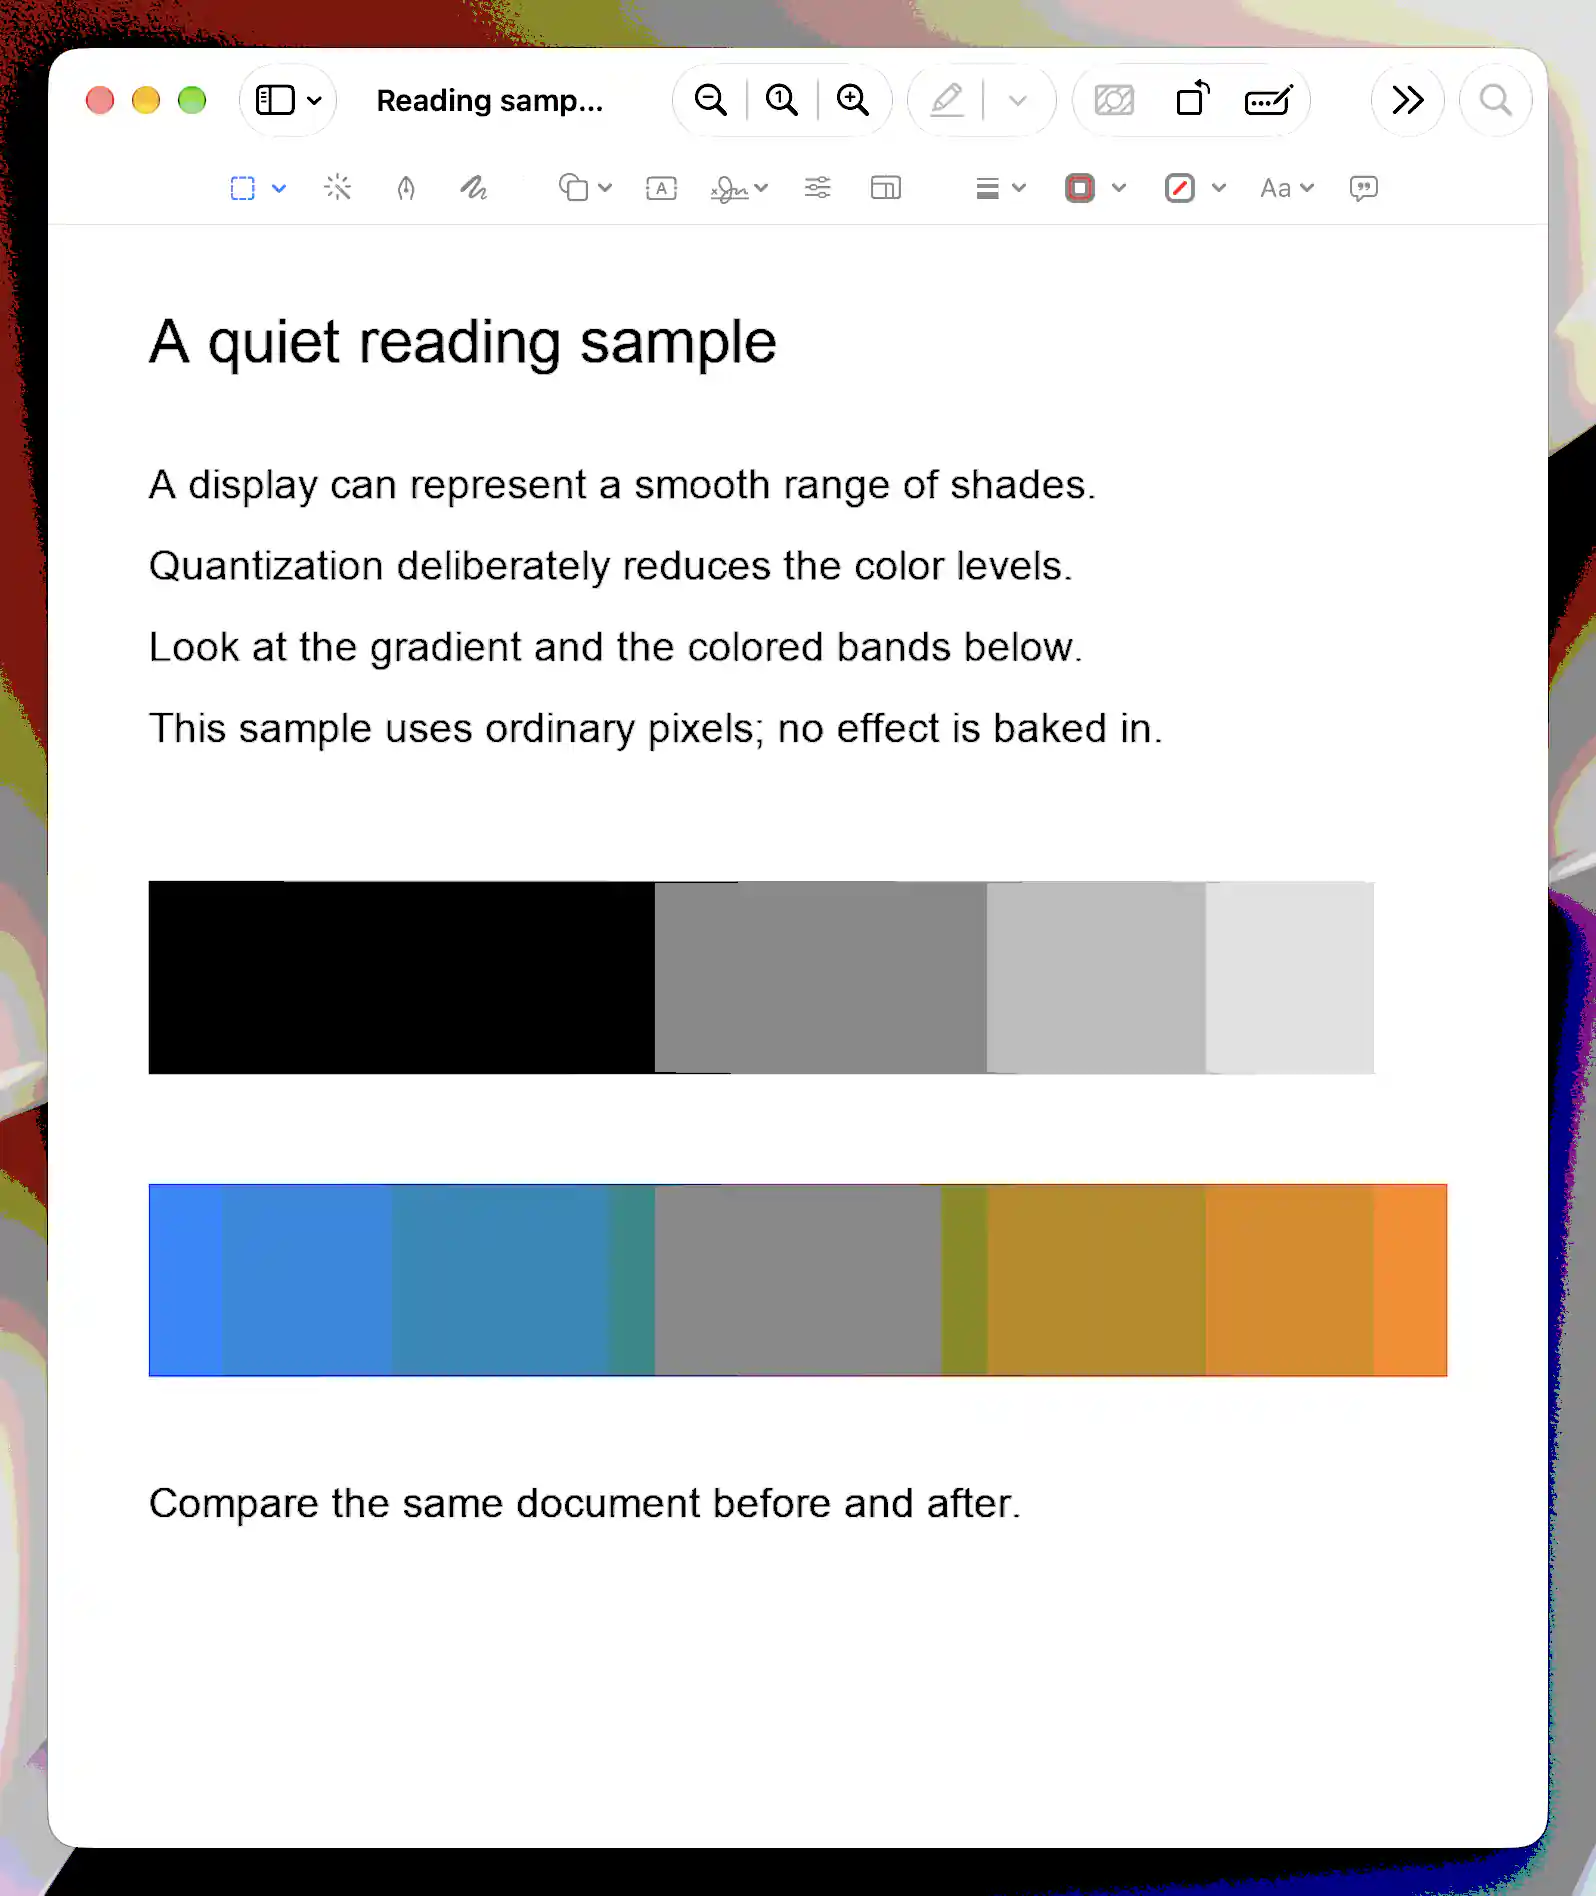
Quantization is set to five levels, producing stepped gradients in this sample through the compositor adjustment path.
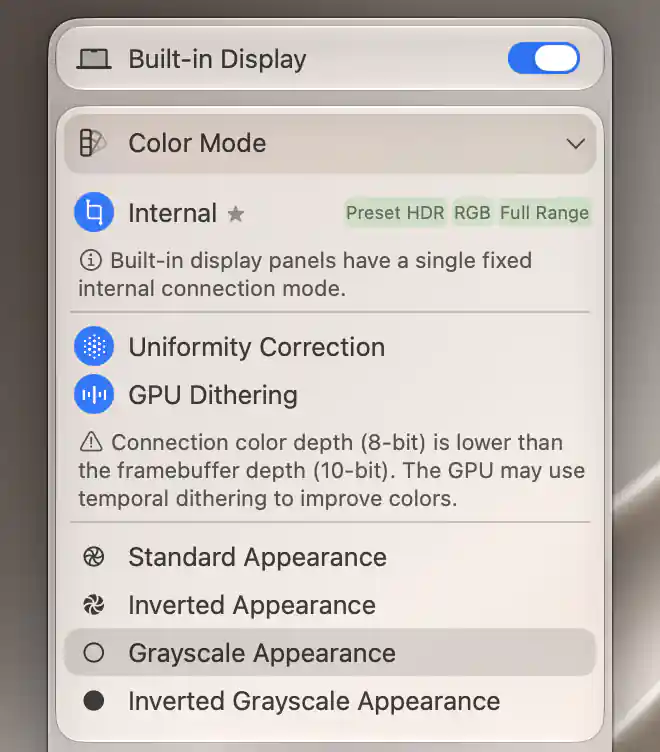
Grayscale Appearance is applied to the built-in display; the action row is highlighted here.
Troubleshooting
If the hardware floor has no effect, confirm Combined brightness is active and test the combined slider rather than an independent hardware slider. Check for monitor auto-brightness or another app changing hardware brightness outside BetterDisplay.
If GPU Dithering is missing, check the selected display and architecture; the toggle requires an exposed Apple silicon framebuffer setting. If gradients show bands after turning it off, restore the original setting or review the Uniformity Correction interaction. Hardware measurements are needed to confirm a completely modulation-free result.
Undo the setup
Clear the custom hardware floor to restore its default, or return to your recorded value. Re-enable GPU Dithering if it was originally on, restore the previous color format, and choose Standard Appearance to undo framebuffer grayscale. Reset Quantization separately through Image Adjustments.
Related pages
Additional information
This section explains feature access and platform requirements for this tutorial.
Features requiring Pro license
The combined minimum hardware brightness setting requires Pro. GPU Dithering and the exposed framebuffer appearance actions are not independently Pro-gated. Quantization and the Color Temperature slider require Pro, as do the custom virtual-screen methods. Basic software dimming has no separate Pro gate.
Platform compatibility
The hardware-floor method is available on Apple silicon and Intel when working hardware brightness and combined software dimming are available. GPU Dithering and framebuffer Grayscale Appearance require supported Apple silicon displays. Color-depth choices depend on architecture, connection, display mode and GPU; panel-side behavior requires separate verification.