Set up a fully scalable HiDPI desktop
Choose a comfortable desktop size without being limited to the few scaled resolutions macOS shows by default. BetterDisplay's flexible scaling adds a finer set of HiDPI choices to supported native displays; a virtual screen offers an alternative when that method is unavailable.
Before you begin
Desktop size and panel resolution describe different things. A smaller logical resolution makes text and windows larger; HiDPI renders that desktop with more detail before fitting it to the panel. Read MacOS scaling, HiDPI, LoDPI explanation for worked examples and the relationship between desktop, rendering and output pixels.
Use flexible scaling first for a built-in or natively connected display, such as one connected through USB-C, DisplayPort or HDMI. Sidecar and DisplayLink need the virtual-screen approach below when native model overrides are unavailable. Save your work before applying system changes, and have administrator authorization available.
Model overrides affect displays sharing the same vendor and model identifiers. Select the intended model before changing it, and review other pending system changes before choosing Apply.
Enable flexible scaling
- Open BetterDisplay's Settings > Displays, then select your display.
- Find System Configuration and Flexible Scaling and enable Edit the system configuration of this display model.
- Enable Enable flexible scaling. Leave the optional resolution-range customization at its defaults for the initial setup.
- Select Apply in the sidebar notice and complete helper or administrator authorization.
- Follow the activation notice. Reboot for a built-in display. On eligible external Apple silicon displays, Activate can apply the change without rebooting; read its confirmation because displays briefly go blank and some Macs may sleep.
- Open the display's block in the App Menu. Choose a HiDPI mode and use its resolution slider to find a comfortable desktop size.
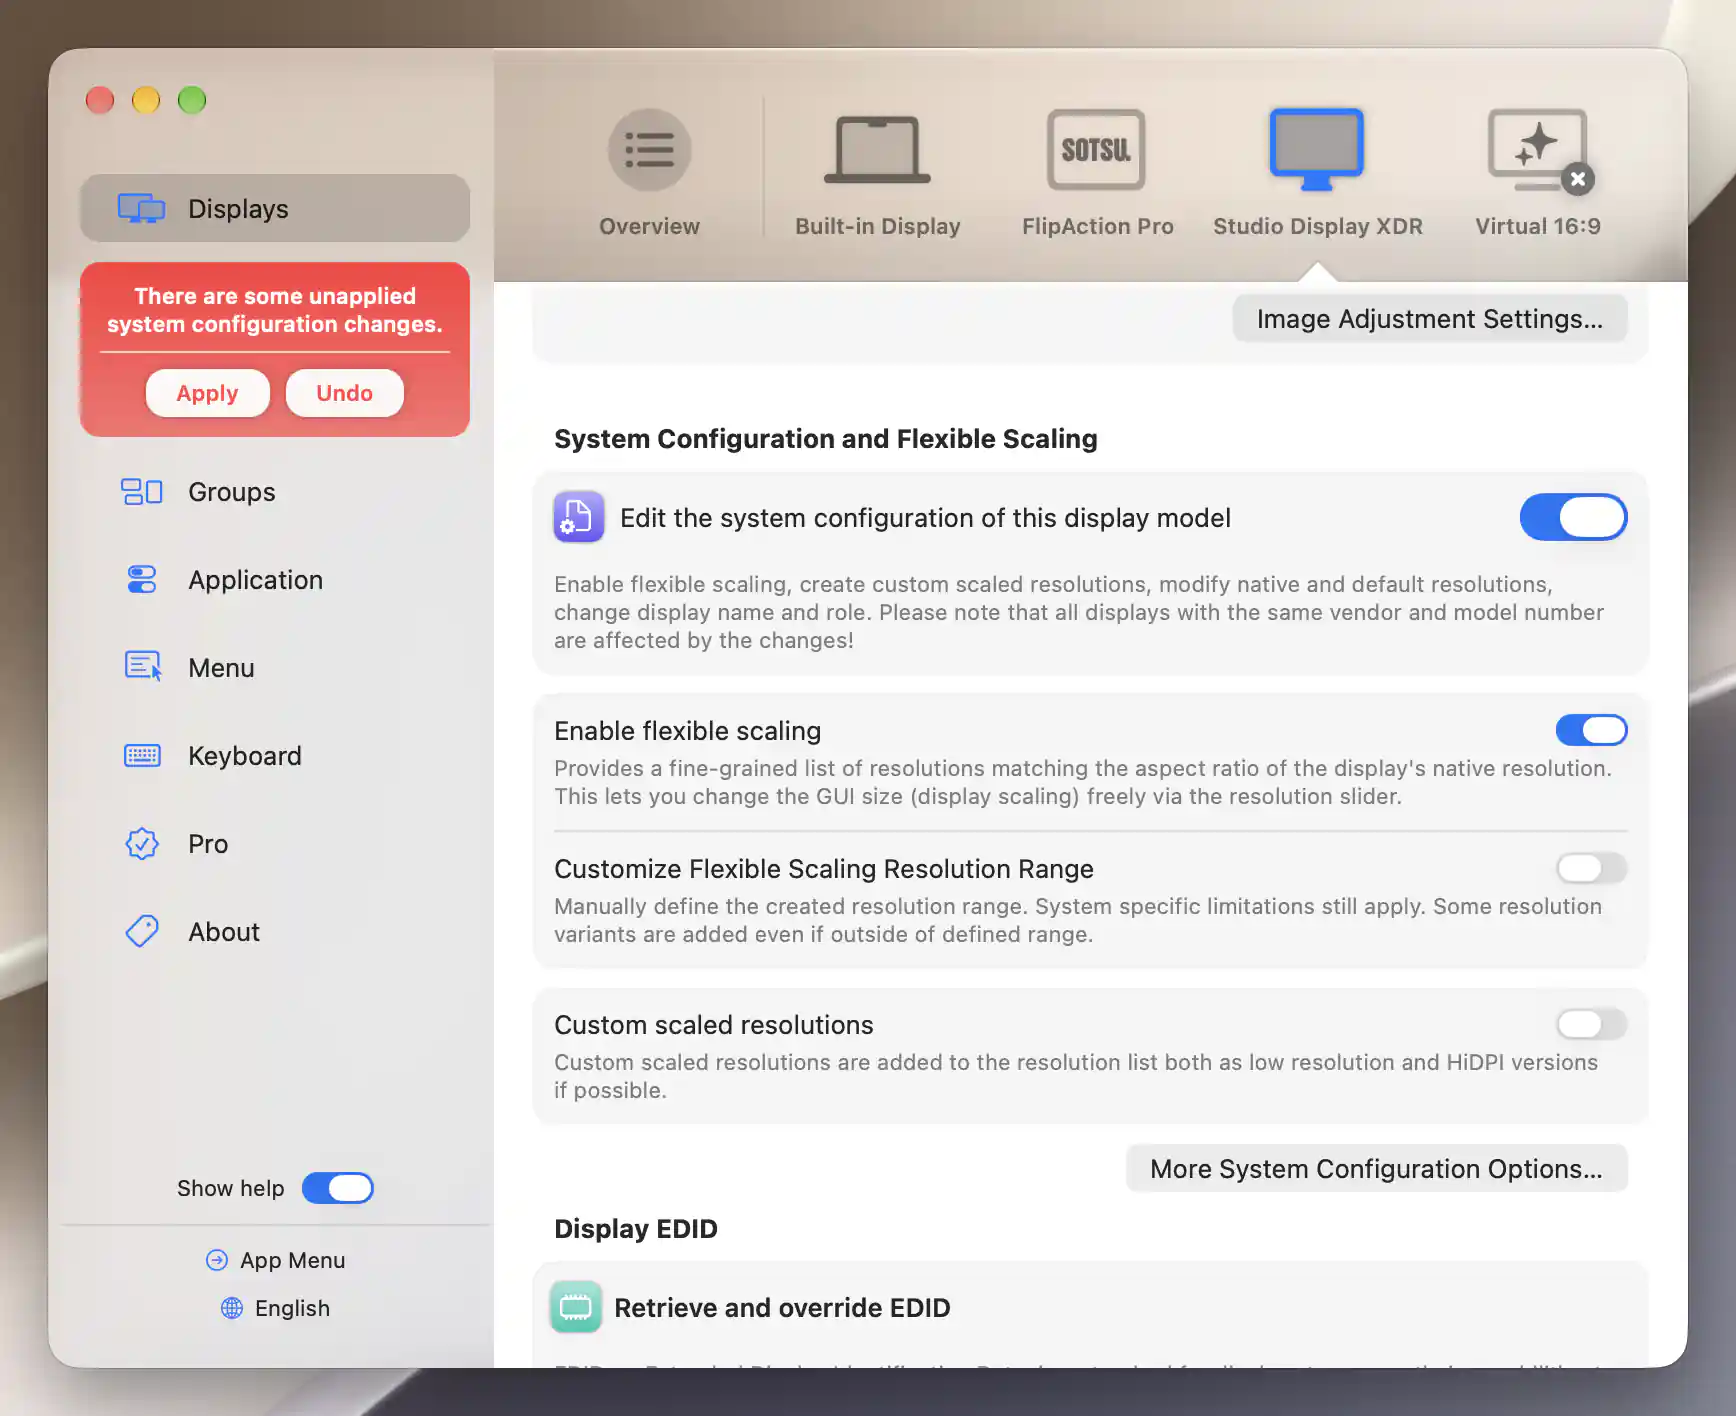
Flexible scaling is enabled for this display model; the sidebar shows pending system changes.
Check the result
The resolution slider should offer more closely spaced desktop sizes. Check text in an ordinary document at several sizes and select the one you prefer. HiDPI improves the rendering method; it cannot add physical pixels to a low-density panel.
The slider's 100% reference comes from the display's default desktop resolution, rather than its brightness or an absolute physical size. If you want to change that reference, review Edit default resolution in More system configuration options. You do not need to change it just to enable scaling.
The resolution slider changes desktop size while keeping HiDPI rendering.
Use a virtual screen when native scaling is unavailable
A virtual screen is a separate desktop that macOS renders in memory. You then mirror or stream it to the physical display. This can supply additional desktop sizes for Sidecar, DisplayLink, or other configurations where flexible scaling is unsuitable, but introduces an extra presentation layer.
- Open Settings > Displays > Overview > Create New Virtual Screen….
- Choose Match aspect ratio of and associate to a display and select the physical target in Display to match.
- Keep Associate the virtual screen with this display enabled. For streaming, enable Configure full screen stream to this display and leave Rotation (portrait mode) at Landscape - no rotation. Grant Screen Recording permission if requested and reopen the sheet afterward.
- For mirroring instead, turn streaming off and enable Configure virtual screen mirroring.
- Select Create Virtual Screen. Check that the new Virtual - [display name] desktop is connected and presented on the intended target.
- Adjust the virtual source's resolution slider. The physical display's slider changes the target desktop, rather than the desktop you are now viewing through the stream or mirror.
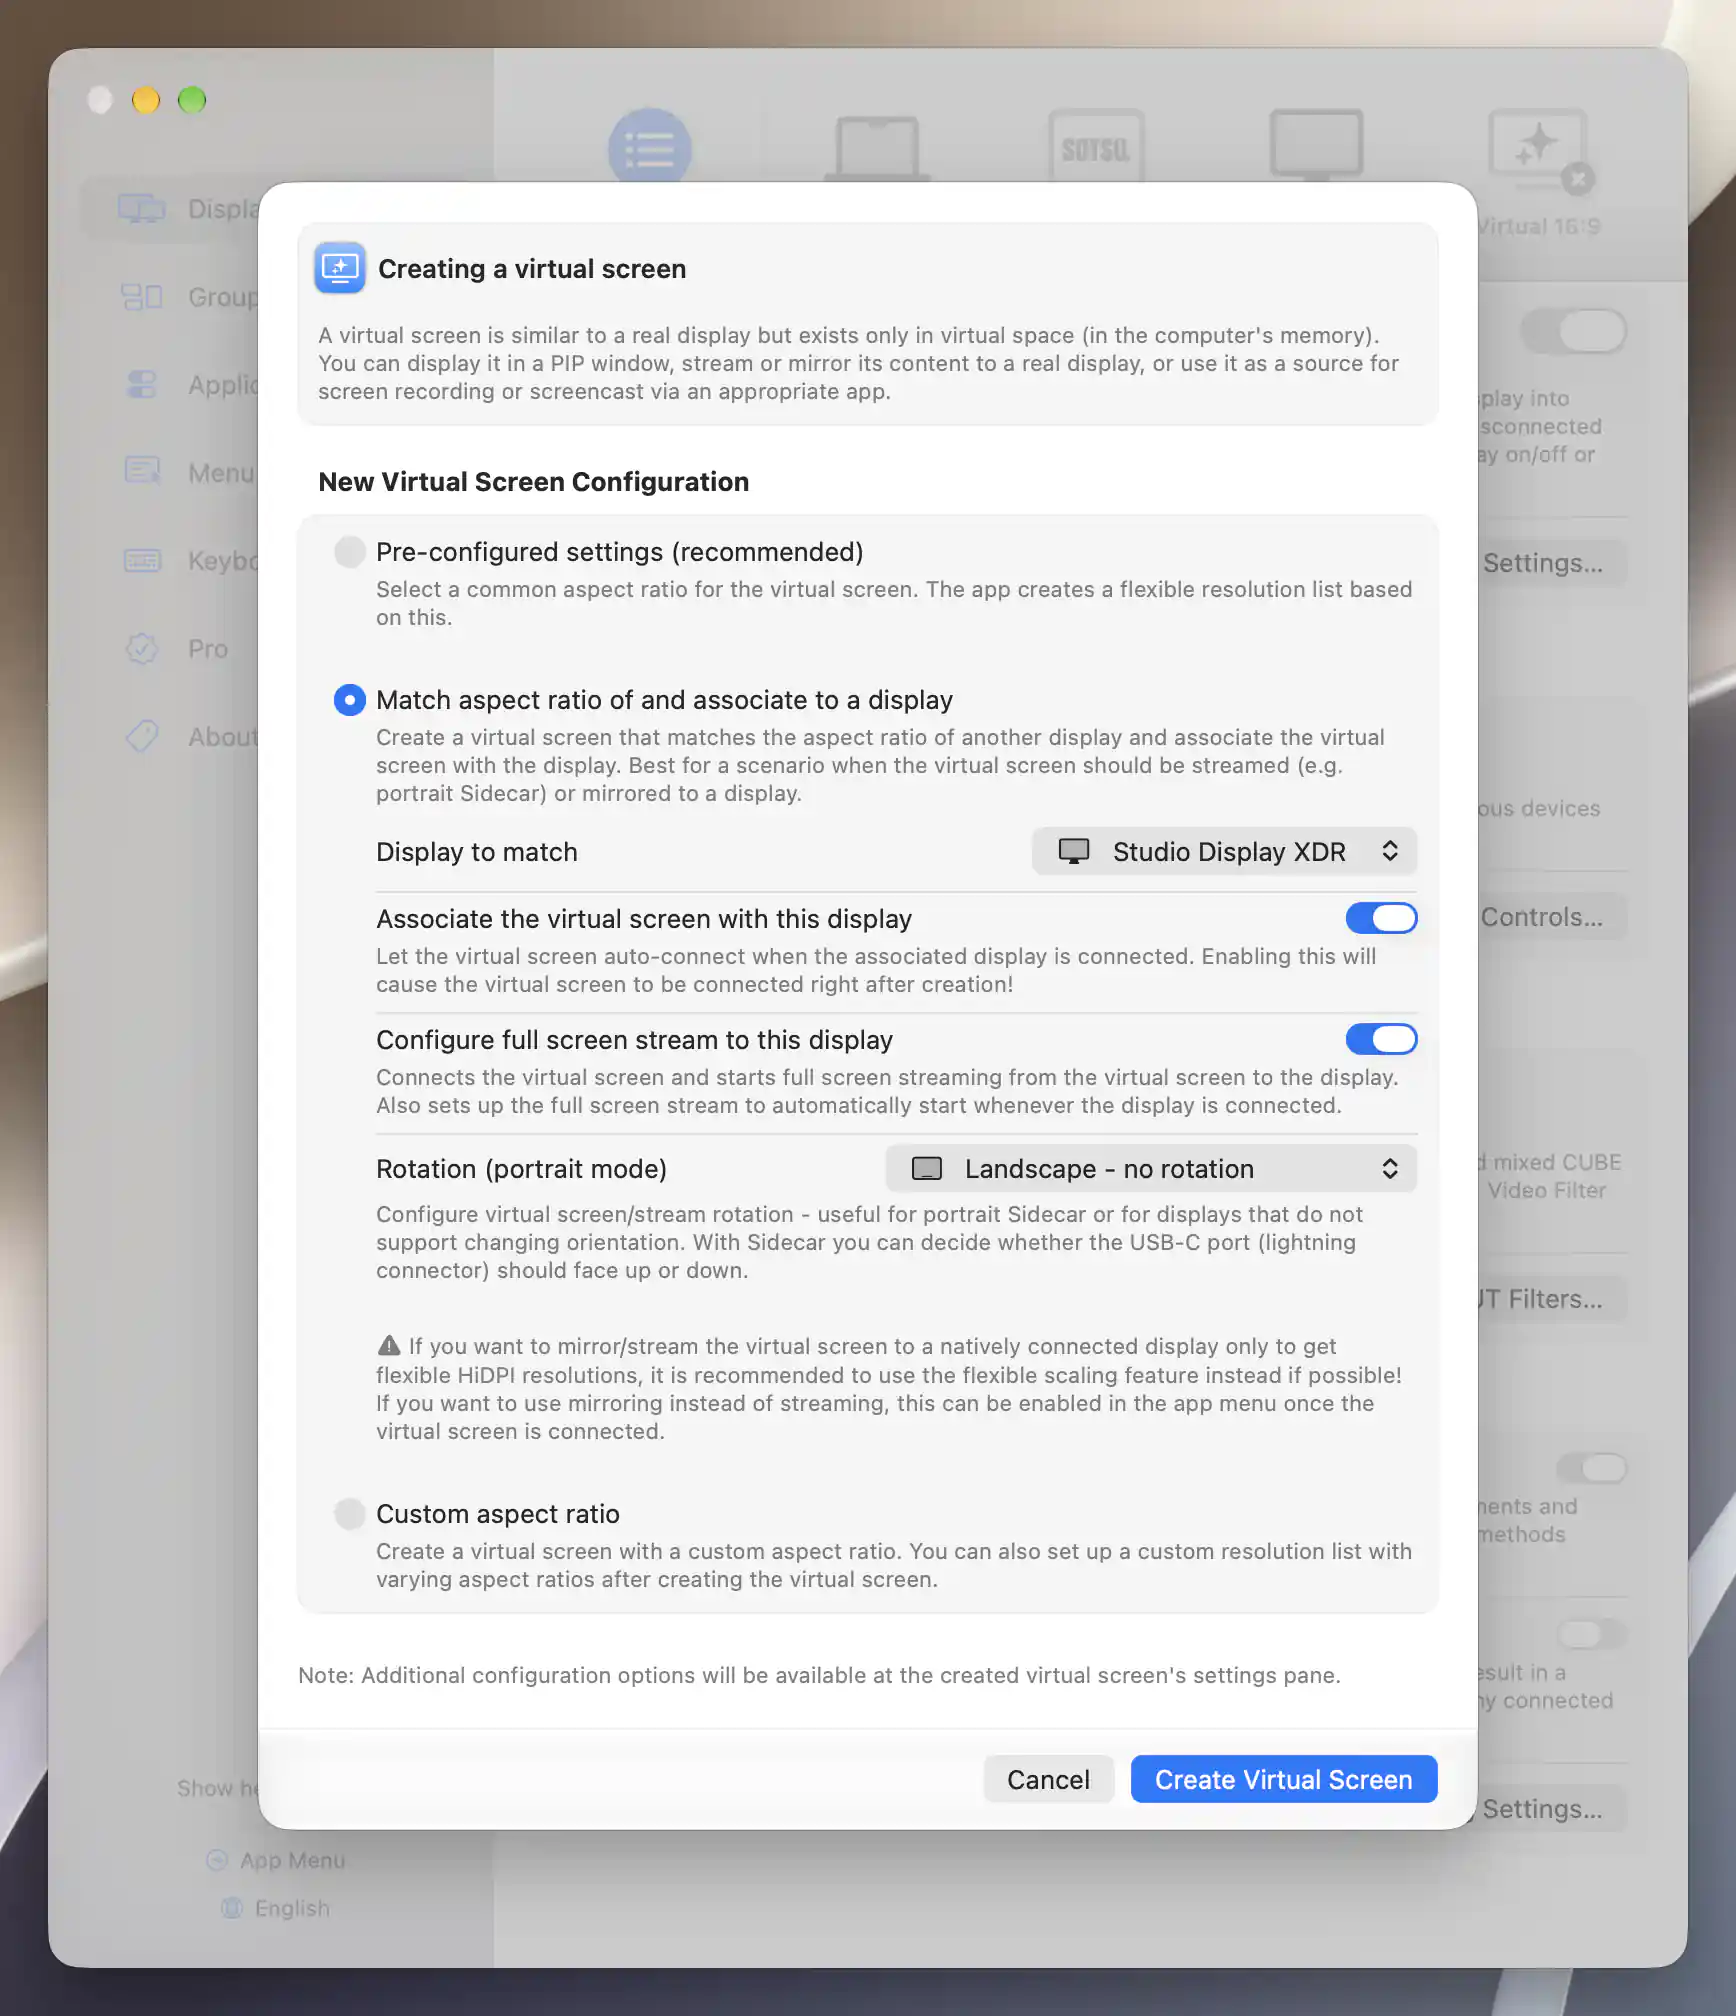
Match the target display and enable association and full-screen streaming before creating the virtual screen.
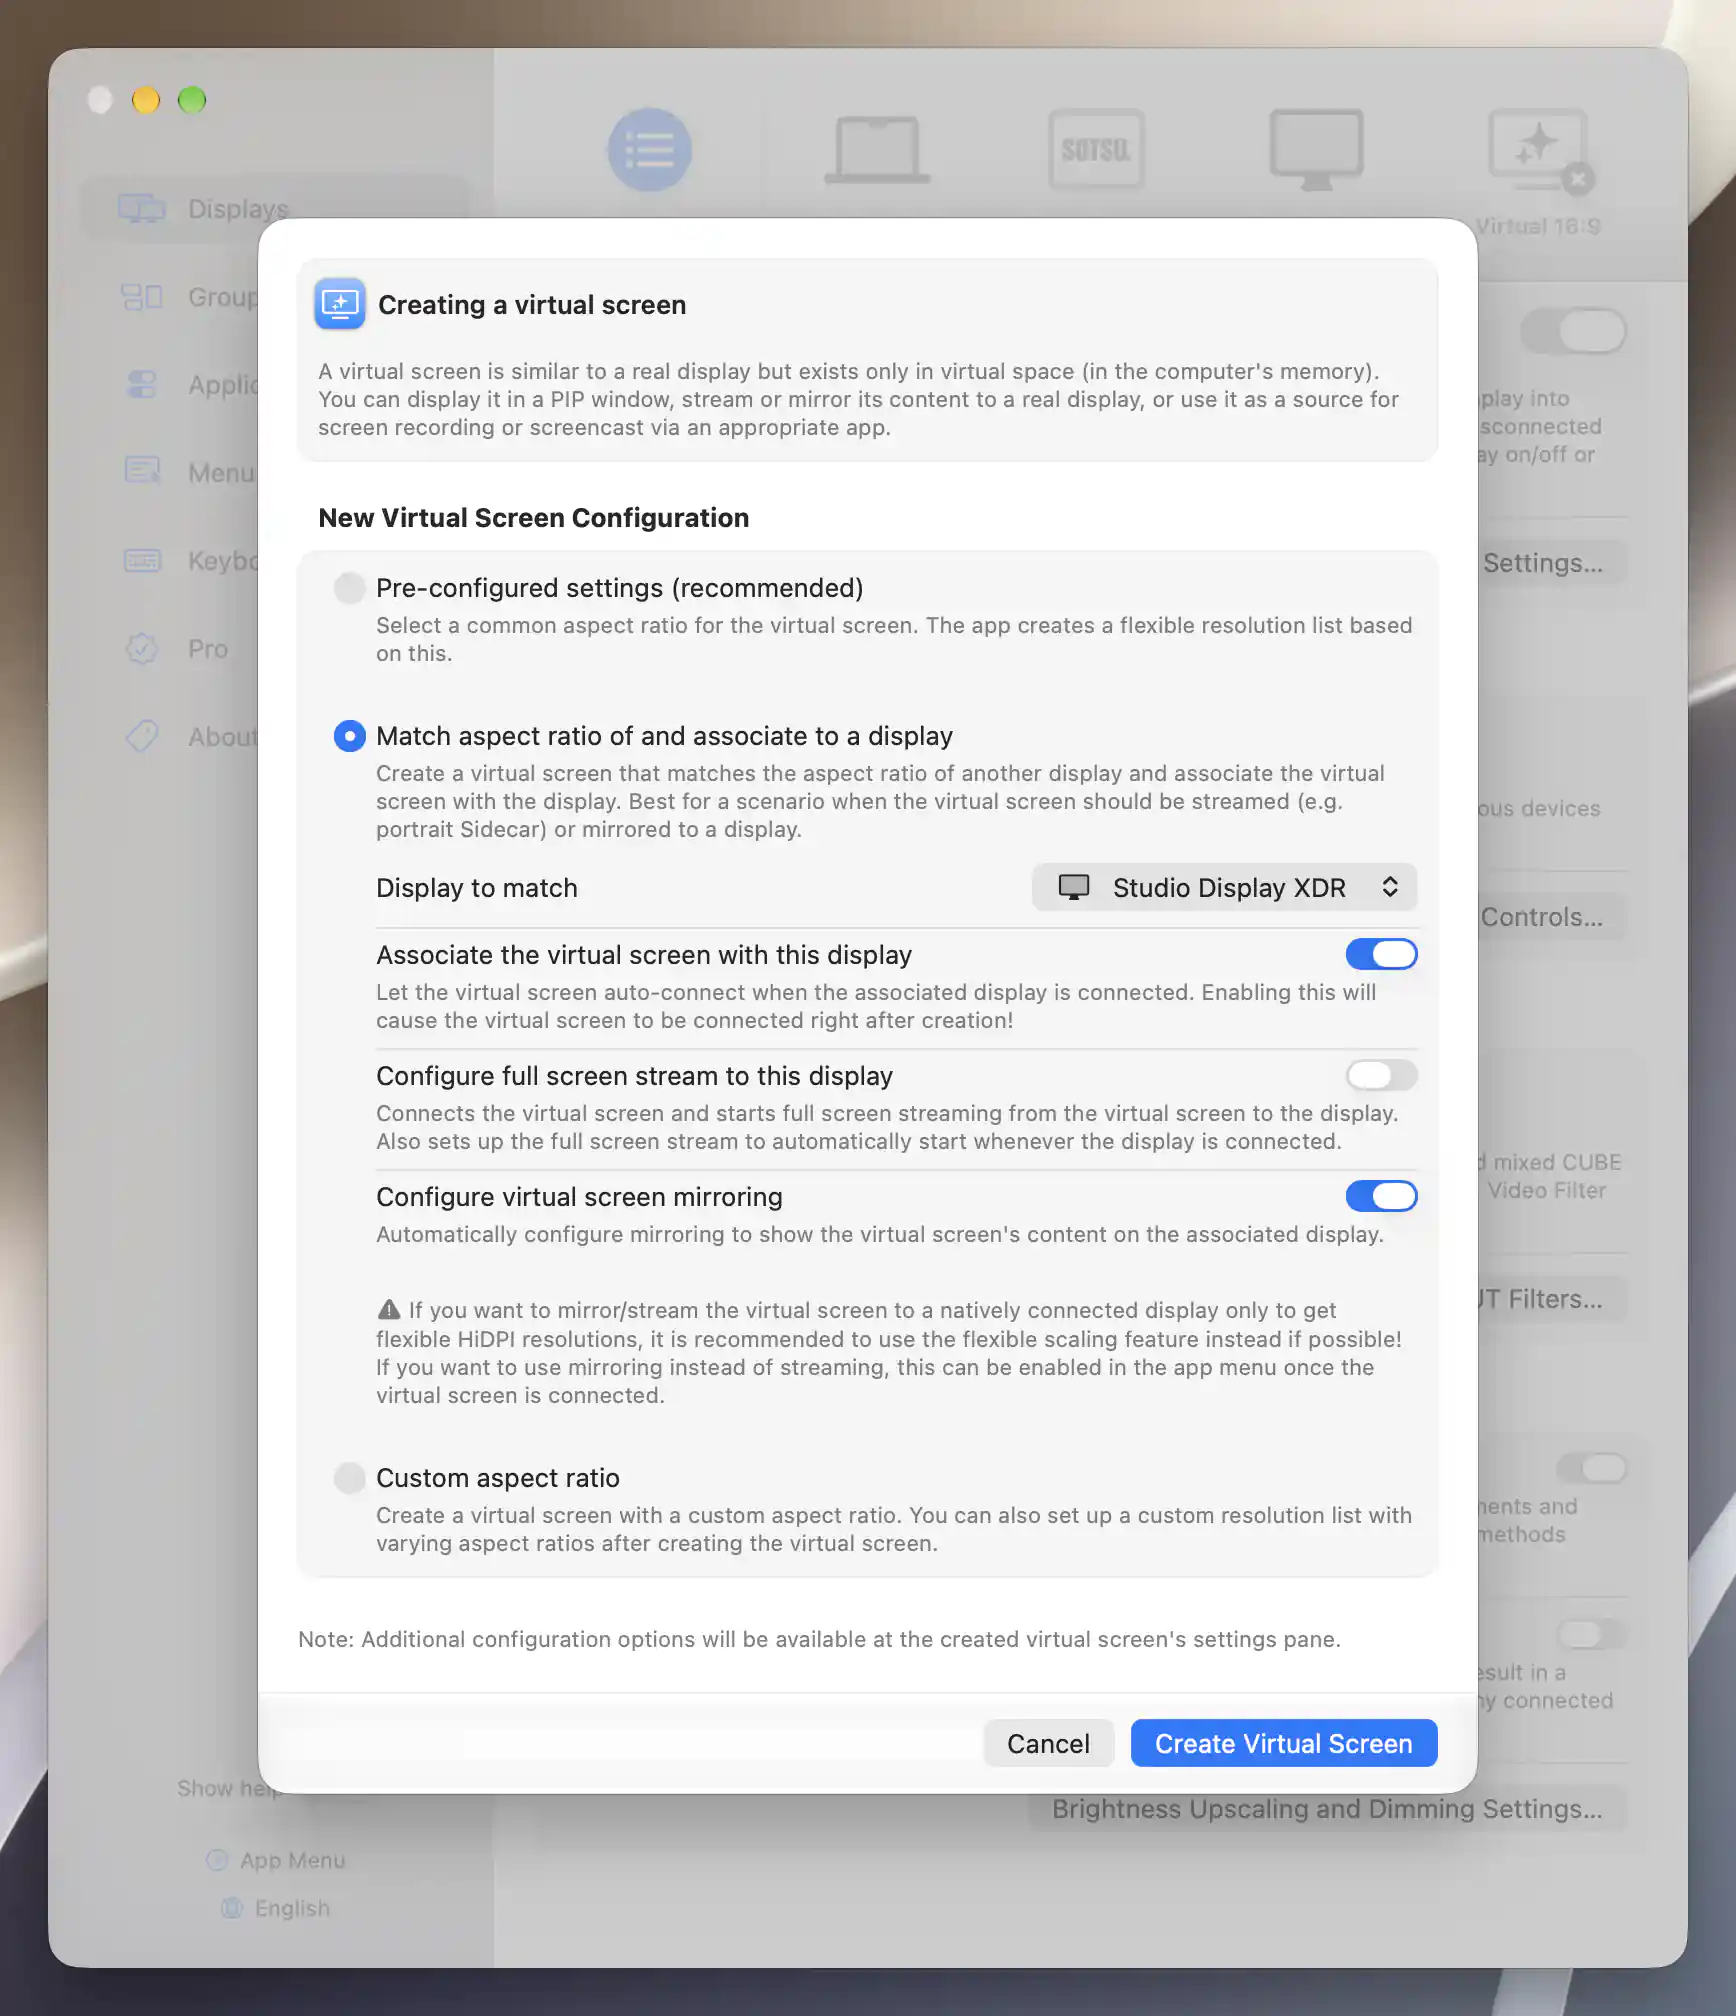
For mirroring, turn streaming off and enable virtual-screen mirroring before creating the screen.
Mirroring and streaming have different tradeoffs. Mirroring makes the two displays share a desktop; streaming retains separate source and target desktops and supports image transformations. For a stream, interact with the virtual source; Command-click the streamed image to move the pointer there. See Streaming and Mirror Display for the detailed behavior.
Troubleshooting
The panel size is wrong or useful modes are missing
Open More system configuration options… and compare Current native resolution with the physical panel specification. If the reported size is wrong, enable Edit native panel pixel resolution, enter the correct width and height, Apply, and activate or reboot again. Enter the actual panel dimensions, not the preferred logical desktop size.
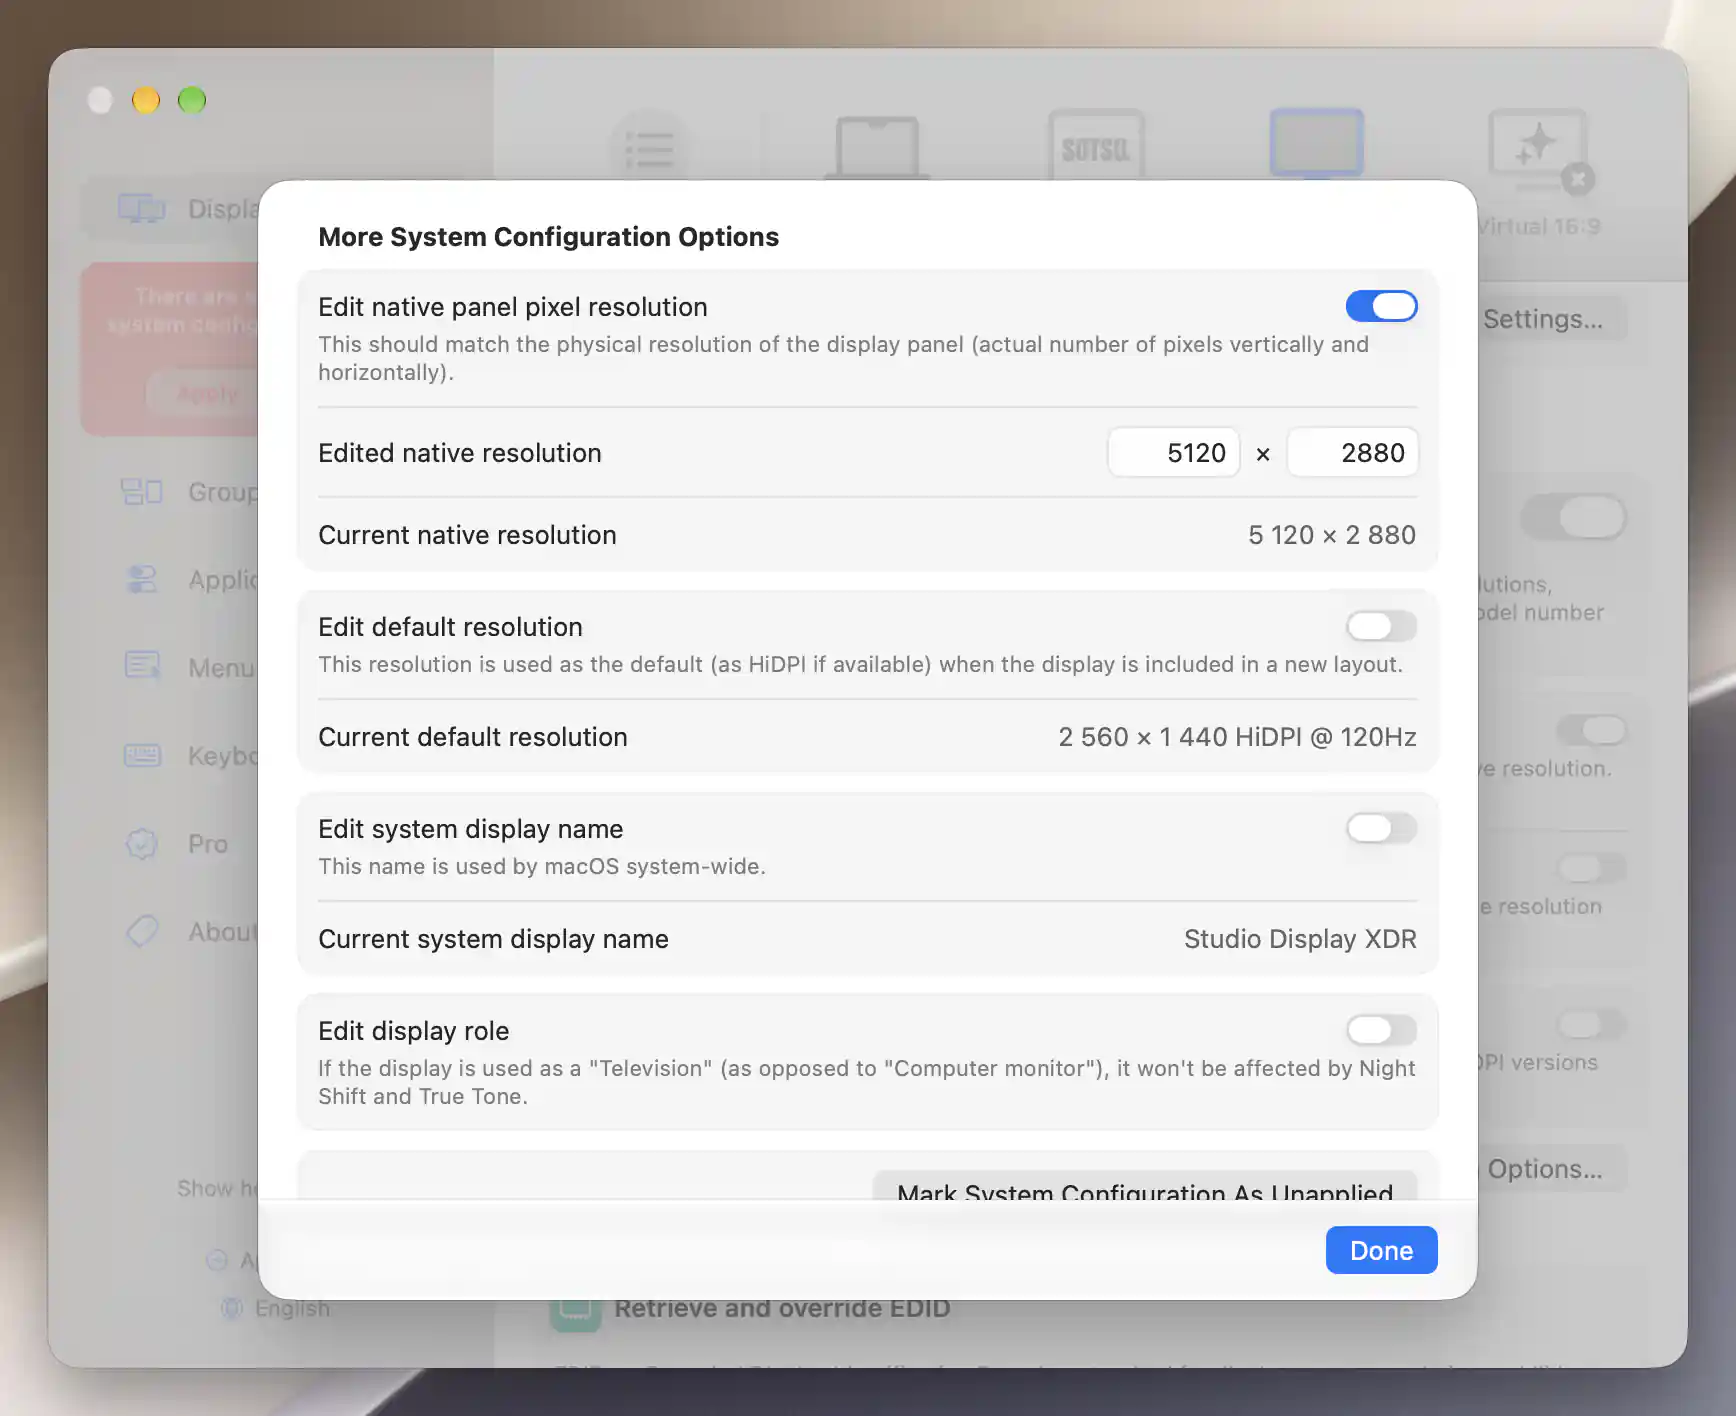
Enter the physical panel dimensions; this example matches the display’s current 5120 × 2880 resolution.
Available modes still depend on the GPU, macOS, connection and display. Avoid applying the old wiki's M1/M2 width limits to every newer Mac. For unusually large desktops, Enable resolutions over 8K (4K HiDPI) is in Settings > Displays > Overview > Advanced Display Settings…. Its requested range does not override native GPU limits; oversized virtual desktops can destabilize applications. Leave it off unless your task needs it, and reapply flexible scaling if you change the setting.
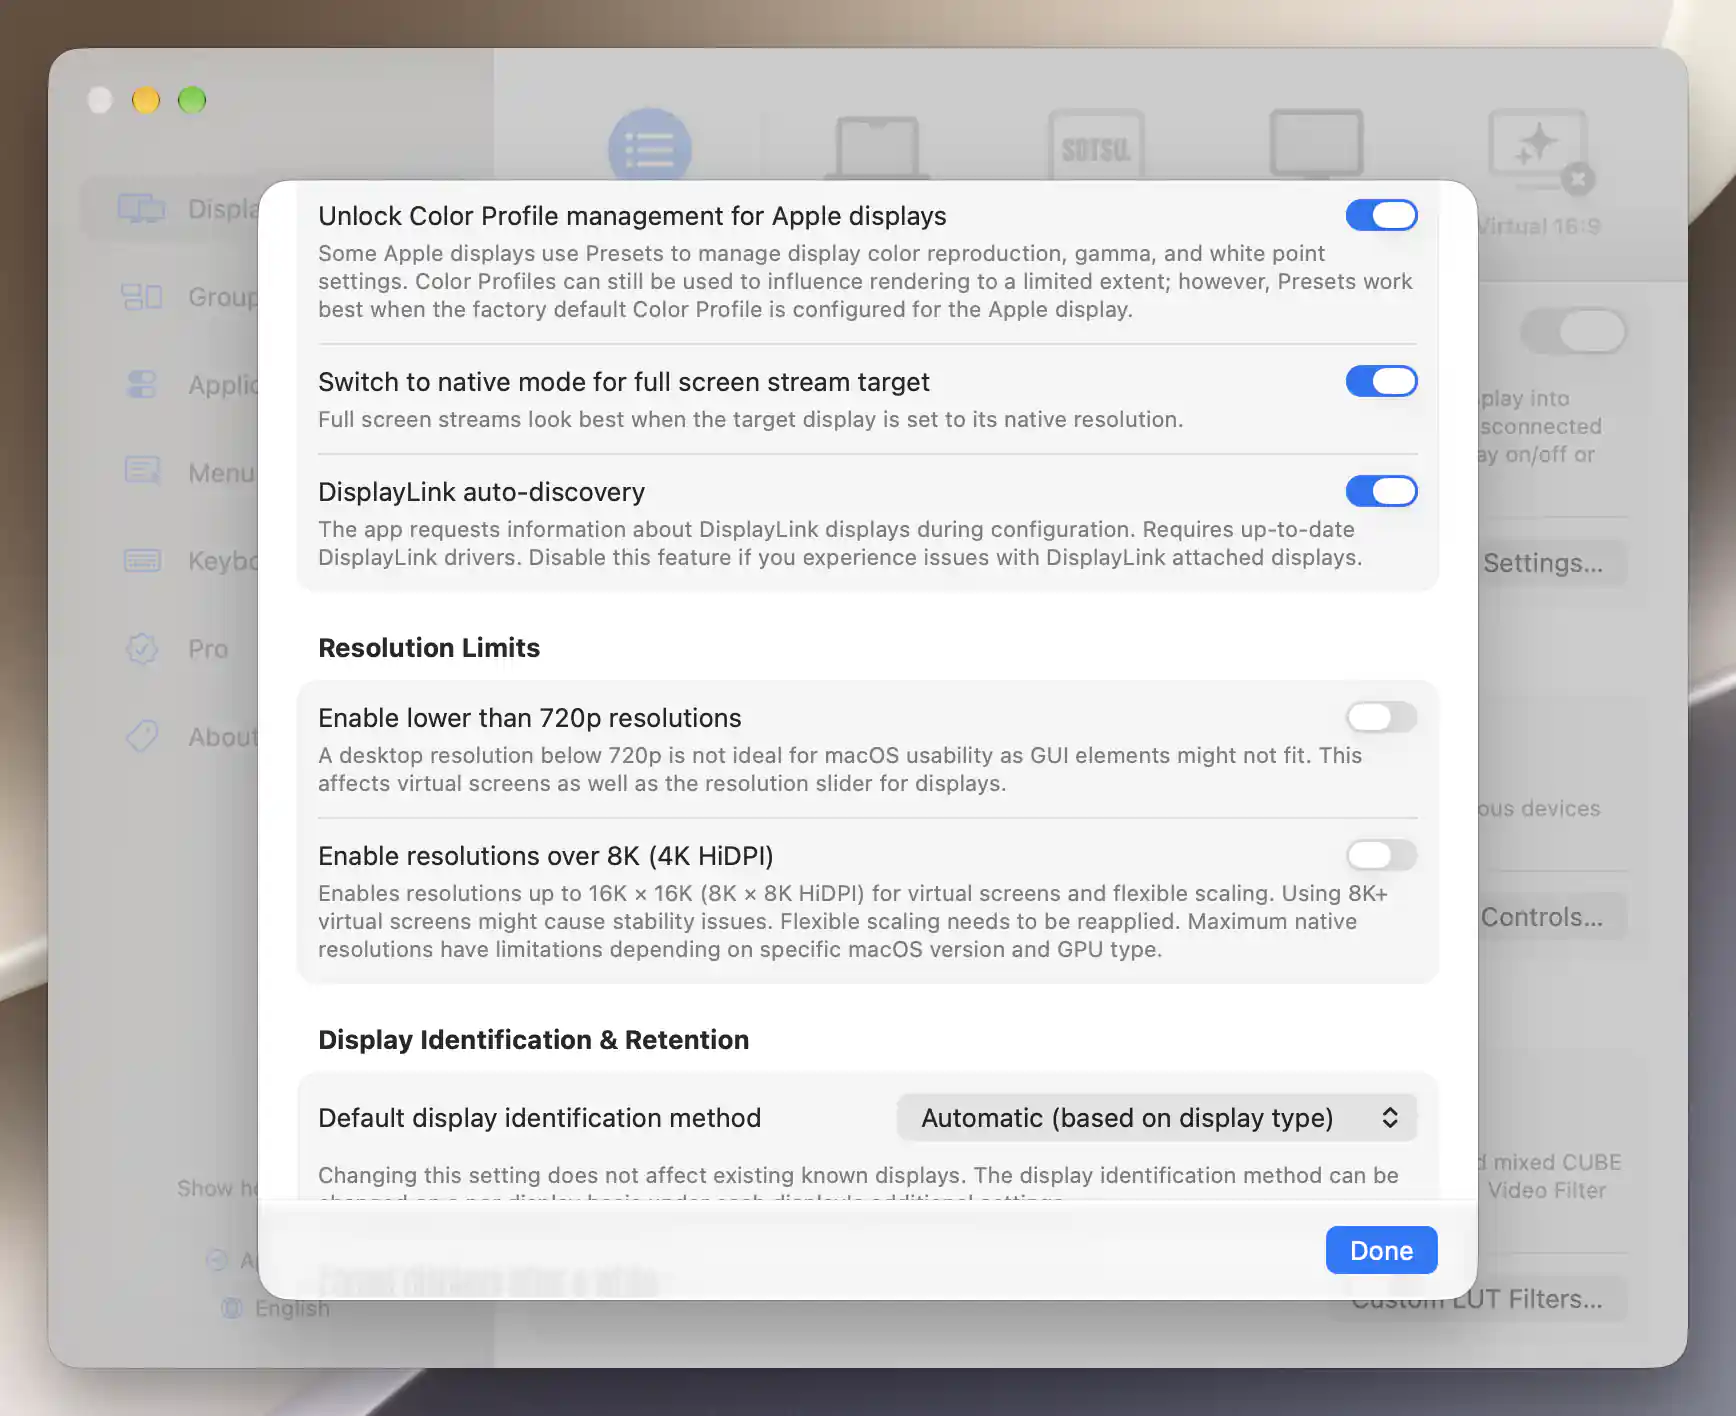
The over 8K option describes its resolution range and stability limits; it remains off in this example.
Custom resolutions disappear after wake or connection
First check that the model configuration was applied. On eligible external Apple silicon displays, try App Menu > Tools > Displays and Virtual Screens > Reinitialize External Displays. It briefly interrupts external output; save work first. Built-in displays require the appropriate restart workflow instead.
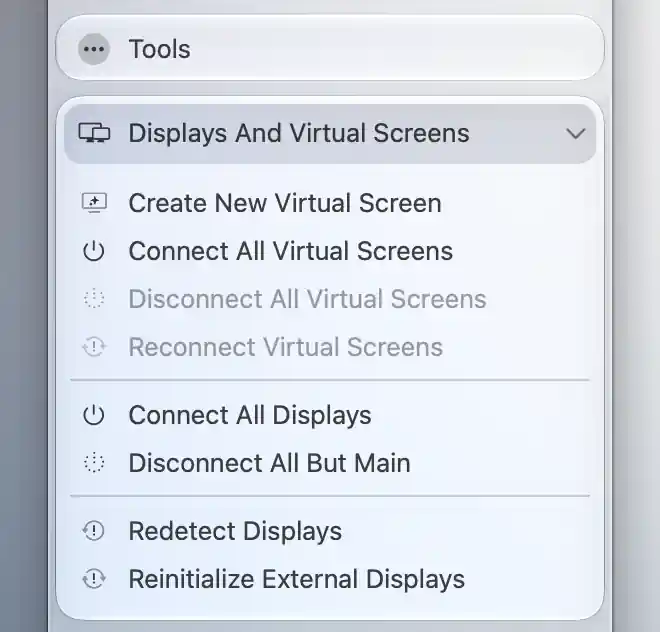
Reinitialize External Displays is in Tools, under Displays And Virtual Screens.
Recovery settings
The older global Reinitialize external displays with flexible scaling enabled if needed switch is absent from current Settings source. Use manual reinitialization first; if wake/unlock repeatedly causes trouble, per-display Additional settings offers reinitialization after wake/unlock where supported. A shortcut is available under Settings > Keyboard > Keyboard Shortcuts…. Enable automatic recovery only for a setup that needs it; these actions can briefly blank displays.
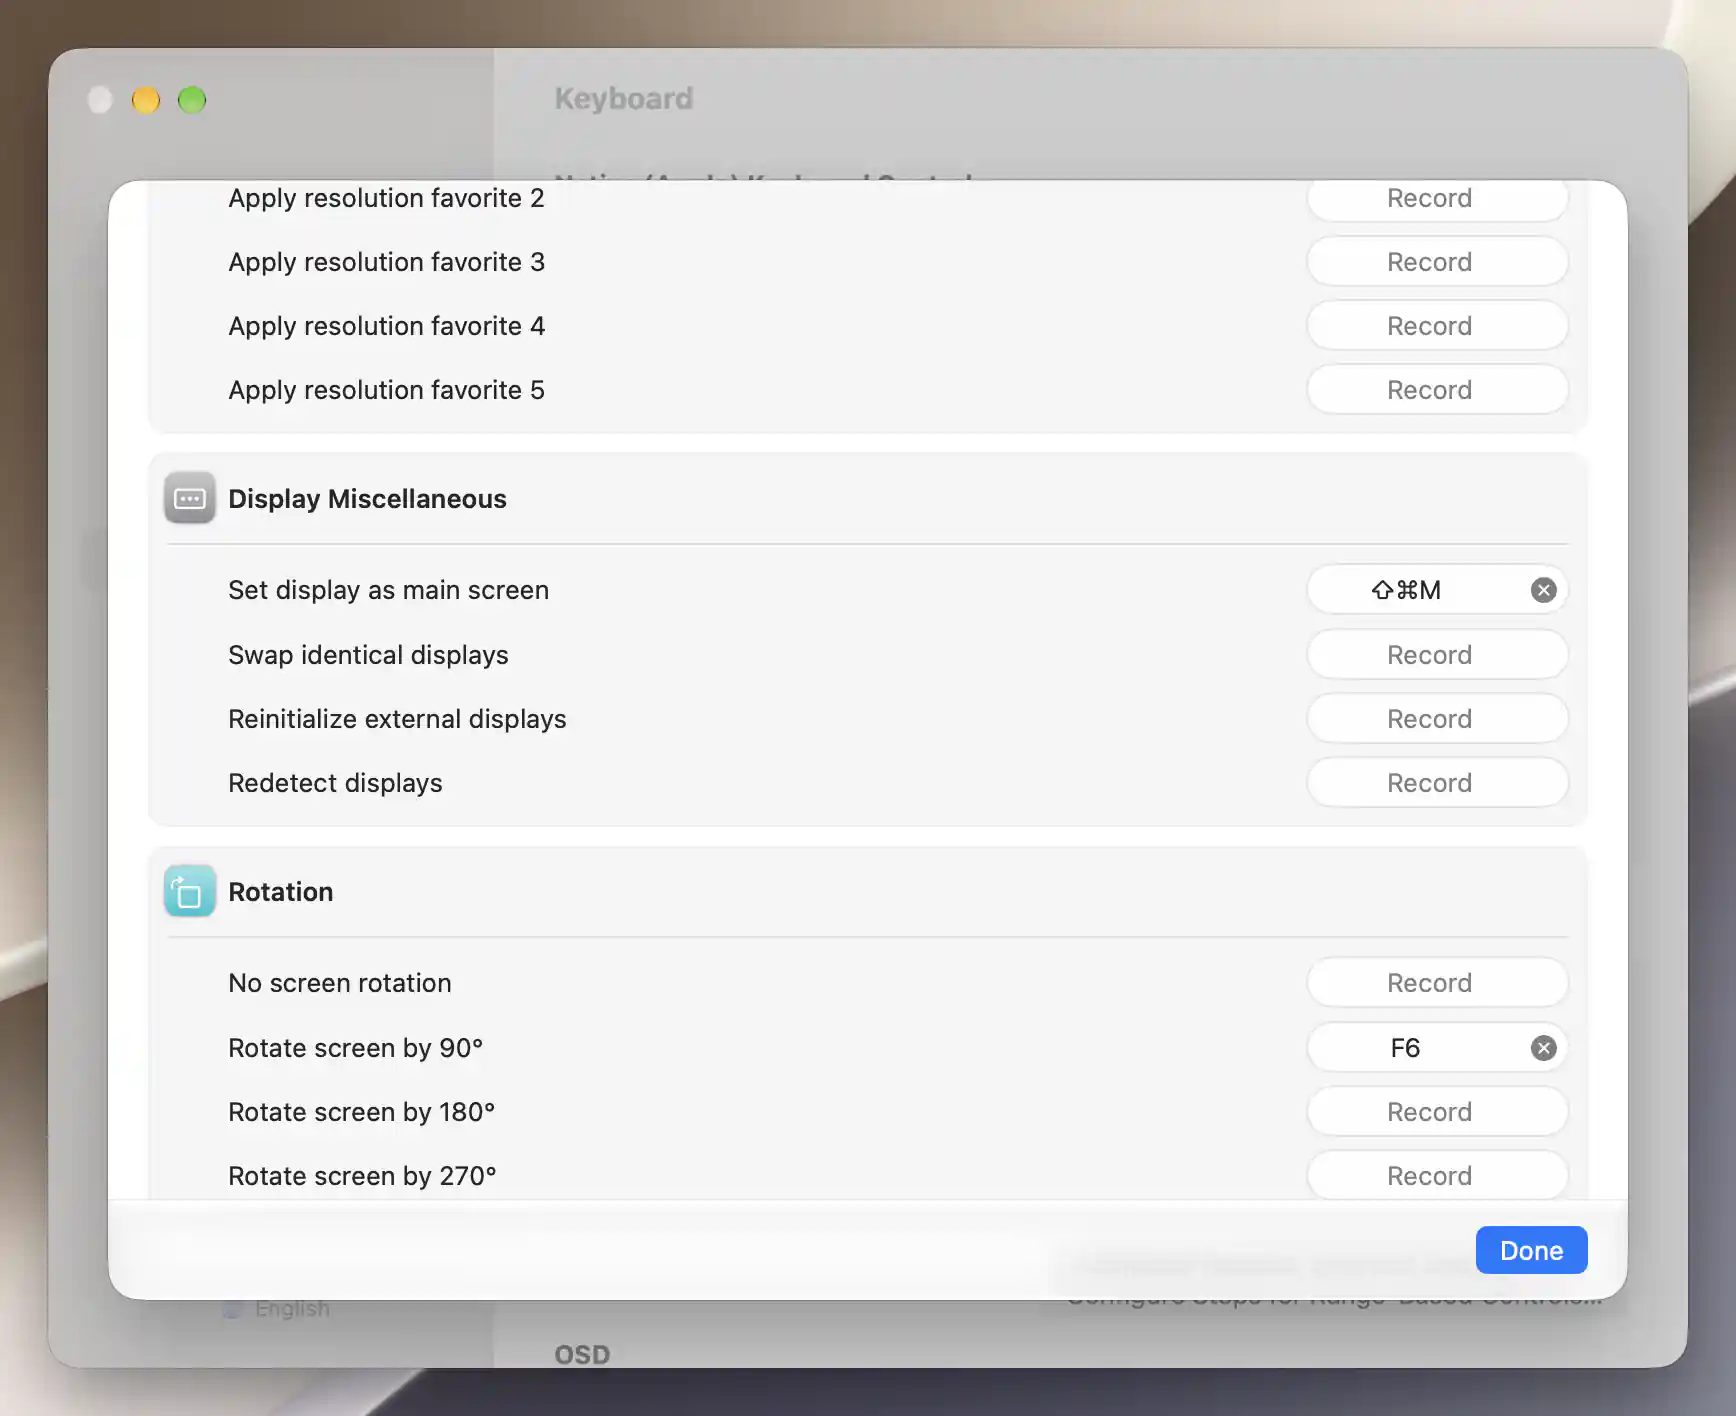
Assign a shortcut to Reinitialize external displays in the Display Miscellaneous group.
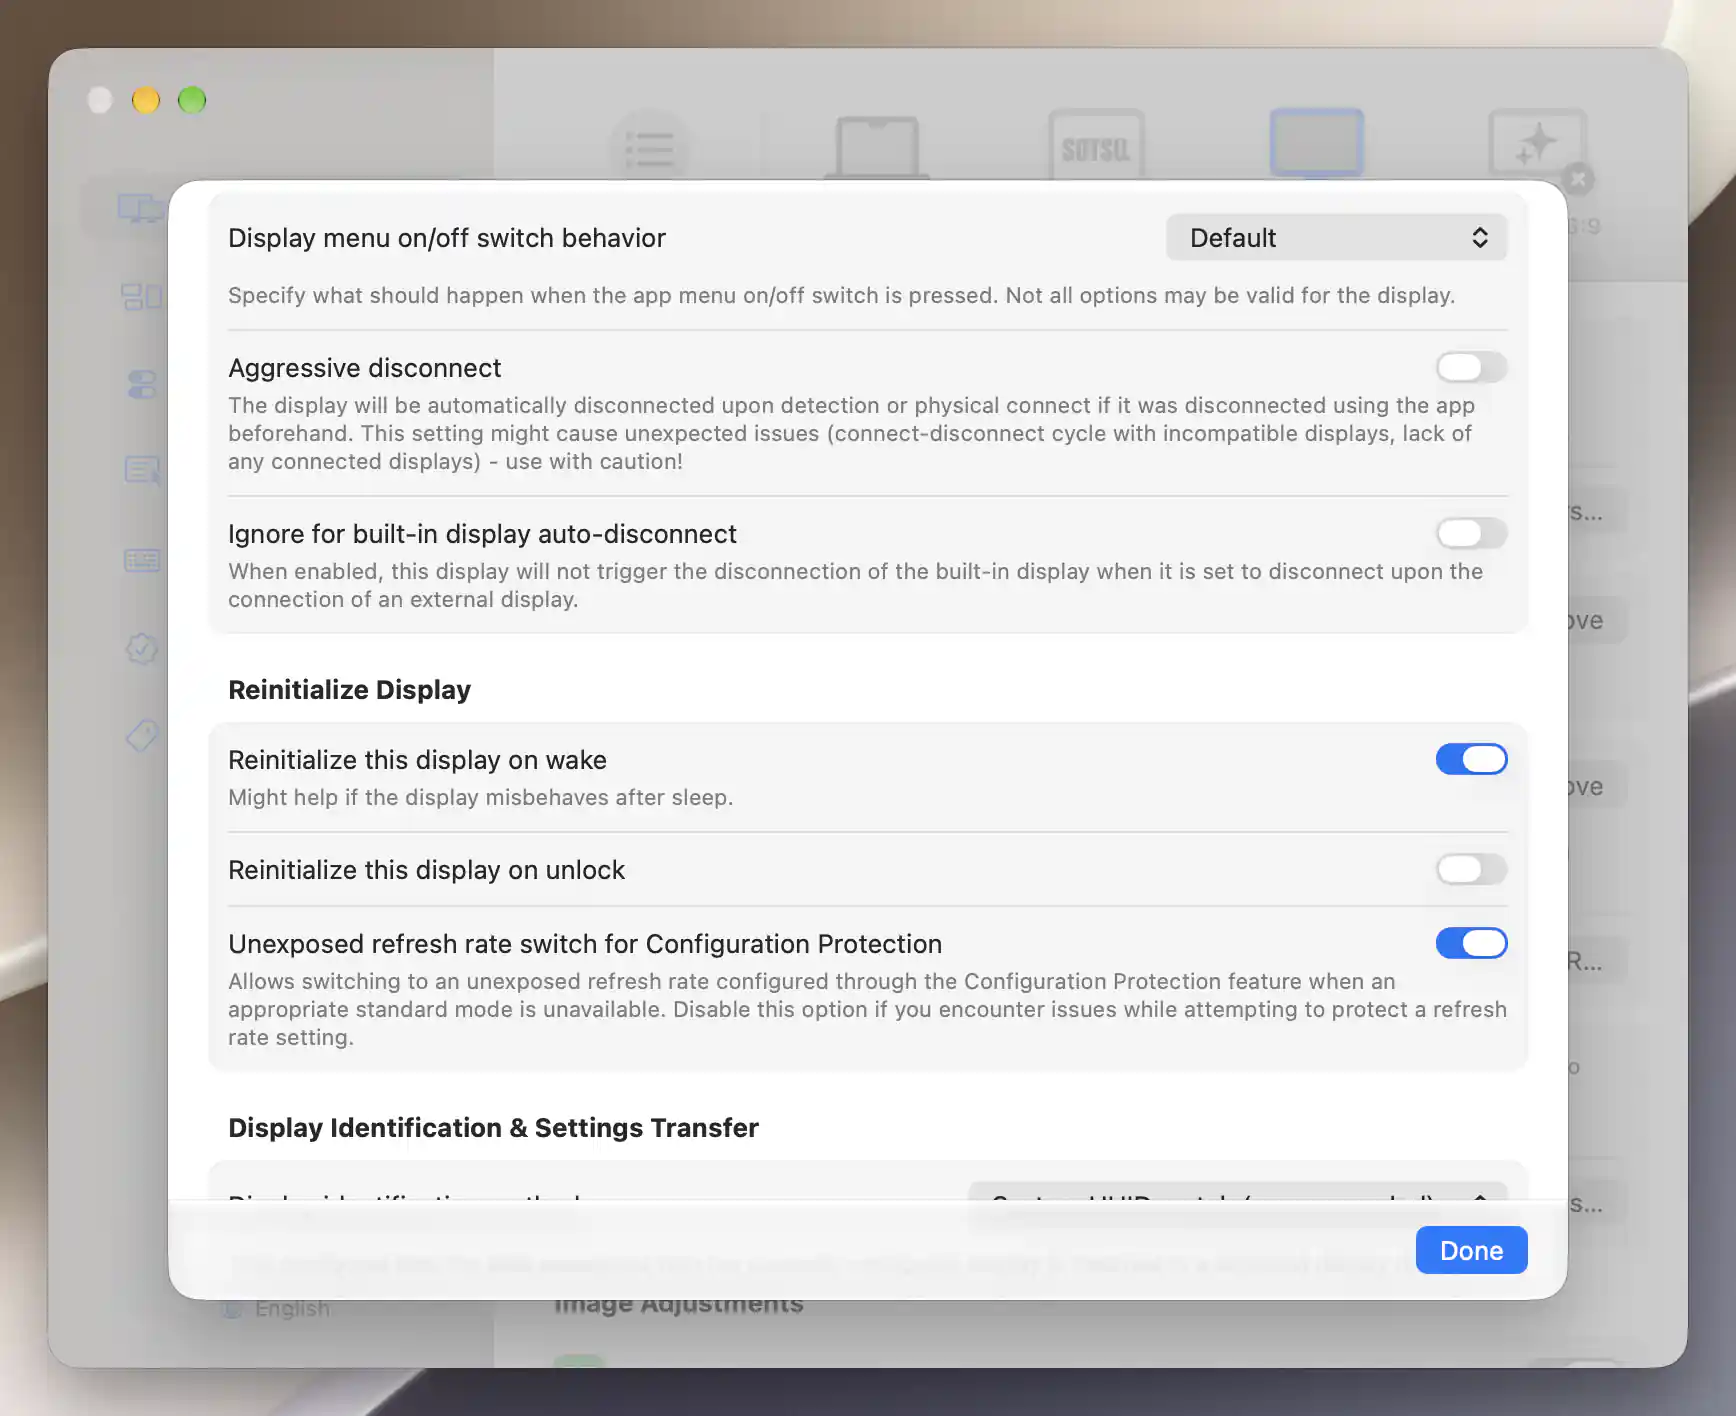
Enable reinitialization on wake for the selected display; the separate unlock option remains off here.
The current flexible-scaling and native-size figures above also cover the earlier v1 setup.
Mirroring points in the wrong direction or the desktop is hard to reach
Stop mirroring and configure Mirror Display from the virtual source to the real target. Choose Set as Main Display on the desktop you want to use as main, and use Move Display or macOS display arrangement to place it beside your other screen. For streams, the physical target remains a separate desktop; pointer routing explains how to return to the source.
Undo the setup
Turn Enable flexible scaling off, Apply the model changes and activate/reboot as requested. To remove all model overrides, turn Edit the system configuration of this display model off and Apply; this also removes other overrides for that model. For the virtual method, stop streaming or mirroring, then discard only the virtual screen you created for this task.
Related pages
- MacOS scaling, HiDPI, LoDPI explanation
- System Configuration and Flexible Scaling
- Create New Virtual Screen
Additional information
This section explains feature access and platform requirements for this tutorial.
Features requiring Pro license
Flexible scaling and its range customization require Pro. Matching/association, custom virtual-screen geometry, streaming and BetterDisplay mirroring setup also require Pro. Preset virtual-screen creation is available without Pro; macOS can configure mirroring separately.
Platform compatibility
Both Apple silicon and Intel support the documented scaling/virtual-screen approaches when the device capabilities allow them. Native overrides need an eligible built-in or native connection; Apple silicon external-display activation/reinitialization has additional device requirements. Streaming requires Screen Recording permission. Available resolutions depend on GPU and macOS.