Video Filter Window
Video Filter Window lets you apply an effect to a chosen area of the screen by placing a movable window over it. Move or resize the window to change the affected area; the filter acts on the content behind it. This makes it different from a floating copy of a separately selected display or application window.
Where to find it: App Menu > Tools > Video Filter Window. Additional configurations have numbered entries. Its own context menu also exposes the applicable window and filter settings.
A new filter window uses Use Compositor Filter, which processes the content behind it without the ordinary Screen Recording capture path. Turning that option off switches to screen capture and requires macOS Screen Recording access. You do not need a particular external display to use a filter window.
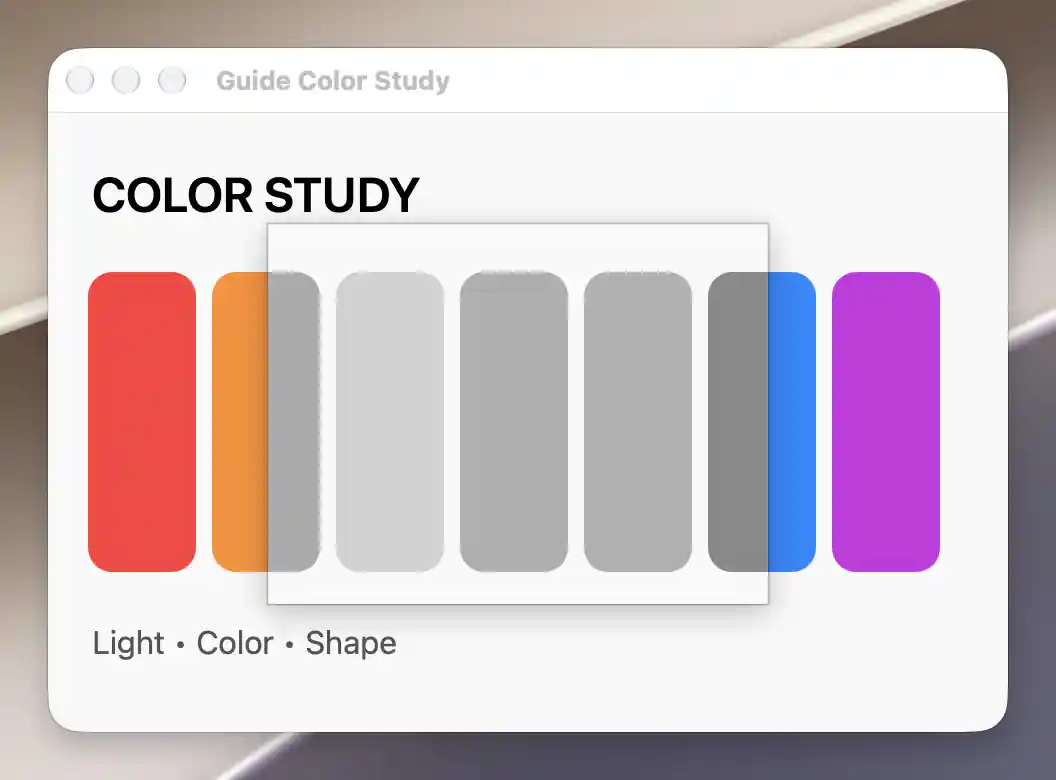
The filter removes saturation only inside its bounds, leaving the surrounding colors unchanged.
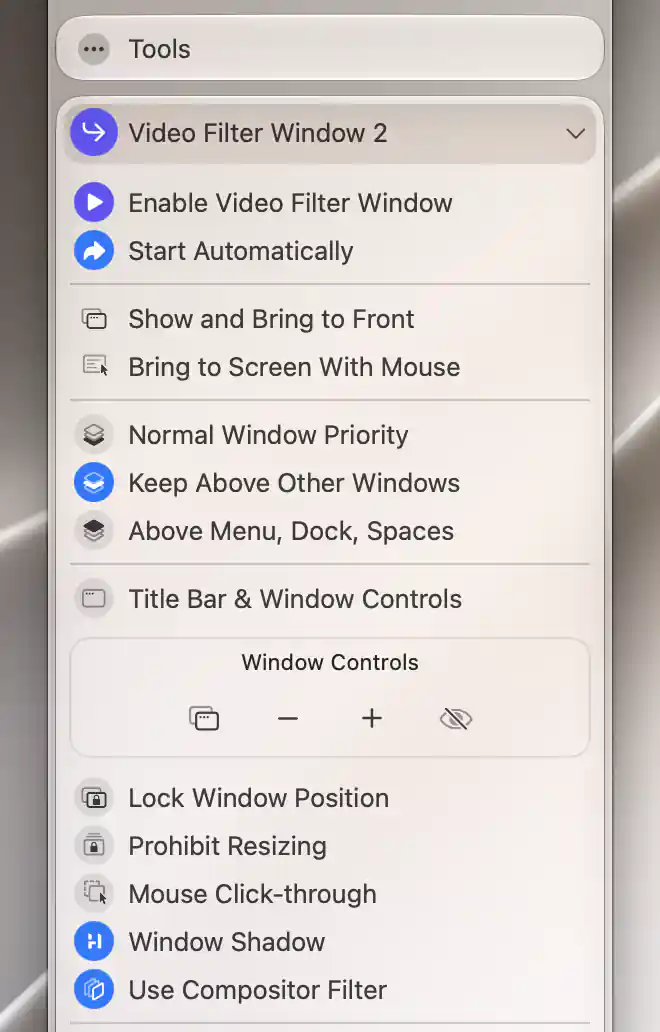
The compositor option filters the content behind the active window without a capture pipeline.
Activate and place the window
Turn on Enable Video Filter Window, then place and size the window over the area you want to filter. Turning the same option off stops this configuration. Moving the window onto another display changes the screen area it processes, and BetterDisplay remembers its position and size for this configuration.
Use Show and Bring to Front to restore an active window's presentation. Bring to Screen With Mouse moves it to the display containing your pointer, using the saved relative position and size there. Both commands are in the App Menu rather than the window's context menu.
If you want the filter window to return when you launch BetterDisplay, enable Start Automatically. It is off by default. Automatic recovery also applies after an unintentional stop around sleep and wake.
Window behavior
The filter acts on content behind it at its chosen stacking position. Choose a priority to decide how it sits among the other windows:
- Normal Window Priority treats it as an ordinary window.
- Keep Above Other Windows, the default, keeps it above ordinary windows.
- Above Menu, Dock, Spaces places it above those system surfaces. This also exposes Show on Lock Screen, which is off by default.
Title bar and window actions
Title Bar & Window Controls and Window Shadow both start on. If you hide the title bar, the active window gains a Window Controls strip in the menu. It provides bring forward, minimize/restore, zoom and hide; bring-forward is disabled in the context menu.
Video Filter Window uses a zoomed ordinary window rather than PIP's native full-screen mode.
Keeping the filter in place
Once the filter covers the area you want, Lock Window Position prevents moving it, and Prohibit Resizing prevents resizing it. Both start off.
Mouse Click-through, also off by default, lets input reach the windows underneath the filter. Its toggle is available only in the App Menu. After enabling it, use that menu again when you need to change the filter window's behavior.
Filters and opacity
The filter settings are always available in this window, so there is no separate Video Filters enable switch. Adjust the effects to change the appearance of the content behind the window. The shared filter reference explains the tonal, color, texture, photo, blend and custom LUT adjustments, together with Reset Video Filters.
Use Compositor Filter chooses between compositor and capture processing. Changing it restarts active processing.
Alpha sets the window's overall opacity from 0% to 100%, starting at 100%. Making the window transparent does not by itself enable mouse click-through; appearance and input handling are separate choices.
On the capture path, Target FPS limits captured frame rate to 1–200 fps or Unlimited (∞), which is the initial setting. Apple silicon also offers HDR Filter Pipeline on that path. Both settings are hidden while compositor filtering is active.
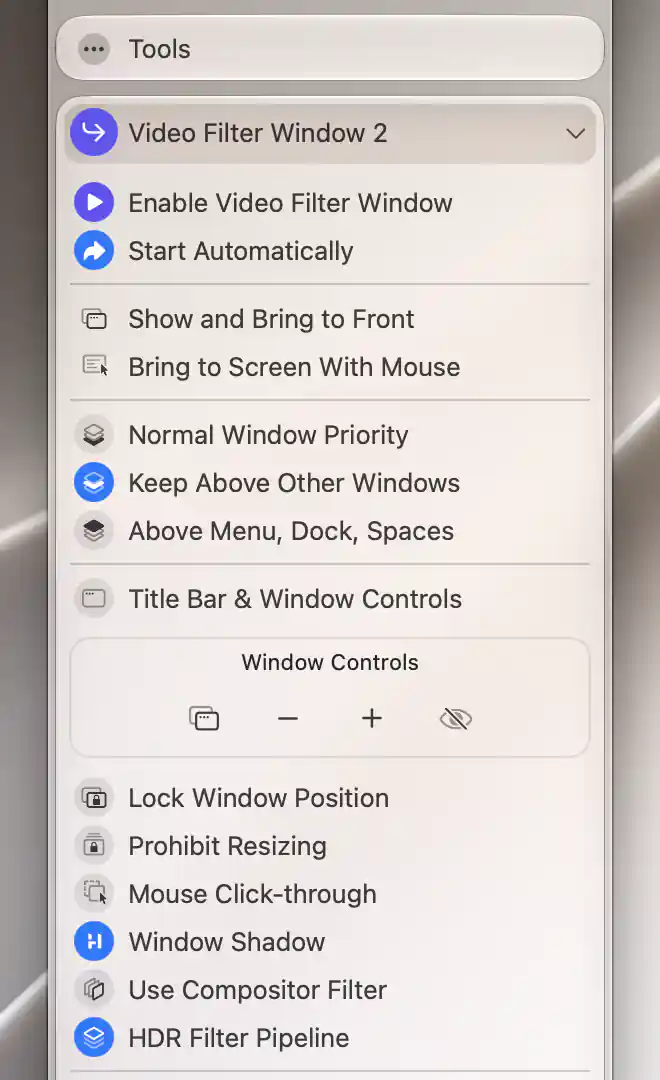
When the title bar is hidden, window actions remain available in the menu; the capture pipeline exposes HDR processing.
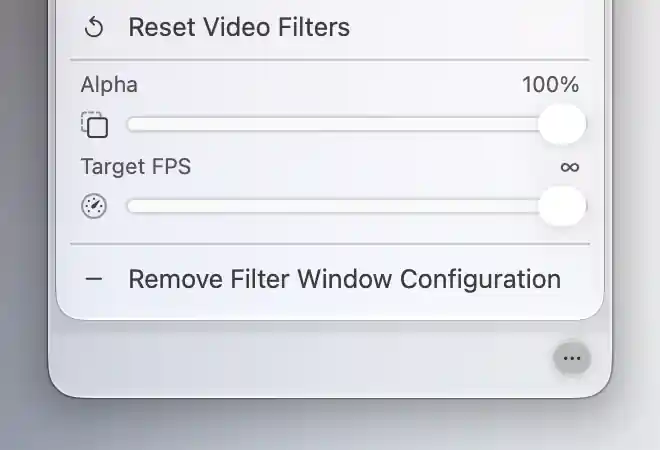
The capture pipeline provides output opacity and a target frame rate below the filter adjustments.
Multiple filter windows
You can keep different filter setups in separate configurations. Add Filter Window Configuration, in the original entry, creates another independent filter window configuration. Each one remembers its own preferences, effects, custom LUT selections and geometry.
A numbered entry offers Remove Filter Window Configuration instead. This stops and removes that configuration and deletes its saved settings immediately, without a confirmation dialog. Add/remove commands appear in the App Menu, not in the output's context menu.
Stopping a window preserves its setup for later use. Reset Video Filters resets its effects rather than its position or window settings.
See Picture in Picture for a floating copy of a display, or Stream Selected Content for selected application windows.
Additional information
This section explains which features require Pro and how availability differs between Mac platforms.
Features requiring Pro license
- Starting a filter window and changing its window or filter preferences.
- Enabling automatic start and adding a configuration.
- Show and Bring to Front and Bring to Screen With Mouse.
Stopping an existing window, hiding it, using its basic Window Controls strip, disabling automatic start and removing an additional configuration remain available without Pro.
Platform compatibility
Video Filter Window is available on both Apple silicon and Intel Macs. HDR Filter Pipeline requires Apple silicon and capture processing; the compositor path does not expose it.
Compositor filtering does not use the ordinary Screen Recording capture path. Capture processing requires macOS Screen Recording access, and no particular external display is required.