Apply a custom 3D LUT to a display or a live preview
Apply a custom 3D LUT to a whole display, then use the same definition in a separate live preview. The first changes the presented desktop; the second changes only a Picture in Picture copy. Start with a reproducible neutral file to learn the workflow, then compare an appropriate creative transform with its bypassed view.
Before you begin
- Use an ordinary SDR desktop with harmless, already available content. Keep a separate connected physical display available for recovery and for the preview window. The source and viewing display must be different, with the preview outside its own captured desktop.
- Choose a connected, non-mirrored display whose software image adjustments and compositor filter layer are available. For the PIP, follow BetterDisplay's actual screen-capture permission request. If macOS asks, review the app under System Settings > Privacy & Security > Screen & System Audio Recording, and follow any requested restart. Apple explains this permission.
- Privately record the display's current LUT selections, image-adjustment values, software-adjustment method, brightness, gamma, ICC profile, HDR/preset state and relevant automatic rules. Record current values separately from saved and protected targets, including originally unset settings. Preserve existing PIPs and their source, position and preferences.
- Record the manager's existing definitions, their order and settings, and where they are used. Import a new uniquely named definition; editing or replacing an existing definition updates all its users. Stop any existing captures that must not restart during a manager update, after recording how to restore them.
- Use the eligibility described in Additional information throughout setup and targeted bypass. Keep private windows and notifications off the source before starting capture; hiding or pausing a preview is not a reliable privacy boundary after a restart.
Keep the existing ICC profile and custom-profile safeguards in place. A custom 3D LUT is software image processing, separate from the display's color table and from a LUT stored inside a monitor. Neither a creative look nor an unchanged neutral image establishes measured monitor calibration.
Import a neutral test LUT
Save the following text as a plain UTF-8 file named tutorial-identity-sdr.cube. It is a 2 × 2 × 2 identity table: the eight RGB rows reproduce their input coordinates, with red changing fastest, then green, then blue. This order matches the color-cube convention in Apple's Core Image reference.
TITLE "Tutorial Identity SDR"
LUT_3D_SIZE 2
DOMAIN_MIN 0 0 0
DOMAIN_MAX 1 1 1
0 0 0
1 0 0
0 1 0
1 1 0
0 0 1
1 0 1
0 1 1
1 1 1
- Open Settings > Displays > Overview > Custom LUT Filters…. Choose Import Custom LUT… and select your file.
- In New custom LUT filter, keep HDR content range (marked Experimental) off and Signal space at sRGB. Keep SDR/reference white at 100 nits. The new SDR import has no HDR target peak. Check the file name and CUBE dimension of 2³.
- Keep Unique name as Tutorial Identity SDR if it is unused; otherwise choose an unused descriptive name and use that same name below. Choose Add Custom LUT Filter to commit it. Cancel discards the pending import without adding a definition.
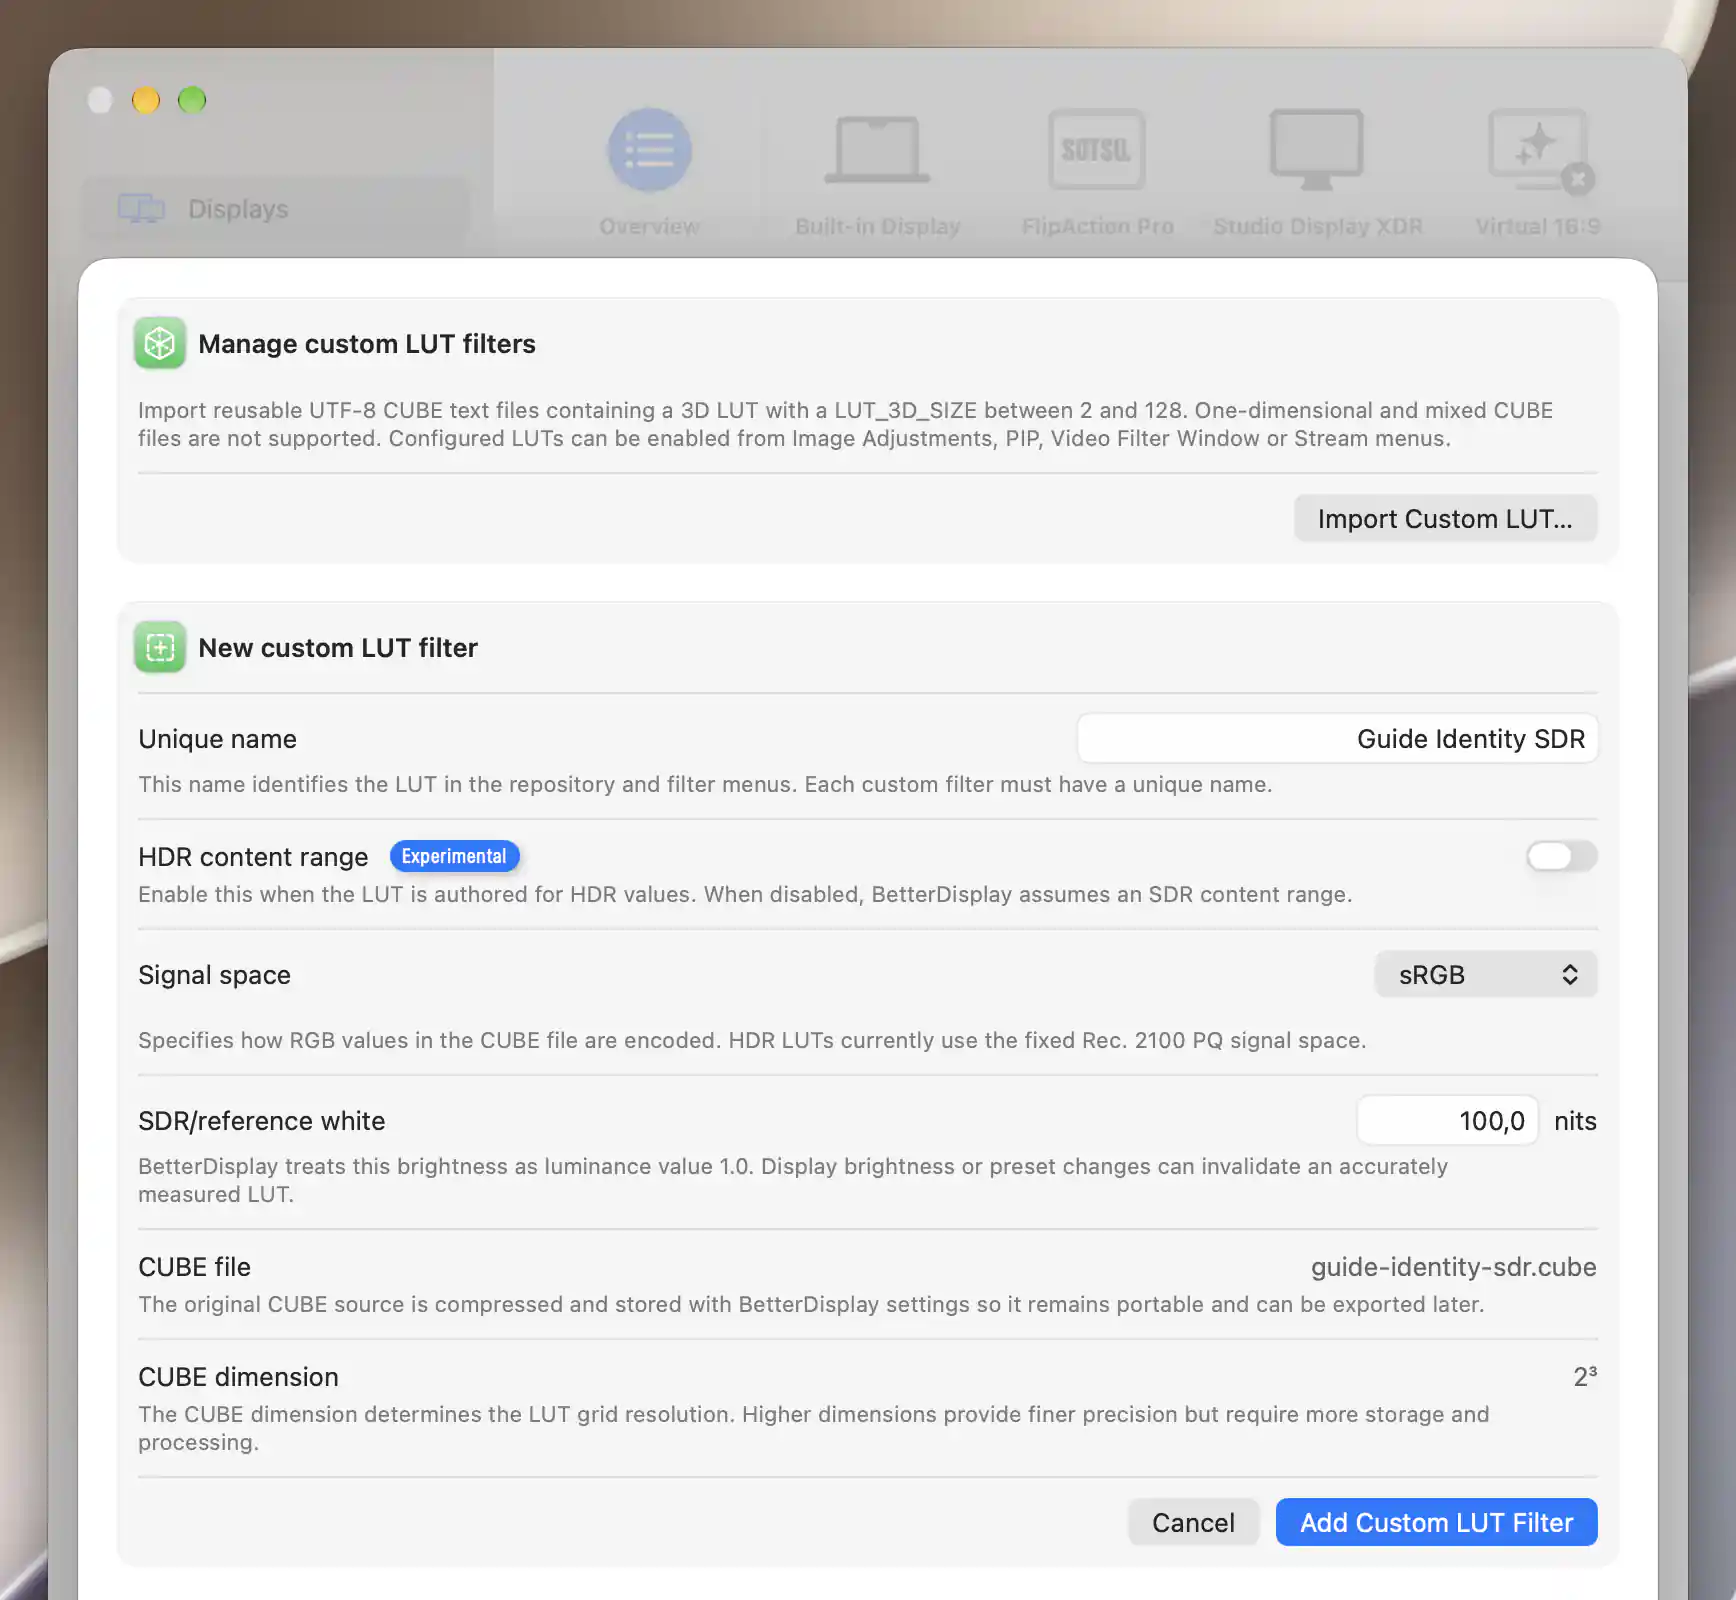
The neutral SDR import is ready to commit; its reference-white entry is metadata, not a panel measurement.
The supported format is a UTF-8 3D CUBE file with a dimension from 2 to 128, exactly that dimension cubed finite RGB triples, and a finite increasing input domain. One-dimensional and mixed CUBE files are not supported; the file-size limit is 256 MiB. The example supplies eight triples for dimension 2.
The signal-space choice affects color processing. Reference white and an HDR target peak record the LUT's authored assumptions and participate in validation; entering a number does not set or measure the monitor's luminance. The identity table adds no intentional color transform, although the color-management and capture path can still affect the actual appearance.
Apply it to the whole display
- Open Settings > Displays > [your display] > Device Control > Image Adjustments. Check Enable software-based video adjustments and Enable compositor filter layer. Both normally start on. If either is off, record it before enabling only what this trial needs. Leave color-table compatibility safeguards unchanged.
- In App Menu > [the same display] > Image Adjustments, check that Suspend Image Adjustments is off. If you need an isolated comparison, record and temporarily turn off only other LUT selections and individually interfering adjustments or automatic rules. Keep actual brightness, the profile and the test content fixed.
- Under Custom LUT filters:, select your new named filter. The selection is saved and applies without an Apply button. Look at the actual display; this is the whole-desktop compositor path.
- Select the same name again to bypass only that LUT. Verify its selection is off. Do not use Reset Image Adjustments, which changes unrelated adjustments, or broad suspension as a substitute for single-filter bypass.
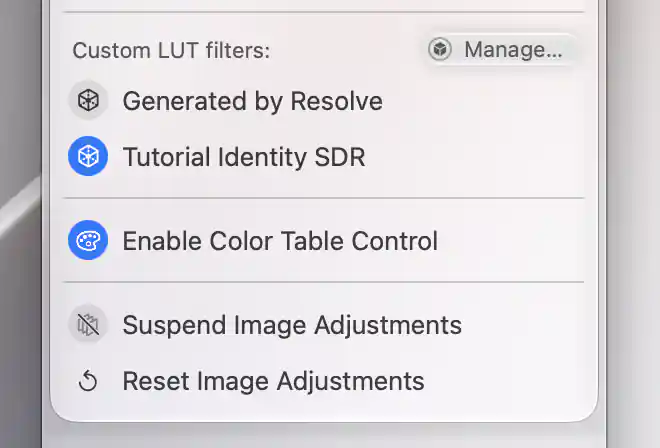
This LUT selection applies to the whole display; the selected icon records assignment, without establishing physical color accuracy.
An identity LUT may look unchanged. Its checkmark confirms the saved selection, not that a visible filter layer was successfully created or that the panel is calibrated. For an observable comparison, separately import a known, appropriately authored and licensed SDR creative LUT using its specified signal space. Give it a new name, enable only that trial LUT, and alternate its own selection on and off over suitable existing content. Do not replace a shared definition to perform this test.
Make a separate preview
- Leave the trial LUT off in the source display's Image Adjustments. Use a source desktop without other display-side LUTs or processing that would confound the comparison; record any selections you temporarily bypass. This avoids intentionally applying the same LUT to the desktop and then to its captured copy.
- In App Menu > [source display] > Picture in Picture, find the original/default PIP entry and choose Add PIP Configuration. This action is offered only in that entry in the App Menu. Keep the original configuration intact; use the actual new entry's label rather than assuming a number.
- Open that new entry. Keep Start Automatically off. Choose Start, then move the PIP to the separate viewing display. Confirm it shows the intended source and does not capture itself. Use its ordinary window with Title Bar & Window Controls and Window Shadow on; leave cropping, flips and rotation off, and Alpha and Magnification at 100%.
- Turn Video Filters on to expose its settings. Leave built-in effects at their neutral defaults and Customize Blend Mode off. Keep HDR Filter Pipeline off wherever it is offered. Under Custom LUT filters:, select your new identity filter, or the separately imported creative filter you are comparing.
- Compare the original source with the PIP, then select the same name again to bypass that LUT in the PIP. The source display's selection stays off. Keep the viewing display's own adjustments fixed; a LUT on that display would also affect the preview you see.
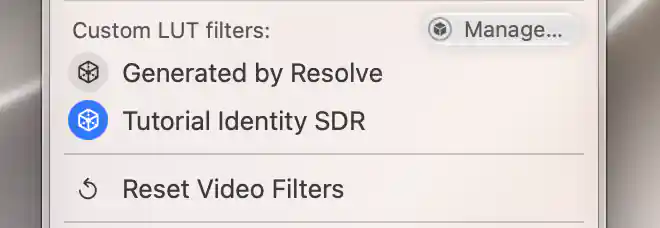
This selection belongs to the preview’s Video Filters; the display-wide LUT assignment remains off.
A selected custom LUT keeps the capture filter pipeline effective even if Video Filters is later off. Deselect the LUT itself to bypass it. Custom LUTs run after the built-in effects and blend result, in the manager's stored order; selecting several is a stack. There is no individual custom-LUT strength slider. Blend Mode Opacity belongs to built-in blending and is not a strength adjustment for one LUT.
Changing a selection or editing a shared definition can restart an active preview. Stop the trial before putting private content on its source. Its capture exclusion choices do not exclude that content from other apps or guarantee that a display-side effect is included or excluded from every capture path.
Check the result
- For the neutral example, confirm the saved name, 2³ dimension, SDR/sRGB settings and the correct per-display or per-PIP selection. An unchanged picture is consistent with the identity table, but does not prove active rendering.
- For a known creative LUT, alternate its selection off and on while content, brightness, profile, other adjustments and viewing conditions stay fixed. The whole-display trial should affect that desktop; the separate trial should change the PIP while its unprocessed source stays unchanged. Check actual displays as well as the chosen capture path.
- Return each selection to off and verify the baseline returns. Unexpected differences with the identity table warrant checking source/output color management, other filters, HDR/presets and capture processing before blaming the LUT file.
A screenshot records its capture path, not physical color accuracy. Measured correction requires an appropriate measurement and calibration workflow with stable display settings. See color profiles and calibration.
Troubleshooting
- The file will not import: check plain UTF-8 text,
LUT_3D_SIZE, exact row count, finite values and increasing domain. A familiar filename extension alone does not make a supported 3D CUBE. Use the neutral example to separate parsing from a particular transform. - The name is missing or unavailable: confirm the import was committed, the exact consumer is selected, software adjustments/compositor capability are enabled for the display, and the eligibility below is still active. A mirrored receiver is not a suitable whole-display target. See Custom LUT Filters.
- The preview looks stronger than the original: inspect source-display and viewing-display LUTs, the preview's other effects, and the manager's filter order. Bypass only the interfering selections. Turning Video Filters off alone does not remove custom LUTs.
- Capture fails or looks different: follow the actual permission request, confirm harmless capturable content and the chosen SDR source, and compare the actual capture path. Protected content and source availability can limit capture. Do not use an overlay-sharing switch as a universal privacy or capture-inclusion guarantee.
- An ICC profile blocks color adjustments: preserve the safeguard and use the custom-profile compatibility explanation. Color-table adjustments and compositor LUTs are separate methods; do not bypass the safeguard just to try a LUT.
Keep HDR experiments separate from this SDR workflow. An HDR LUT needs appropriate authored signal/calibration assumptions; HDR capture filtering requires Apple silicon and a compatible capture/output path. An HDR label or reference-white/peak entry does not guarantee captured highlight detail, measured output nits or an accurate HDR correction.
Undo, stop and remove
- Stop trial triggers and further menu changes. Keep the needed license/trial active while deselecting only the new trial LUTs from the display and PIP. Restore the original selection sets, including any temporarily bypassed existing LUTs, without changing their global order.
- Turn the trial PIP's Start Automatically off. Let pending imports, menu callbacks, source/capture starts and restarts settle, then choose Stop again and verify the trial is inactive before private source changes or removal. A prior Stop may precede pending work; Hide and Pause are not substitutes.
- Choose Remove PIP Configuration only in the new additional entry. Wait for its deferred removal and verify the entry disappears. Keep existing configurations, sources and virtual screens intact.
- If you no longer need the new definition, open Settings > Displays > Overview > Custom LUT Filters…, identify only your new filter, choose Delete… and confirm Delete in Delete Custom LUT Filter?. Deletion removes that definition and all its assignments, including remembered consumers. Check its uses first; never delete a shared existing filter to undo one selection. Let refreshes settle before restarting any original captures.
- Restore only changed image-adjustment values, brightness, profile/HDR/preset state, software/compositor switches, source-app window positions and individually paused rules. Restore affected physical and pre-existing virtual modes, origins and main-display state if anything changed. Preserve independently recorded current values and protected targets.
Export Original LUT… saves the imported source file, not a backup of its configured metadata, assignments or global order. An originally absent saved value is not equivalent to entering its displayed default. If ordinary targeted UI cannot reproduce an original unset state, or both a current value and a different protected target, preserve the original private record/backup, leave only the affected rule off and record the precise restoration limit. Do not use global Reset, Forget or Import to clean up this trial.
Related pages
- Custom LUT Filters: formats, settings and shared definitions
- Image Adjustments in the App Menu and software-adjustment settings
- Video Filters and Stream Transformations
- Picture in Picture
- Color profiles and calibration and custom-profile compatibility
Additional information
This section explains feature eligibility and platform requirements for the two LUT paths.
Features requiring Pro license
Importing and editing custom LUTs, their per-display and per-stream selections, and the PIP setup/preferences used here require Pro or an eligible trial. Keep that eligibility active through targeted cleanup: selecting an already enabled LUT to turn it off also requires it. Stopping an active PIP, removing an additional configuration, and manager Export/Delete are separate free actions; deletion is global and is not an appropriate bypass for a shared filter.
Platform compatibility
The ordinary SDR whole-display compositor and PIP LUT paths are available on both Apple silicon and Intel Macs, subject to actual display/layer availability and capture access. The documented app requires macOS 26.3 or later. HDR capture filtering requires Apple silicon and an appropriate capture/output path; the main procedure uses SDR.