Management and Quick Toggles
The management submenus collect the actions you use to configure, identify and maintain a display. Quick toggles sit alongside them for everyday changes such as choosing the main display or turning HDR on. The available actions follow the selected display's capabilities and, for a virtual screen, its saved configuration and connection state.
Where to find it: App Menu > display > Manage Display or App Menu > virtual screen > Manage Virtual Screen. Quick toggles normally appear in the device's menu. If Toggles is Hidden, they move into its management submenu instead.
Manage Display is available for connected entries that are not BetterDisplay virtual-screen entries. Manage Virtual Screen is also available when its screen is disconnected; actions needing the live display are then unavailable.
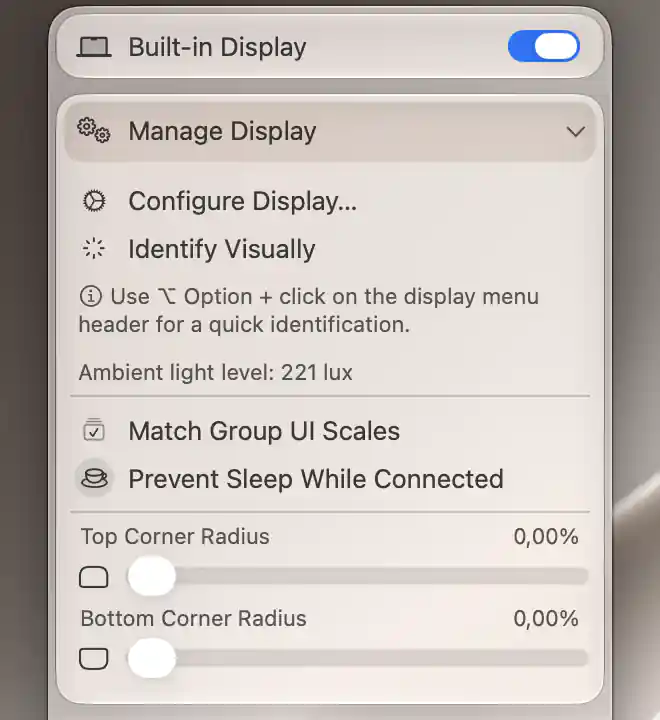
On supported built-in panels, Manage Display includes the current ambient-light reading.
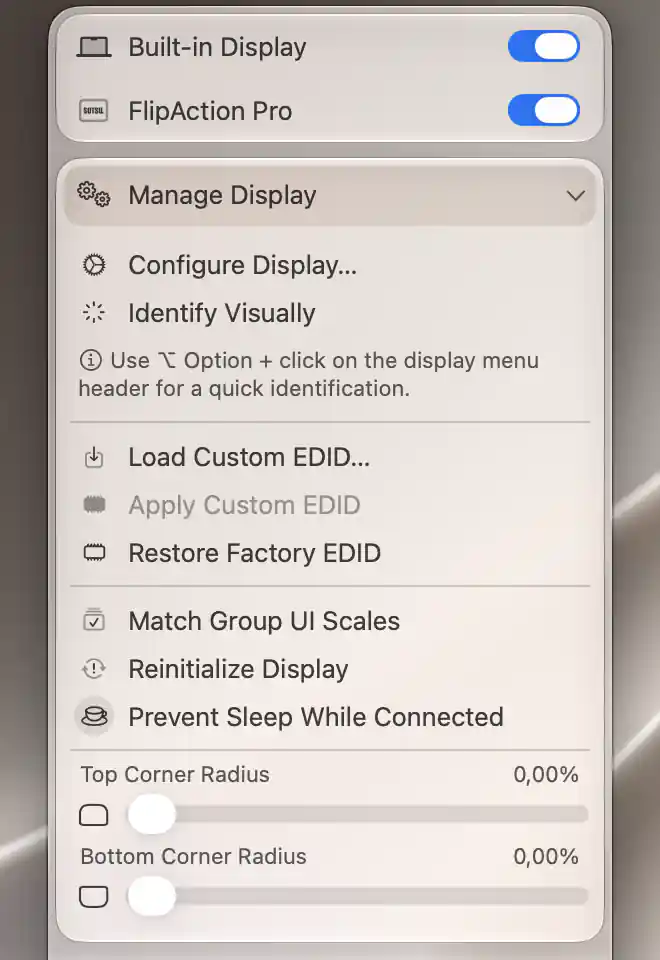
Manage Display groups display-specific maintenance actions and rounded-corner settings.
Manage Display
Choose Configure Display… to open Settings with this display already selected. An attached App Menu closes when Settings opens; a detached menu can remain available.
Identify Visually briefly highlights the real screen. This is useful when similar display names make it hard to tell which menu belongs to which monitor.
An Ambient light level: reading appears when a hardware ambient-light controller supplies it and observation succeeds. This measures the surrounding illumination in lux, rather than the screen's brightness in nits. A built-in sensor's reading is hidden while the lid is closed.
EDID and reinitialization
An external display on Apple silicon can expose EDID actions when its framebuffer service is accessible. EDID is the identifying and capability information supplied by a display. These actions let you load and apply an alternative version of that information:
- Load Custom EDID… opens this display's EDID customization sheet and binary-file importer. Loading stores the data; applying it is a separate action. A successful import reports EDID data binary successfully loaded. Importer failures show the returned error, and data that cannot be interpreted is identified in the sheet.
- Apply Custom EDID applies the stored override. It is disabled if there is no stored override or the custom override is already active.
- Restore Factory EDID removes the active override and returns to the factory-provided information.
These are live overrides, not permanent writes to the display's EDID memory. Apply and Restore execute directly from this menu, without the additional confirmations shown by the corresponding Settings buttons.
Reinitialize Display is another way to refresh a supported Apple-silicon external display through its EDID path. It tries an applicable automatic custom override when that feature is available; otherwise it restores factory EDID. This can change the active identification and modes, rather than simply redraw a window.
Group matching, sleep and rounded corners
Match Group UI Scales uses this display as a source for the active groups' UI Scale Matching. Eligible target displays are adjusted so interface elements have similar sizes. The action uses existing group rules; it does not create a group or enable a disabled rule.
Prevent Sleep While Connected keeps a display-sleep-prevention request active while this display is connected. It is saved per display and is off by default. When the condition ends, that display's request is released, although another display can still keep its own request active. The menu-bar icon option can indicate that sleep prevention is in use.
Top Corner Radius and Bottom Corner Radius add black rounded-corner overlays. They work independently of image-adjustment controllers, so you can choose a different radius for each edge without changing the image processing.
Both sliders range from 0–3% of the screen's shorter dimension, with quarter-percentage snap points, and default to zero. Changes apply immediately and are saved per display. Zero removes the corresponding overlay. The overlay is visual: it neither changes the desktop resolution nor intercepts clicks.
Manage Virtual Screen
Use Configure Virtual Screen… to open the saved virtual screen's Settings. Identify Visually highlights its linked display when connected. Reconnect Virtual Screen disconnects and recreates an already connected virtual screen; it is disabled when disconnected. An unsuccessful recreation reports Unable to connect virtual screen.
Discarding a saved virtual screen
Discard Virtual Screen opens Settings with the question Do you want to discard the virtual screen? You then choose what to remove:
- Cancel keeps the screen.
- Discard Virtual Screen disconnects it and removes its saved virtual-screen entry.
- Discard & Remove Color Profile, when a factory profile is known, also attempts to delete that profile. This can require administrator credentials.
The confirmation recommends removing the unused factory profile. Removing the virtual screen and deleting its profile are separate operations: a failed profile deletion does not undo the discard. The Color Profile reference explains the helper/admin authorization path.
Top and bottom corner-radius sliders are also available here while the virtual screen has a connected linked display.
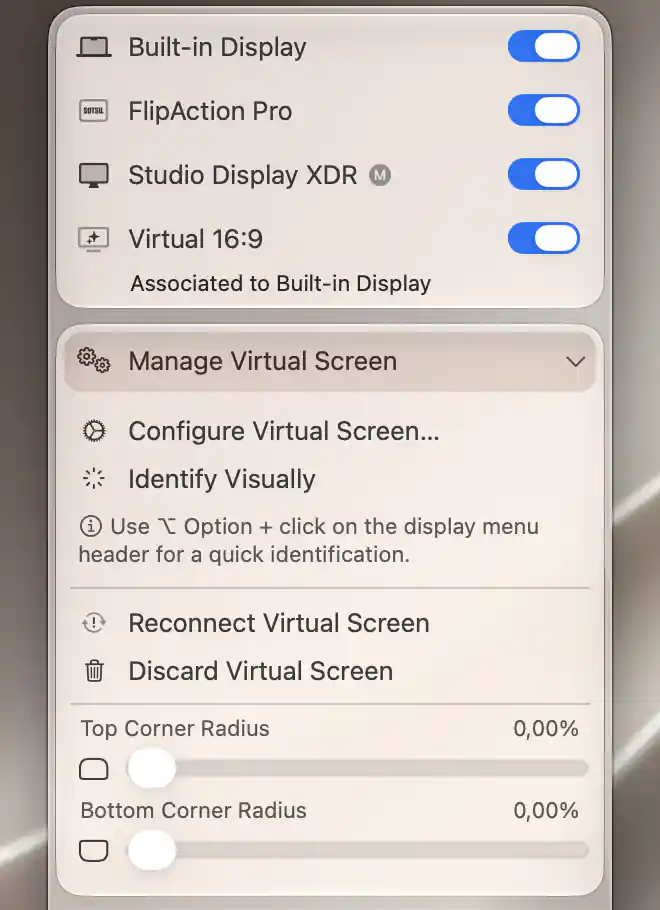
A connected virtual screen exposes identification, reconnect and management actions.
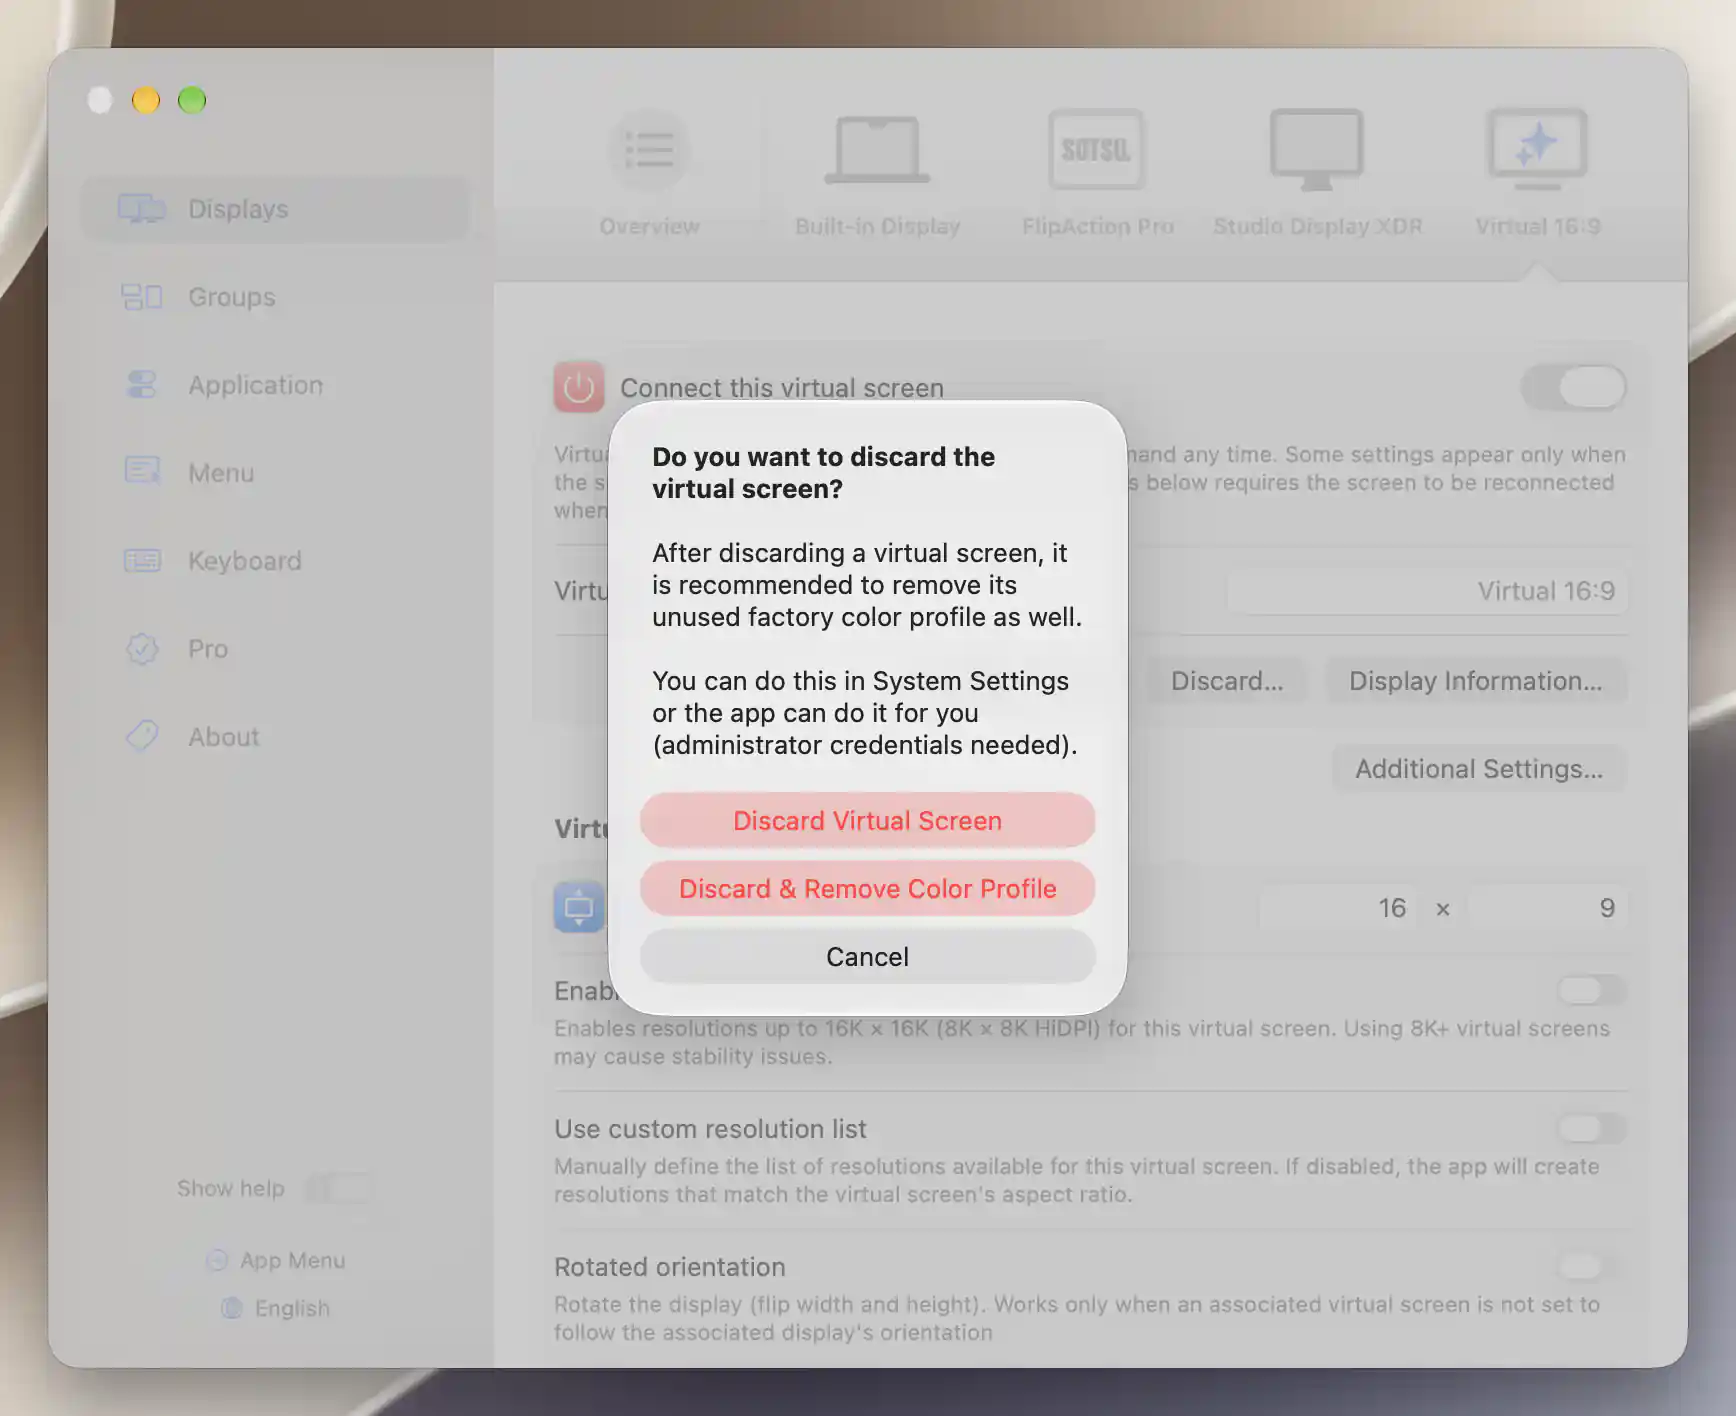
The discard confirmation offers optional factory-profile removal when a profile is available.
Orientation, resolution and main display
Virtual-screen orientation
Rotated Orientation swaps a virtual screen's configured width and height. A connected virtual screen reconnects with the new dimensions. Its active streams and Picture in Picture windows are stopped and restarted against the recreated screen when available. For a disconnected virtual screen, the new orientation is saved for its next connection.
When associated displays set the orientation automatically, the disabled toggle reads Rotated Orientation (Automatic). This width/height change is different from physical Screen Rotation.
HiDPI and the display notch
High Resolution (HiDPI) appears when the display has HiDPI modes and is not a mirror target. It switches to a nearby mode of the opposite HiDPI/LoDPI class, retaining the current refresh-rate representation and bit depth. An exact size counterpart may not exist, so the desktop dimensions can change. The toggle cannot create an unsupported HiDPI mode.
For a worked comparison, see HiDPI versus LoDPI at the same desktop size.
Display Notch appears only when a suitable notched/notch-free alternative mode exists. It switches to that mode, changing the usable desktop shape. It does not physically hide the notch hardware.
Choosing the main display
Set as Main Display appears when another display exists and this one is not a mirror target. Choose it to make this the main display. Its toggle-like appearance reports main status: selecting it when already on does not choose a different main display or leave the system without one.
Changing main display can remove another connected display's Main Status protection and show a notification. Group layout rules can still take precedence over your choice.
HDR and brightness
HDR mode
Enable HDR Mode appears when HDR is supported. Enable HDR Mode (Forced) replaces it when forced HDR is permitted and available, or when forced HDR is already active.
An HDR change can also affect software upscaling, Night Shift and True Tone according to the global display settings.
Brightness upscaling
Brightness Upscaling (Direct) appears for compatible built-in displays when direct control is allowed. Changing it disables the software-upscaling preference and selects or removes direct hardware control. The Apple Display Preset reference explains how this affects automatic brightness and the active preset.
Brightness Upscaling is the alternative software path. It appears when software upscaling is supported and direct control is not the offered path. Selecting it saves the software-upscaling preference. Neither choice guarantees a particular physical brightness.
Automatic brightness
Auto Brightness appears when supported and direct built-in control is not active. It controls the display's automatic brightness feature.
BetterDisplay can temporarily suppress automatic brightness while seeking a value or upscaling. During that temporary suppression, the toggle can still represent its intended on-state. Turning it off also clears the temporary restoration flags.
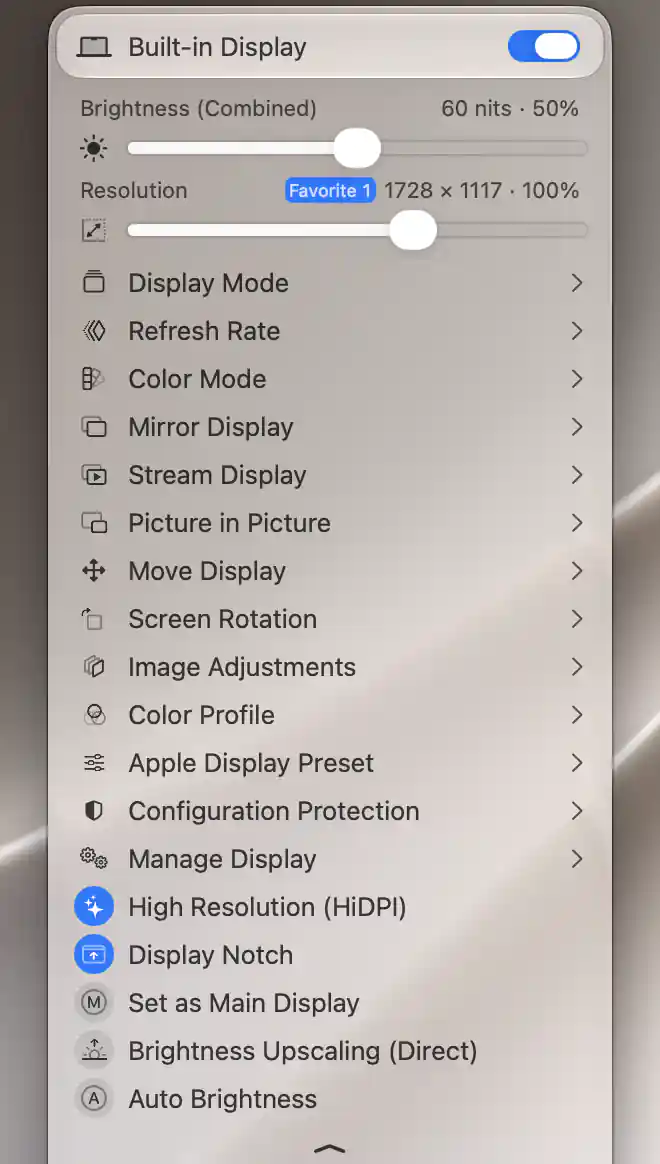
The available quick toggles depend on the selected panel and its enabled controllers.
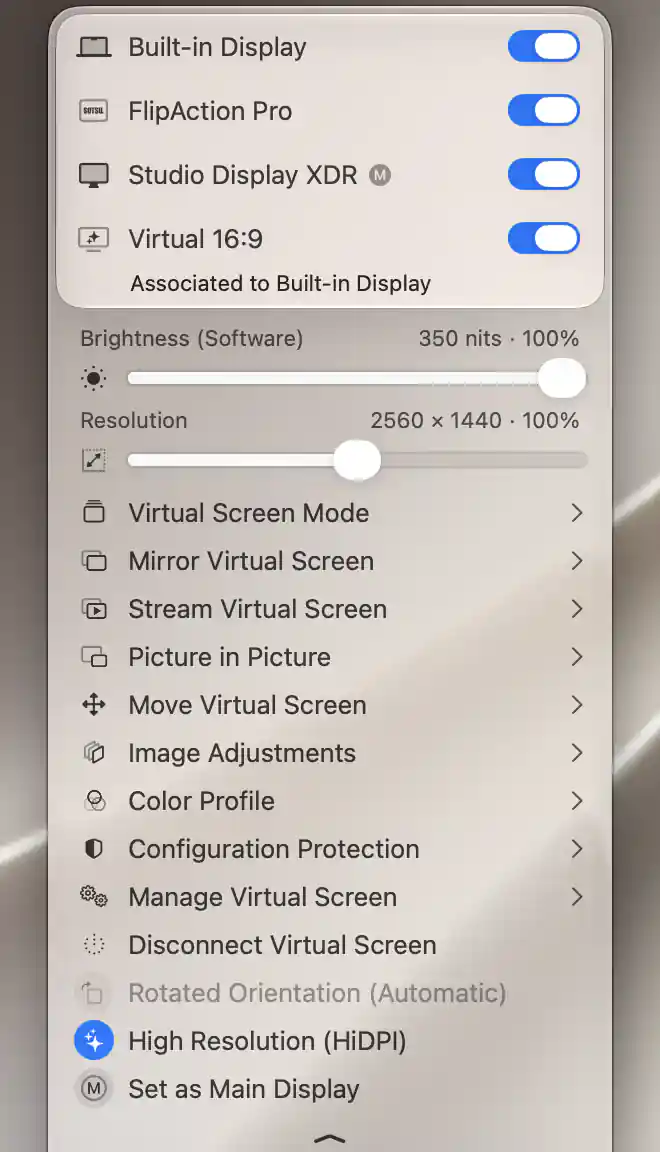
Orientation follows the associated display, so Rotated Orientation (Automatic) cannot be changed directly.
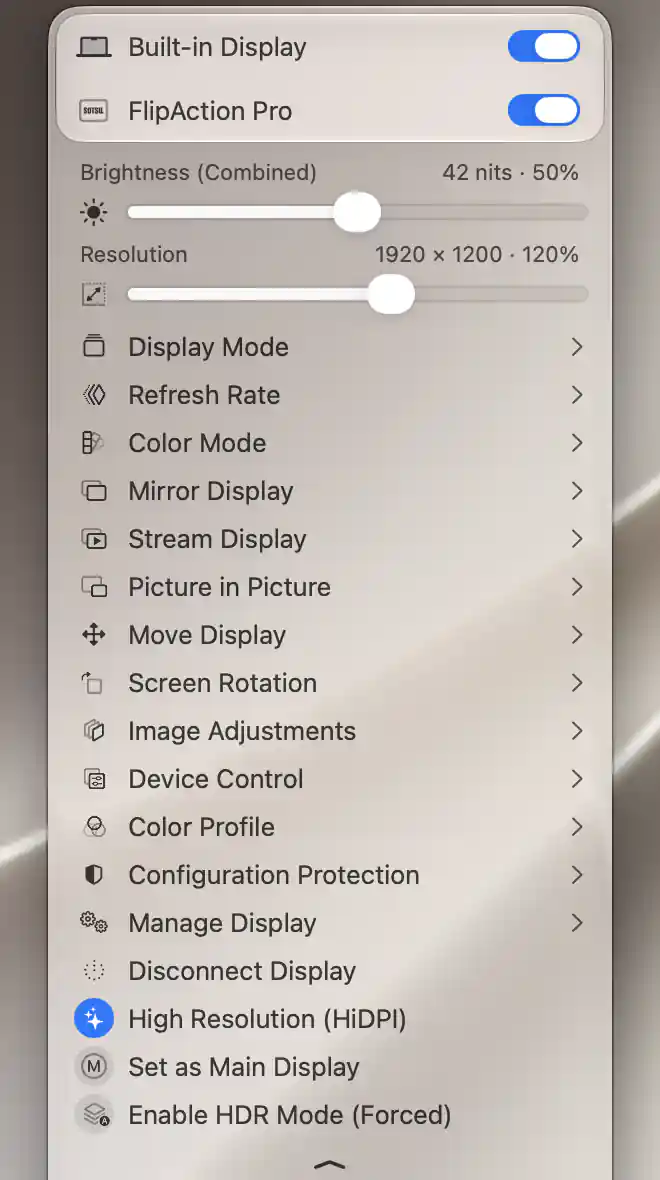
Supported forced-HDR options appear after Allow Forced HDR is enabled in Color Mode.
These actions and toggles act on the selected device. A saved preference, the current system state and an available capability are different things: an absent toggle usually means its prerequisites are not met, while a checkmark reports the state that the app currently exposes.
Additional information
This section explains which features require Pro and how availability differs between Mac platforms.
Features requiring Pro license
- Load Custom EDID…, Apply Custom EDID and Restore Factory EDID; automatic custom-EDID application during reinitialization also requires Pro.
- Match Group UI Scales and Prevent Sleep While Connected.
- Virtual-screen Rotated Orientation.
- Enable HDR Mode, including its forced variant.
- Direct and software Brightness Upscaling.
An already active direct-upscaling mode can still be turned off without Pro. Reinitialize Display itself, ordinary Set as Main Display, HiDPI/notch/automatic-brightness toggles, corner-radius sliders and the listed configuration/identification/reconnect/discard actions have no separate Pro gate. The separate keyboard shortcut for setting the main display requires Pro.
Platform compatibility
EDID override actions and Reinitialize Display require Apple silicon and a supported external display with an accessible framebuffer service. Forced HDR uses Apple-silicon connection-mode support.
The other features can be available on both Apple silicon and Intel Macs, subject to their display, controller and virtual-screen prerequisites. Direct upscaling requires a compatible built-in display; processor family alone does not establish that support. Color-table software upscaling requires Apple silicon, while Intel needs a compatible overlay path. Ambient light and automatic brightness require a suitable sensor/controller.